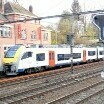
Herman Geschrieben 22. Juli 2022 Geschrieben 22. Juli 2022 (bearbeitet) I do struggle with Catenary. No, not on single - or two parallel tracks. I use the "left - right" wich I learned from @Roter Brummer on the forum. Thank you Roter Brummer. I already learned a lot in BBA08FC9-D1BA-4EBD-A804-52B18AABC111 Aheim module from R.B. So I'm looking for advise, tips and tricks when several combined track-switches needs catenary. An extra question : Is an individual catenary per 180 mm track ( HO ) ok ? Look sometimes overdue ? Ich tue mich schwer mit der Oberleitung. Nein, nicht auf einem - oder zwei parallelen Gleisen. Ich benutze das "links - rechts", das ich von @Roter Brummer im Forum gelernt habe. Vielen Dank Roter Brummer. Ich habe schon viel gelernt in BBA08FC9-D1BA-4EBD-A804-52B18AABC111 Aheim Modul von R.B. Nun suche ich nach Ratschlägen, Tipps und Tricks, wenn mehrere kombinierte Weichen eine Oberleitung benötigen. Eine zusätzliche Frage : Ist eine einzelne Oberleitung pro 180 mm Gleis ( HO ) ok ? Sieht manchmal überfällig aus ? Regards, Grüße, Herman Something like this one , So etwas wie dieses hier. A start Bearbeitet 22. Juli 2022 von Herman extra picture
simonjackson1964 Geschrieben 24. Juli 2022 Geschrieben 24. Juli 2022 (bearbeitet) Hi Herman I've managed to get Catenary to work so I feel reasonably qualified to offer some advice. Regarding the spacing, I have noticed that if you stretch an individual length of catenary too far, the middle "pops up" demanding a gantry. I use this as my "maximum allowed spacing for gantries on straight track, and also on complex junctions Below see some screen shots of one of my layouts that has a pretty comprehensive catenary system. One tip I've found when using the "realistic" straight catenary is to place it with the automatic snapping turned off, otherwise they tend to decide where they want to go not where you want them!. Turn it back on to position the next gantry. And work in one direction on the track but stretch the catenary backwards towards the previous gantry. Also I use the catenary maintenance railcar to check that the cables are in the correct place so at least one will be in contact with at least one pantograph at all times. It just seems appropriate some how! Cheers Simon (Blame Google for wrong translations!) Hallo Hermann Ich habe es geschafft, Catenary zum Laufen zu bringen, also fühle ich mich einigermaßen qualifiziert, um Ratschläge zu geben. In Bezug auf den Abstand ist mir aufgefallen, dass, wenn Sie eine einzelne Länge der Oberleitung zu weit strecken, die Mitte „auftaucht“ und eine Brücke verlangt. Ich verwende dies als meinen "maximal zulässigen Abstand für Portale auf geraden Gleisen und auch auf komplexen Kreuzungen Unten sehen Sie einige Screenshots von einem meiner Layouts, das ein ziemlich umfassendes Oberleitungssystem hat. Ein Tipp, den ich bei der Verwendung der "realistischen" geraden Oberleitung gefunden habe, ist, sie mit ausgeschaltetem automatischen Einrasten zu platzieren, da sie sonst dazu neigen, zu entscheiden, wohin sie wollen, nicht dorthin, wo Sie sie haben wollen!. Schalten Sie es wieder ein, um das nächste Portal zu positionieren. Und arbeiten Sie auf dem Gleis in eine Richtung, aber strecken Sie die Oberleitung nach hinten in Richtung des vorherigen Portals. Außerdem benutze ich den Oberleitungswartungstriebwagen, um zu überprüfen, ob die Kabel an der richtigen Stelle sind, damit immer mindestens eines mit mindestens einem Stromabnehmer in Kontakt ist. Es scheint nur irgendwie angebracht zu sein! Prost Simon Bearbeitet 24. Juli 2022 von simonjackson1964 Add more info.
Herman Geschrieben 24. Juli 2022 Autor Geschrieben 24. Juli 2022 (bearbeitet) Hello Simon, thank you for the advices. They are usefull. A tiny remark. On your pictures I miss the crossbeam, 7416B384-A00D-46BB-A3B4-7C9F72987AB0, and his variants. And I was just trying to use them in the station. If it fails, maybe I'll go back to route masts and the tower mast for 2 or 3 tracks. I find them more easy to handle. Nice you gave an answer. There is work to come for me in the layout with catenary. Cheers, Herman (BE) You have impressive pictures with the catenary , great ! Bearbeitet 24. Juli 2022 von Herman
prinz Geschrieben 24. Juli 2022 Geschrieben 24. Juli 2022 Hello Herman, a long time i also don't know, how to use the crossbeam. I hope, in my latest published layout "Anlage nach Märklin-Heft 0700, Anlage 29" (Content-ID F26F6CB4-2012-461A-82F5-BD49B78132E6) the crossbeam is used correctly. I had no comment from Roter Brummer . The crossbeam is used at the mainstation. Here a photo with some layers switched off: I noticed that is necessary to find the correct variations. Here they are (for that example) (Between all elements: a track): All elememts here are expanded by animation to 0.5. So i placed these elements to one point in the main station, regarding the right distance by using the animation, some time using a temporary catenary element (follow route of a track and expand if necessary). After all positions were correct, i made a group of these 5 elements (because along the main station distances between tracks are not changing). Then i placed copies of this group along the station. To create the catenary i started at one side of the main station. For all tracks between the actual crossbeams i placed a new catenary and let it follow that track. The catenary was shortened or expanded to match the crossbeam (if it is the second it will connect). I don't know, if this is the optimal way, but for me: it works. Best regards, Wolfgang
simonjackson1964 Geschrieben 24. Juli 2022 Geschrieben 24. Juli 2022 Hi Herman The crossbeam and variants are there, mostly at the station. I took a bit to work out how they worked, but they are easily the best option for electrifying a lot of tracks Quick and hopefully easy tutorial (Points are there just to give track centres): With irregularly spaced tracks where they might be on platforms for example. Start with Variation 1 (default) on the left. Let it autosnap to the track. I recommend doing this on track with Z rotation = 0, 90, 180 or -90 at least for the first one. Adjust the Y coordinate (or x if the track is 90 or -90) to an easy number. I used y=-280. Then add another crossbeam to the next track, set the Y coordinate the same. Then set to Variation 2. Use the Breite animation to adjust the length so it just overlaps with the first crossbeam Repeat for the next track but set to Variation 3 Continue until you are at the last track, using variant three for all of them except the last. For the last track use variation 4. Finally, add one more crossbeam and set to Variation 5. It will automatically go to the other side of the track and if you set the Y coordinate it will join with the number 4. Number 1 and 5 can have the length adjusted to move the pylon away from the track if needed. You are now ready to add the Catenary. One small point - for extra realism add an insulator to the top wire next to the pylon. If it was really like that, the top cable of the catenary would short to earth! The concrete (Beton) pylons can be used where there is a platform on the outer tracks - harder for kids to climb! Left and right variations for corners, and also superimposed to have two wires side by side. I always select the whole shebang once I've done one, copy and paste it and make adjustments if needed. Hope that helps?
simonjackson1964 Geschrieben 24. Juli 2022 Geschrieben 24. Juli 2022 5 minutes ago, prinz said: Hello Herman, a long time i also don't know, how to use the crossbeam. I hope, in my latest published layout "Anlage nach Märklin-Heft 0700, Anlage 29" (Content-ID F26F6CB4-2012-461A-82F5-BD49B78132E6) the crossbeam is used correctly. I had no comment from Roter Brummer . The crossbeam is used at the mainstation. Here a photo with some layers switched off: I noticed that is necessary to find the correct variations. Here they are (for that example) (Between all elements: a track): All elememts here are expanded by animation to 0.5. So i placed these elements to one point in the main station, regarding the right distance by using the animation, some time using a temporary catenary element (follow route of a track and expand if necessary). After all positions were correct, i made a group of these 5 elements (because along the main station distances between tracks are not changing). Then i placed copies of this group along the station. To create the catenary i started at one side of the main station. For all tracks between the actual crossbeams i placed a new catenary and let it follow that track. The catenary was shortened or expanded to match the crossbeam (if it is the second it will connect). I don't know, if this is the optimal way, but for me: it works. Best regards, Wolfgang Hi Wolfgang You can use 4 and 5 instead of 2 and 1 turned... Cheers Simon
prinz Geschrieben 24. Juli 2022 Geschrieben 24. Juli 2022 Hi @simonjackson1964 , Thank you for your explanation. As i said, that was the first time that i was lucky to use the crossbeam. But after your explanation i hope to use it more often. Cheers back, Wolfgang
Herman Geschrieben 3. August 2022 Autor Geschrieben 3. August 2022 (bearbeitet) Thank you very much @simonjackson1964 and @prinz. Catenary and crossbeam ready. KInd regards, Herman Bearbeitet 3. August 2022 von Herman
simonjackson1964 Geschrieben 6. August 2022 Geschrieben 6. August 2022 I'm considering making a short instructional video (in English) of the easiest ways I've found of electrifying a layout (with a catenary - Not sure if "catenarify" is a word). I admit I found it hard at first but over the course of several layouts I've learned a few tricks that others might not know.

Empfohlene Beiträge
Erstelle ein Benutzerkonto oder melde dich an, um zu kommentieren
Du musst ein Benutzerkonto besitzen, um einen Kommentar verfassen zu können
Benutzerkonto erstellen
Neues Benutzerkonto für unsere Community erstellen.
Neues Benutzerkonto erstellenAnmelden
Du hast bereits ein Benutzerkonto? Melde dich hier an.
Jetzt anmelden