trevor
Mitglieder
-
Benutzer seit
-
Letzter Besuch
Alle erstellten Inhalte von trevor
-
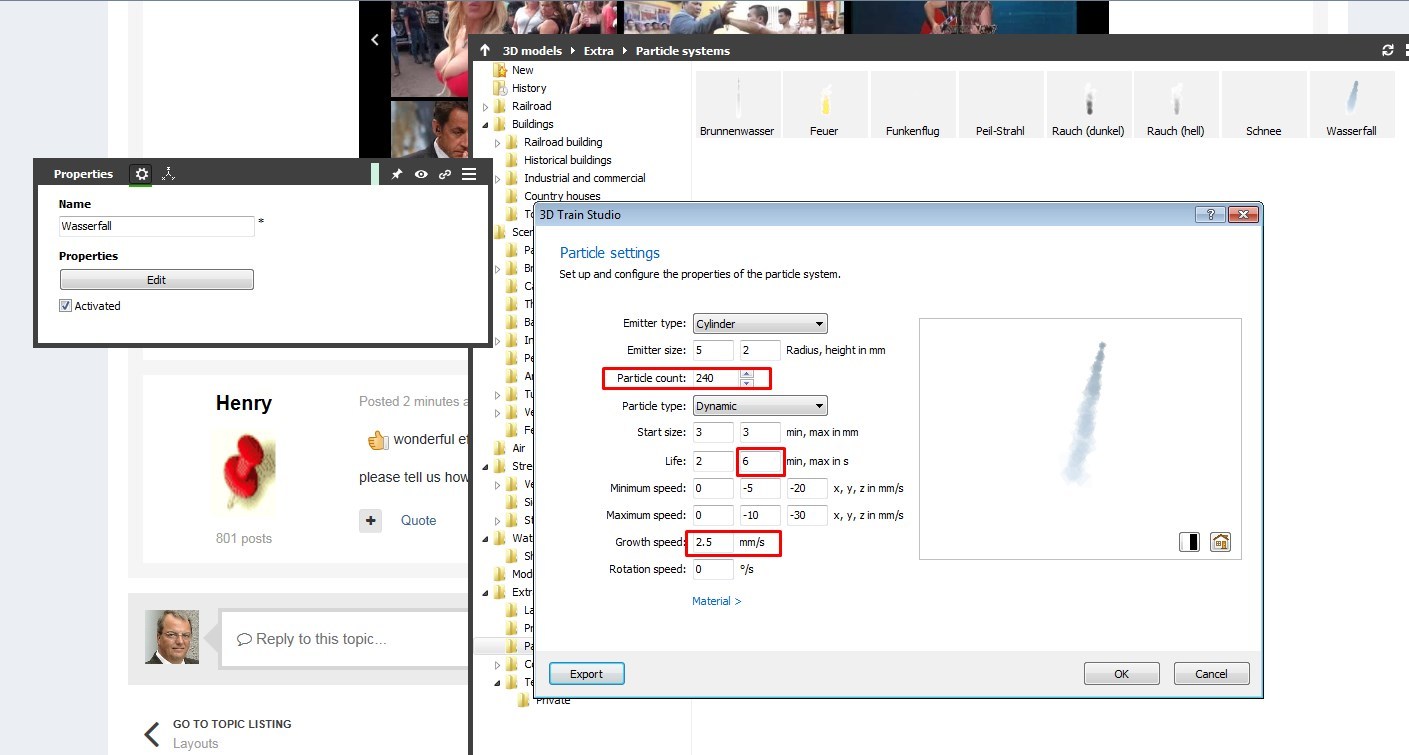
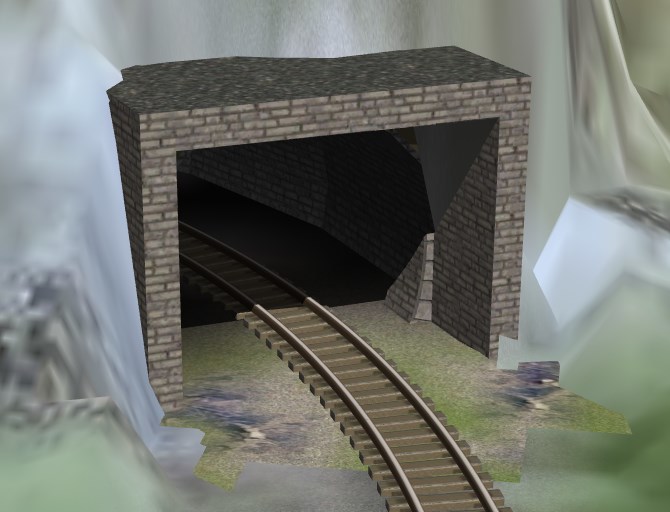
 Note from the images... I have am using a cloud particle effect to create a swirling mist cloud at the bottom of a waterfall. If I make the water surface semi-transparent, the water surface overlays the cloud particle effect when zoomed out. 110 = semi-transparent water zoomed out a little <not what I want obviously.. 111 = semi-transparent water zoomed in 112 = non-transparent water any zoom.
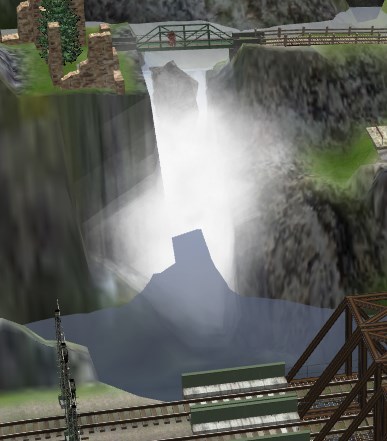


-
Well hurry up then.... (ducking)
-
Thanks Bahnland. I did have that idea in my head too... though the selecting all part kind of eluded me LOL... (A feature that is conspicuously absent...) Thanks for pointing out the grey scale factor, I had not considered that fact. hmm... I'm using a simple paint-shop like program to smooth or add texture to my data... it there a better tool you use that works with the csv? Or do I have to write one of those too LOL .... Best regards T
-
AH.. i.c... That might be a better solution. Still some linear variation variables would be a nice add to that if you didn't already think of it.
-
It would ne nice if .... a). Minimum grid size was tied to model scale.... i.e. grid size = a multiple of say half or quarter track width.. so you do not lose potential map resolution with smaller scales. OR b). There were a Change Layout Scale menu pick that automatically changed the panel size and scaling of everything on the map and selects a new grid size that matched the change as close as you can to the nearest increment.....
-
Yes those numbers I picked out of my head were for the smaller scales... Good to know Version 4 includes better profiling, wondering if that includes a linear randomness factor though.
-
From the first day I started using MBS I have always been confused about scale... That is, I understand the standard modelling scale sizes, but I have always been confused as to its importance within MBS. When I looked at the catalog and discovered the tracks are listed by manufacturer, I sort of assumed the tool was intended, at least originally, to be a drafting tool to use to design a real life layout. That's great I guess, though I have to wonder how many of us actually do that. So now it is three months down the line and, unless someone can explain to me otherwise, the only real difference in which scale you pick within MBS has more to do with terrain than ANYTHING else. Yes I know, you can pack more into a specific size of panel with N-Guage than you can with O-Guage, but, for a virtual layout, panel size is not that important... an HO-Scale 2m / 2m panel with 2cm grid is almost identical to an N-Scale 1m by 1m with a 1cm grid when you boil it down to data... Now, as currently implemented, the minimum panel grid size ends up being the limiting factor in terms of how detailed the layout looks. Currently that minimum is 1cm... (Which is kind of large for the smaller gauges in my opinion ! ... but I digress) That means, the larger the scale you choose, the higher the detail you can potentially achieve. So.. that HO-Scale panel, if set to 1cm grid, gives you four times the terrain and texture resolution over the N-Scale panel. Or to put it another way.. best resolution = biggest scale with smallest grid size. However, since big panels with small grids are hard on your system performance, there must be a trade-off point somewhere. So that leaves me wondering, which scale is best.... It would be great to have a table or calculator that you could use to indicate expected relative performance for any given map size in real world Km by Km with a selected model scale and grid size. Or better, it would be nice if the grid size setting were in real world (scaled up) measurements.... so the smallest grid size was effectively the same no matter which model scale you were using. Come to that...it would be nice to simply have MBS use real world measurements as a standard option. Regards Trevor (Wishing I hadn't started this model in N-Guage...)
-
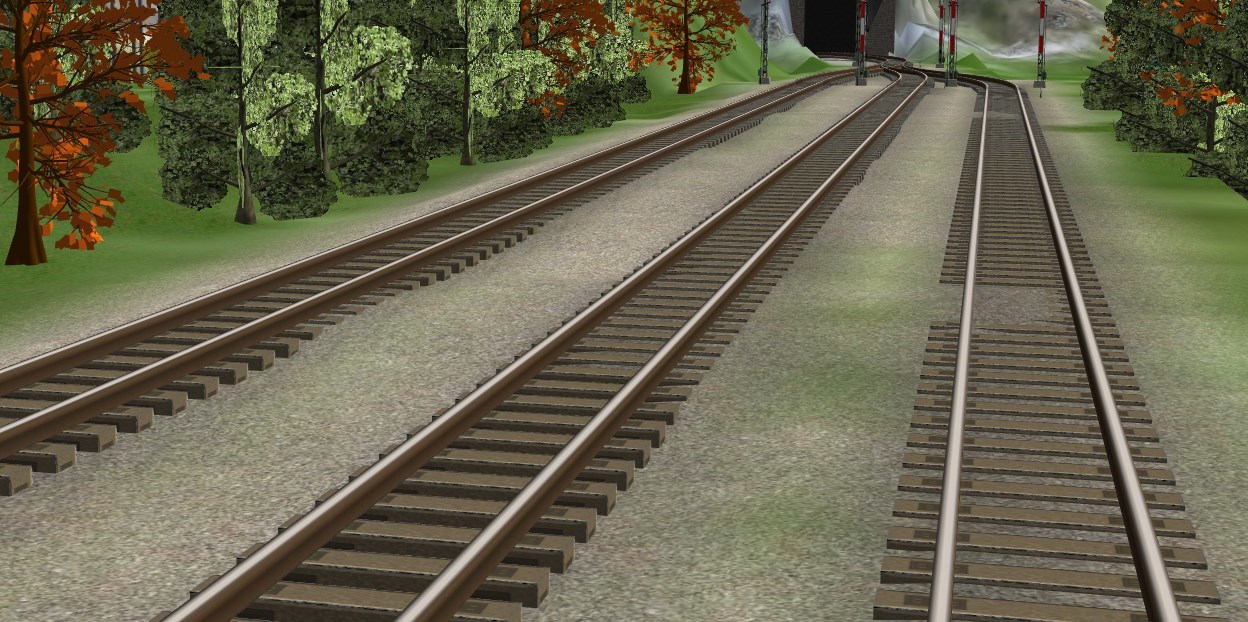
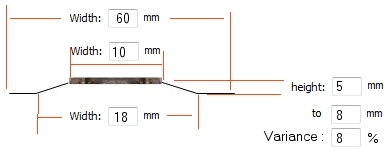
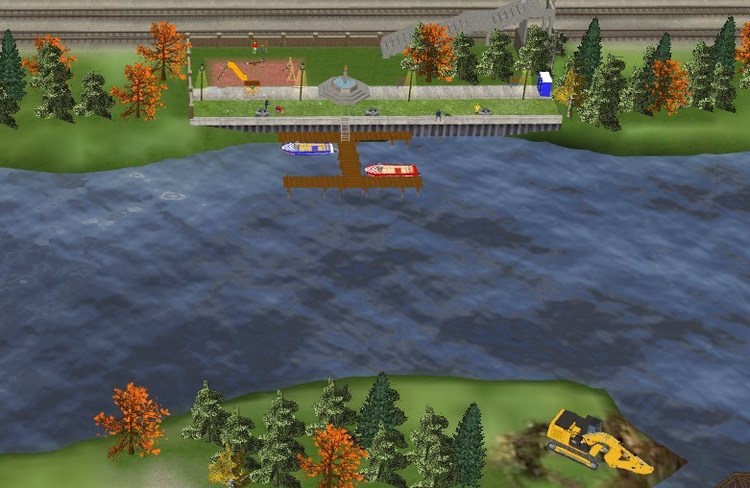
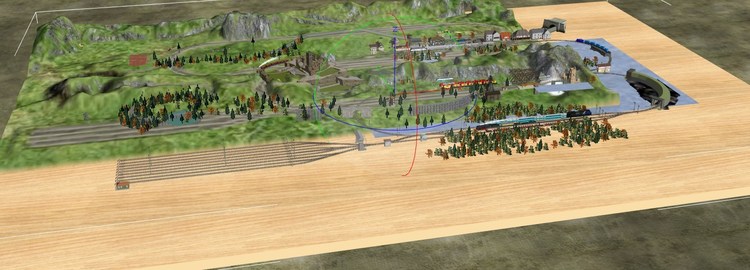
I am not overly impressed with the way the current track bed works. It looks unnatural and toy like. Instead I turn it off and use the export/import height-map bitmap to add a slight texture to the terrain so the ballast undulates a little covering some of the ties and leaving others more exposed as seen in the image here. Then I use texturing to darken between the tracks.. However, that is a lot of work and there are issues adding texture to just where the tracks lie on the bitmap. It would be nice to have the current adjust terrain feature augmented to effectively lay ballast according to a profile defined by a few user defined parameters as shown in the example below, potentially with the addition of a cross track texture. Though I do realize that may be asking too much of the current minimum grid...

-
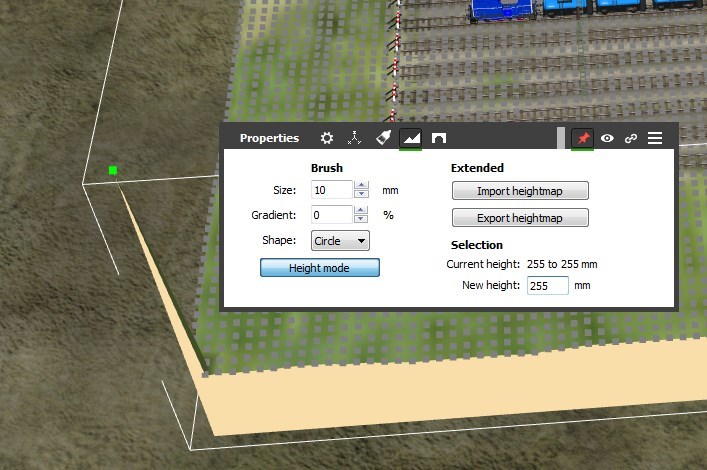
I figured out a quick and dirty way to "FIX" and know the height to enter on the imported bitmap when you massage (blur etc.) part of the contour bit map.. Before you export create a single point peak at the corner of your layout and set it's height manually to a number greater than the current max. Then do the export, and do what you will with the image remembering NOT TO manipulate the image in that corner or add areas that are brighter than that point. When you import use the same value you entered here for the max height. (If you write down what that point was before you can set it back quickly too...)
-
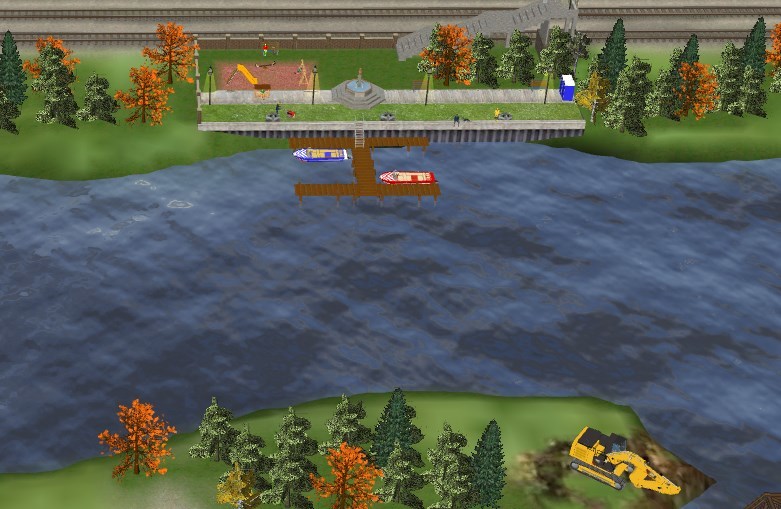
The water effect is great... however, it would be nice if there was a scaling function on that. The default is more oceanic than a lake effect. Regards Trevor
-
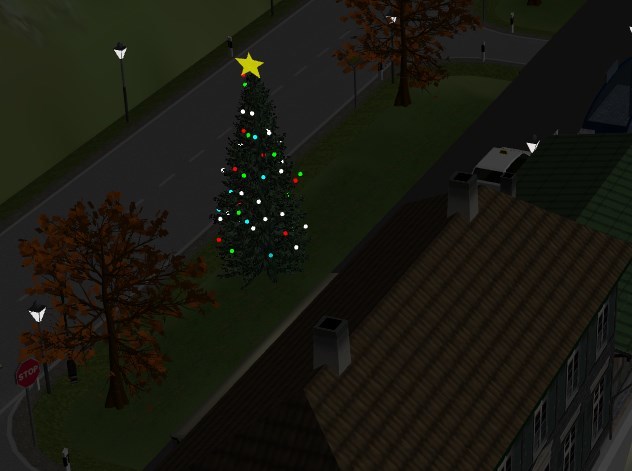
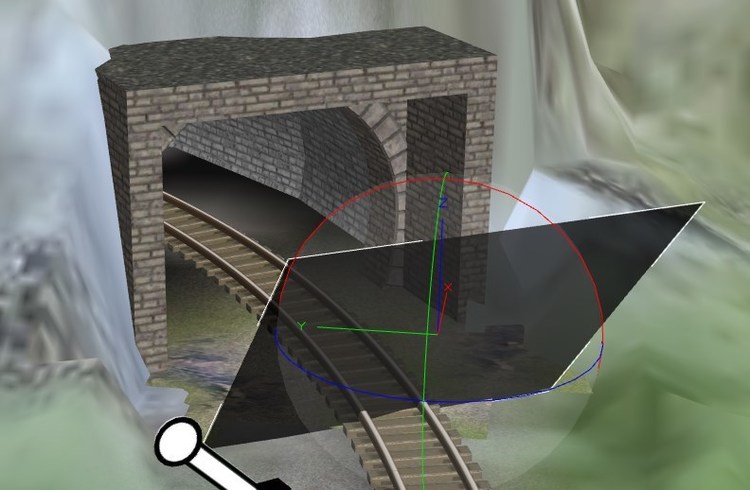
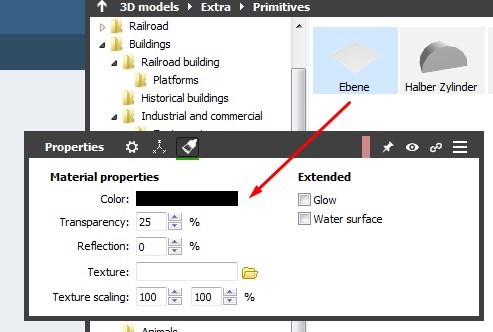
Using an angled semi-transparent Ebene to simulate tunnel entry shadows.

-
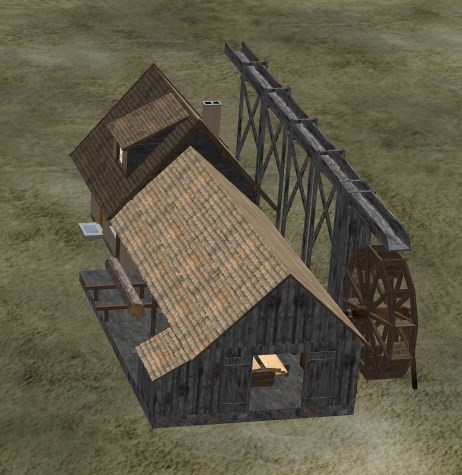
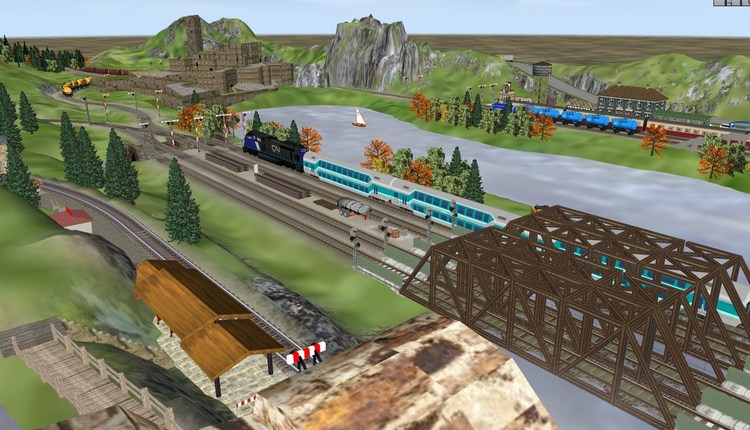
The water in the trough is simply a Water (Rectangular) from the catalog, sized to fit. I used the standard waterfall primitive from EXTRAS and edited it to extended and narrowed the plume a little. Here are the numbers I used.
 Thanks Henry and Easy, Yes I pretty much figured out that would be the only method to shift the contour map.... bit of a painful process though.... and it wont fix the texture map. Re the default elevation on import thing.. I find the current dialog frustrating. Every time I import I need to guess at a number, see what happens, undo, then do a repetitive higher-lower game to get it right.... plus the dialog remembers NOTHING so it's not an overly fast procedure.
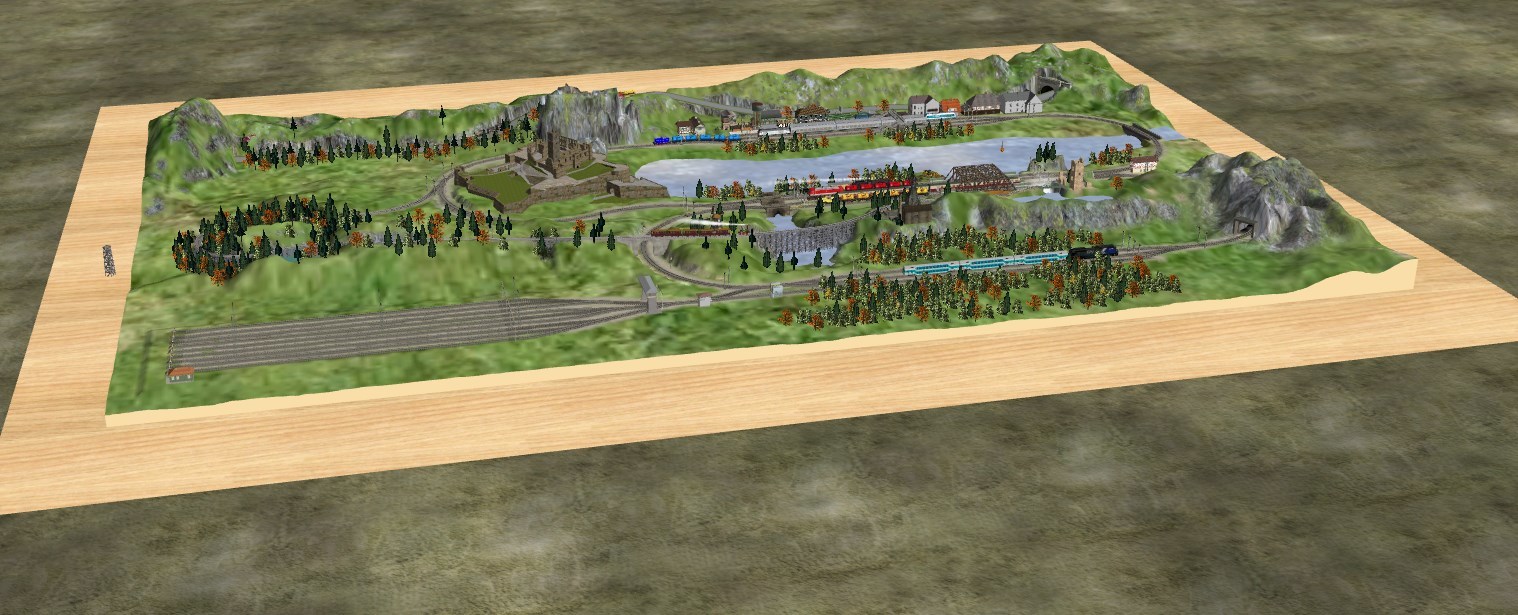
It's amazing how taking the time to add a few details and special effects makes such a big difference. Here I used a simple water primitive along with a slightly modified waterfall particle effect to bring this lumber-mill to life.
Thanks Henry and Easy, Yes I pretty much figured out that would be the only method to shift the contour map.... bit of a painful process though.... and it wont fix the texture map. Re the default elevation on import thing.. I find the current dialog frustrating. Every time I import I need to guess at a number, see what happens, undo, then do a repetitive higher-lower game to get it right.... plus the dialog remembers NOTHING so it's not an overly fast procedure.
It's amazing how taking the time to add a few details and special effects makes such a big difference. Here I used a simple water primitive along with a slightly modified waterfall particle effect to bring this lumber-mill to life.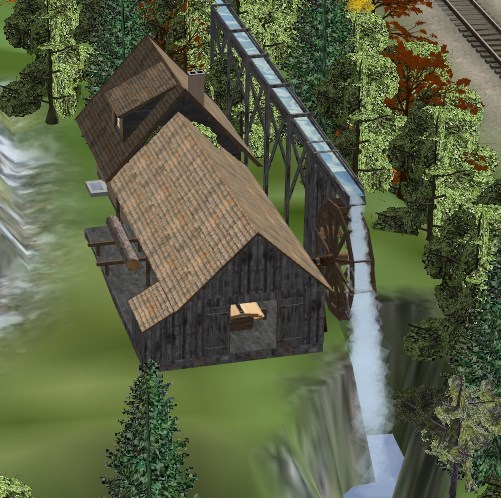
 what I expected.....
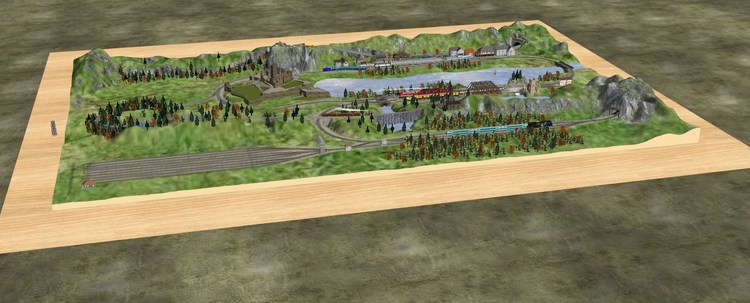 Note..currently I can only extend my layout south and east......
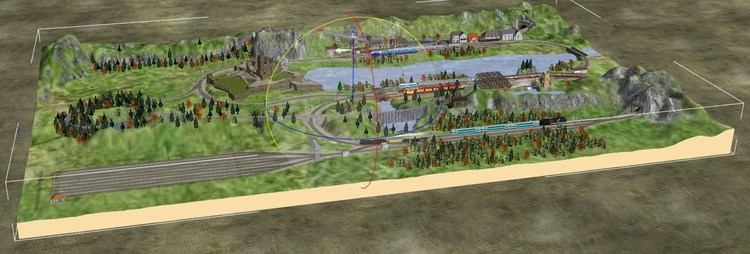
 May not be the right group.. but if I resize the base plate, it should keep the current origin, position, orientation, and grid size of the current base plate..... possibly with the option to indicate where you want the extra space to be relative to the current layout. e.g. X := centered, left, right, Y:= top, middle, bottom Also... when importing the landscape bitmap, it would be helpful if it defaulted to the current max Y value.
In all countries, there is the law, and then there is reality. The truth is, the plaintive also has to show damages. If you are using the material for your own personal use, and in a way NOT to benefit from it or somehow detriment their standing, the rightful owner will not take legal action against you because it costs more than they can recover. If you are using the materials for commercial purposes, or in a way that detriments the owners image however... you are asking for a whole lot of grief. However, there is a huge gray area in the middle....
So.. I wanted to put a camera a-top a tower in my scene. I tried the usual Kamera object and that works but is a FIXED point of view.. (Well.. other than focusing the camera on a moving object, which isn't really what I was trying to do...) Then I remembered how the cockpit cameras give you full pan-and-tilt vision using the mouse and I had an AHA moment. I now have dummy locomotives hovering above my towers so I can "stand" up there and watch my trains go around. Pity you can't zoom with those too though. Regards T
May not be the right group.. but if I resize the base plate, it should keep the current origin, position, orientation, and grid size of the current base plate..... possibly with the option to indicate where you want the extra space to be relative to the current layout. e.g. X := centered, left, right, Y:= top, middle, bottom Also... when importing the landscape bitmap, it would be helpful if it defaulted to the current max Y value.
In all countries, there is the law, and then there is reality. The truth is, the plaintive also has to show damages. If you are using the material for your own personal use, and in a way NOT to benefit from it or somehow detriment their standing, the rightful owner will not take legal action against you because it costs more than they can recover. If you are using the materials for commercial purposes, or in a way that detriments the owners image however... you are asking for a whole lot of grief. However, there is a huge gray area in the middle....
So.. I wanted to put a camera a-top a tower in my scene. I tried the usual Kamera object and that works but is a FIXED point of view.. (Well.. other than focusing the camera on a moving object, which isn't really what I was trying to do...) Then I remembered how the cockpit cameras give you full pan-and-tilt vision using the mouse and I had an AHA moment. I now have dummy locomotives hovering above my towers so I can "stand" up there and watch my trains go around. Pity you can't zoom with those too though. Regards T
 Hmm, yes I am using multiple monitors with a lot of windows open too, so degradation may be worse on my system.
Maybe so, but putting it to sleep if you see no mouse movement or clicking after 2 or 3 seconds seems prudent. But I know you are already swamped so I will shut up now Good to know it's not my system though .
that's a lot of performance loss just to upgrade this.... and if the mouse doesn't move.... why bother?
Hmm, yes I am using multiple monitors with a lot of windows open too, so degradation may be worse on my system.
Maybe so, but putting it to sleep if you see no mouse movement or clicking after 2 or 3 seconds seems prudent. But I know you are already swamped so I will shut up now Good to know it's not my system though .
that's a lot of performance loss just to upgrade this.... and if the mouse doesn't move.... why bother?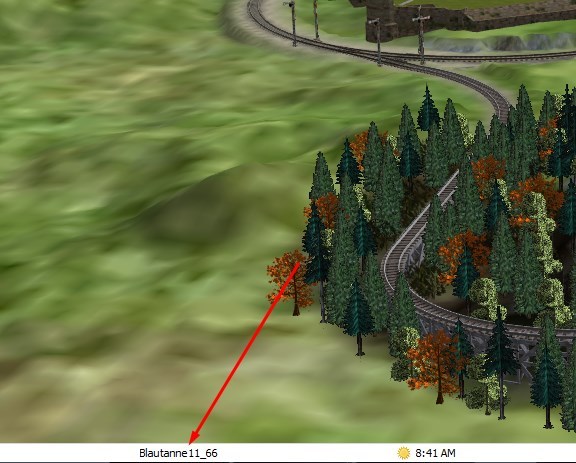 I can't imagine why you would do that if no buttons are pressed though.... but it is what it is I guess.