Curt84328
Mitglieder
-
Benutzer seit
-
Letzter Besuch
Alle erstellten Inhalte von Curt84328
-
Help with programming an event
I am trying to store a variable (Current speed) read from a certain train. I want to read the current speed of the locomotive at all times and then store it as a variable and check to see if the current speed is not 0. If it is not, I plan to trigger a series of events. Unfortunately I am still on V6. I can read the speed, but not check to see if it is zero. Regards Curtis
-
2 PC's
while One Drive, it is limited by your internet speed and the amount of space available on One Drive. I'm not sure that One Drive autolocks files.
-
2 PC's
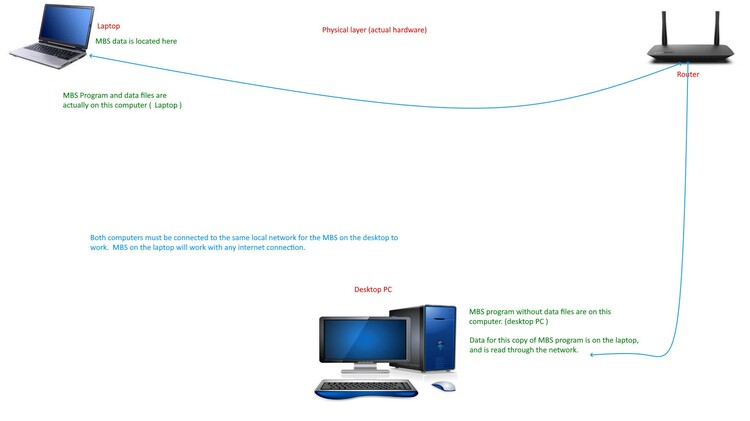
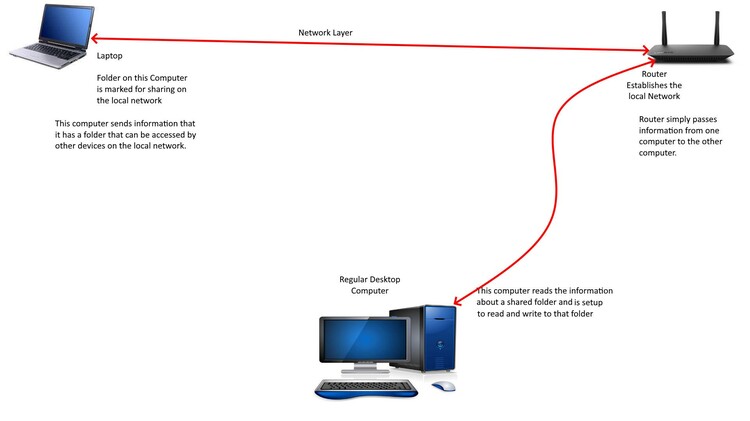
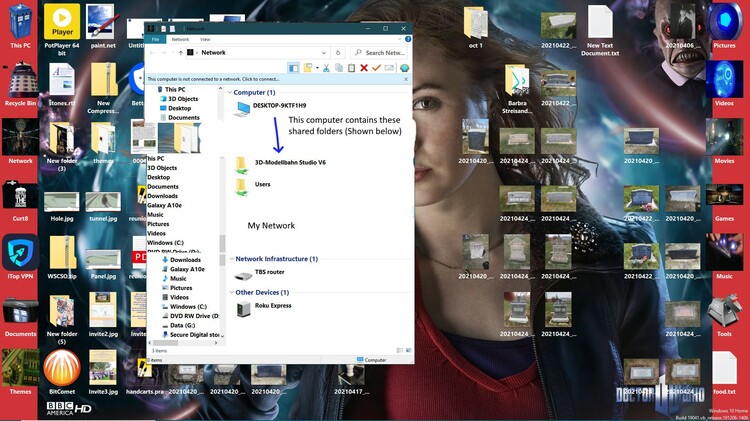
Here are the basics of how folders and data are shared on a network. This is a simple network with 2 computers and a router. While connected to the same network, both computers can use the same data, but only one at a time. Here, the Laptop (While connected to the network) sends information that a folder on it's hard drive can be read by and written to by other computers on the network. The other computer must be setup to read this data (Once) Here, We are looking at the Network from within Windows 10. Desktop-9KTF1H9 can be seen, because it is the local computer. Other computers will not see it, unless it has something to share. Below this computer (Expanded) are the folders that have been marked to share. below that are my router, and my Roku. (to be continued)
-
2 PC's
close, but not quite. bear with me as I create the images for the explanation soon to follow.
-
2 PC's
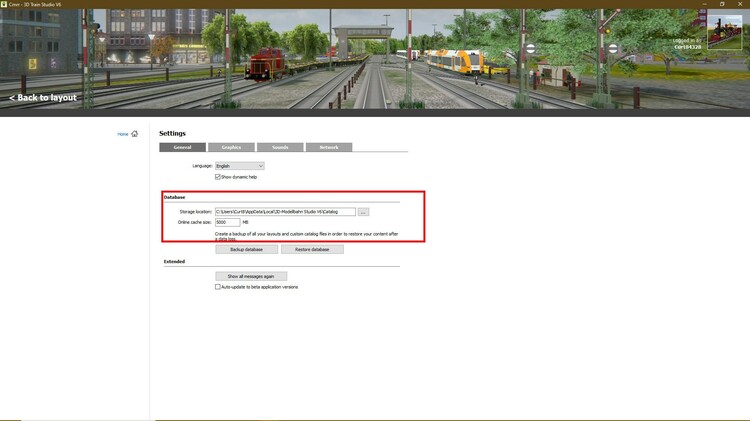
actually yes, yes it is. but... only one computer at a time. You have to have a local area network, which would be created by a router. Both computers must be on, and connected to the network. You create a shared drive on one (It really only has to be one folder) and make that folder available to the network, say as Z: now, place your data into the folder and set the path example Z:3D-Modelbahn Studio V6\Catalog and both computers will look here for their data files The first computer to access the data will lock the files, but they unlock when you exit the program.
-
making hay bales
Yes, thanks, Metallix, showed me the same thing, and after an afternoon of false starts, I got it working. this is the tractor and baler before track contact Track Contact Triggered, and a hay bale dropped, and ready to be picked up by the wagon closeup of the rear of the baler Side view showing Hitch, Power take off shaft and fly wheel. Thanks everyone. Curtis
-
making hay bales
You are correct that the baler is not a vehicle, and I just figured that one out, but good to know.
-
making hay bales
I have a few issues, and want your opinions. First, in my layout I have a section that features making and gathering hay bales. I have a hay baler, and every so often want to drop a hay bale to the ground. There is one behind the baler, but it is hard to see. I figured I could place a track contact on the track and use it to make a bale already placed become visible. The problem is that It becomes cumbersome to implement as each bale then needs it's own event. Can I create some sort of table that lists each bale name etc? I would then make them invisible again and a corresponding bale appear in the wagon. The second issue regards turning. when the tractor turns, the baler or wagon attached swings out and rotates around the back of the tractor. Is there some sort of coupler that can be attached to the baler so that it bends like a railroad car? Curtis
-
The light at the side of the tunnel? Das Licht an der Seite des Tunnels?
are there tiny gaps between tunnel sections? my tunnels are lit, but not from sunlight.
-
Adding water
-
Adding water
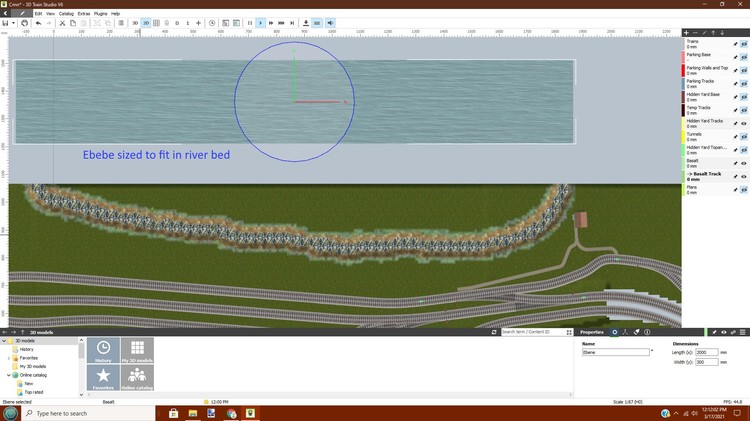
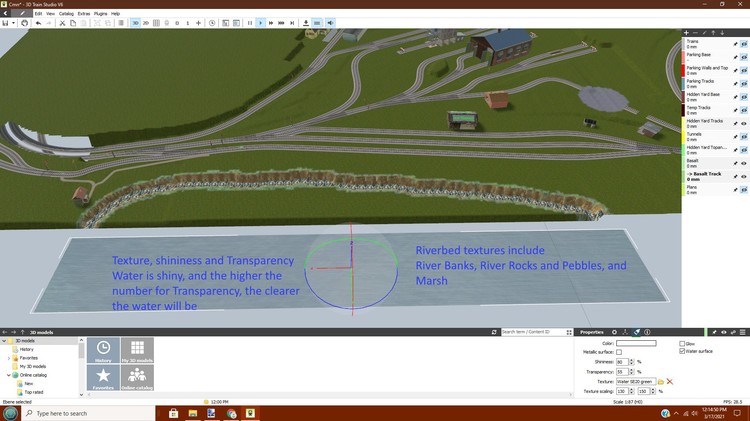
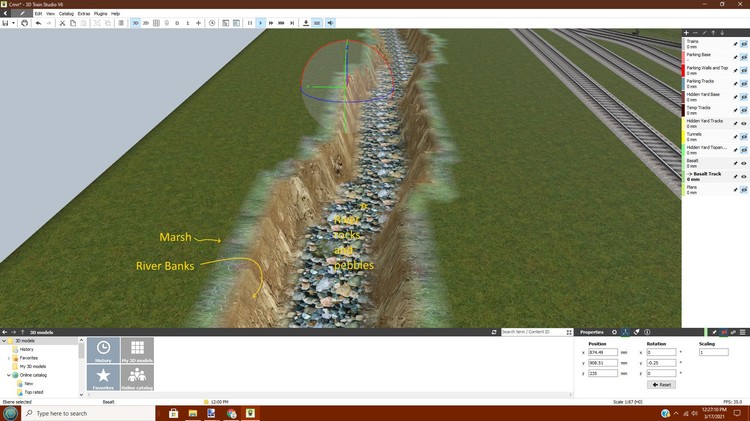
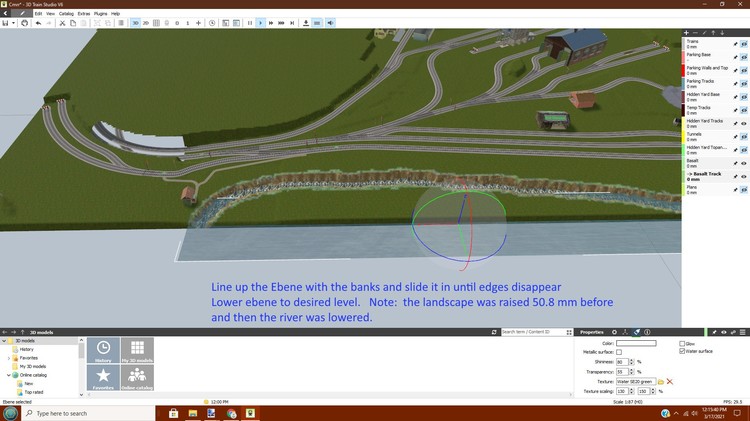
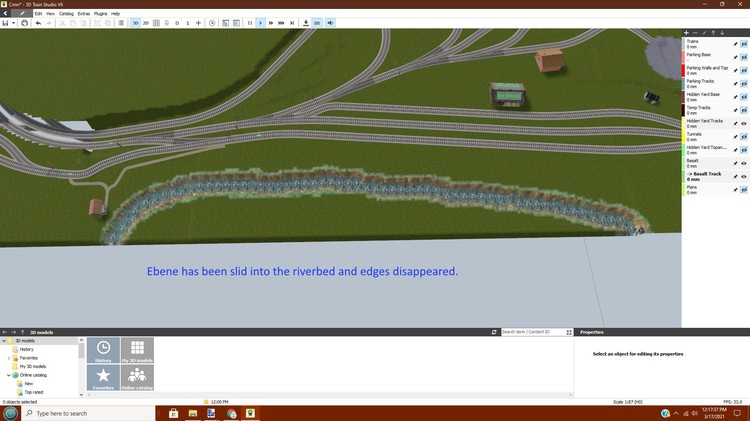
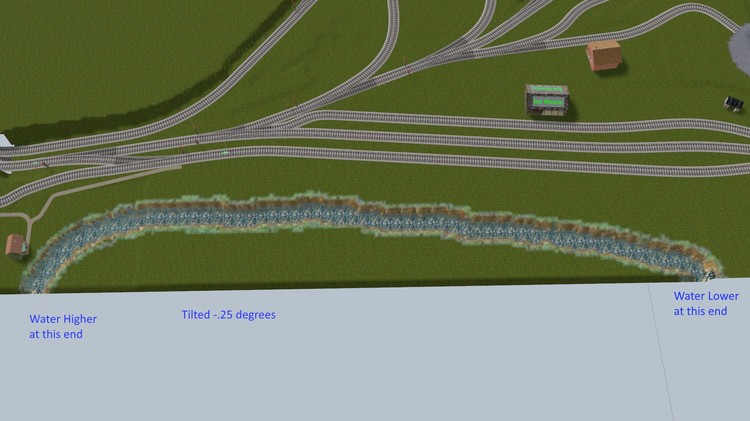
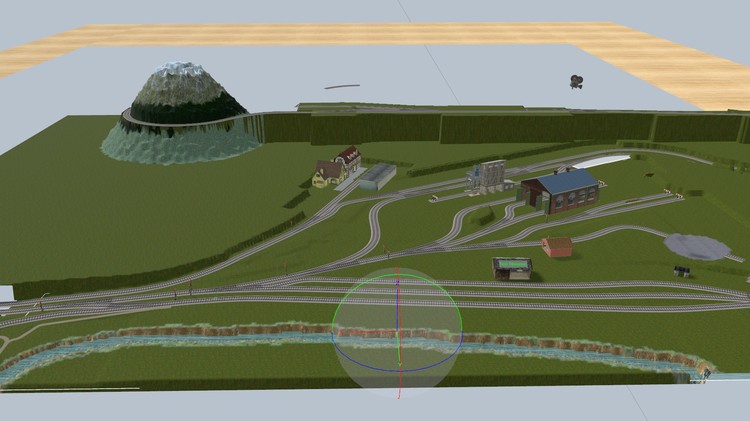
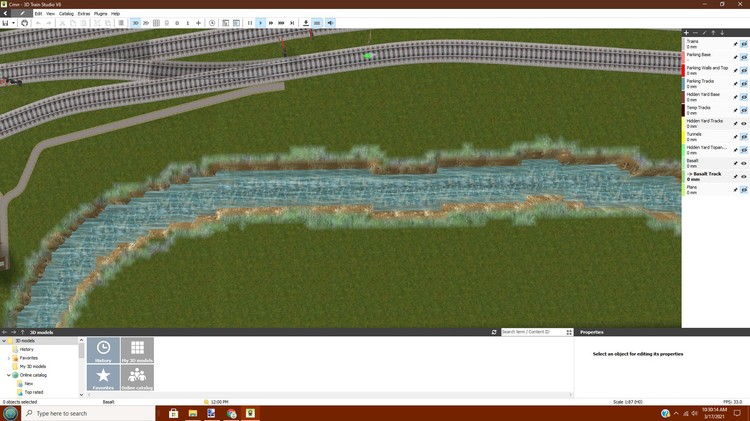
Do you mean like this? I added an Ebene and textured it with a water texture, made it mostly transparent so that the rocks would show, lined it up with the edges and lowered the ebene, so the water was below the top.
-
Adjust terrain
Small boards joined together would decrease the graphics load on the computer, but it would be necessary to make some invisible when landscaping.
-
Adjust terrain
You have an issue with not enough graphics power. The larger your base boards, and the higher the grid, the more graphics power is needed.
-
"Abschrägen der Grundplatte"
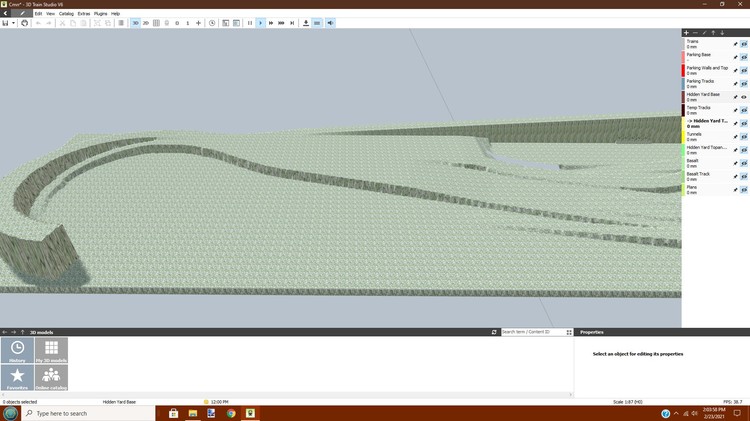
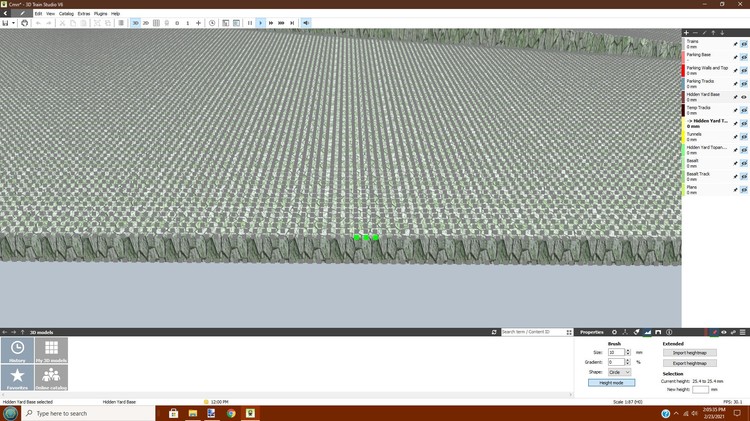
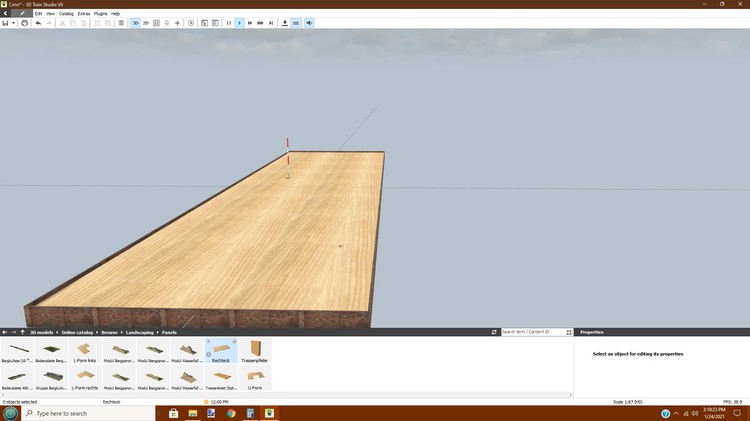
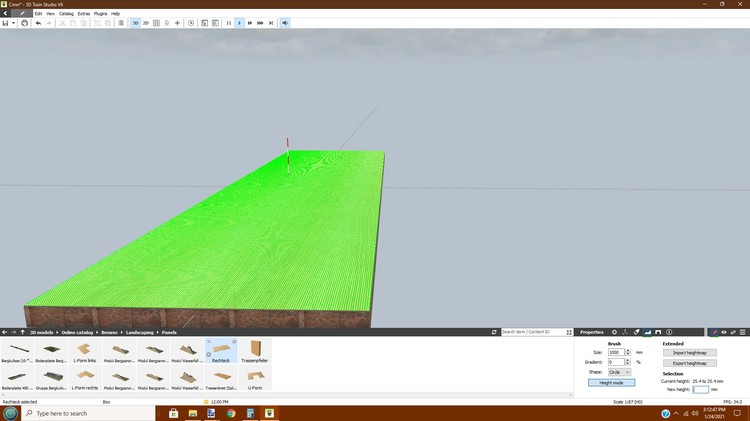
raise the height of the base plate by adjusting terrain on the entire base plate by about 25.4 cm or 50.8 cm. Now select just the outer control points and lower them to 0. erhöhen Sie die Höhe der Grundplatte, indem Sie das Gelände auf der gesamten Grundplatte um ca. 25,4 cm bzw. 50,8 cm anpassen. Wählen Sie nun nur die äußeren Kontrollpunkte aus und senken Sie diese auf 0 ab. It will look like this. Das sieht dann so aus.
-
Forum Antwortzeit wird immer länger
I sometimes have issues, but if I optimize my hard drive (HDD, not SSD) and then clear the cache and the Prefetch folder, performance seems to get restored to optimum.
-
Doors
First, give each car with doors that you want to open a keyword trigger: For each car with keyword Play animation forward timer timer expires Play animation reverse set vehicle speed for locomotive.
-
Landscaping
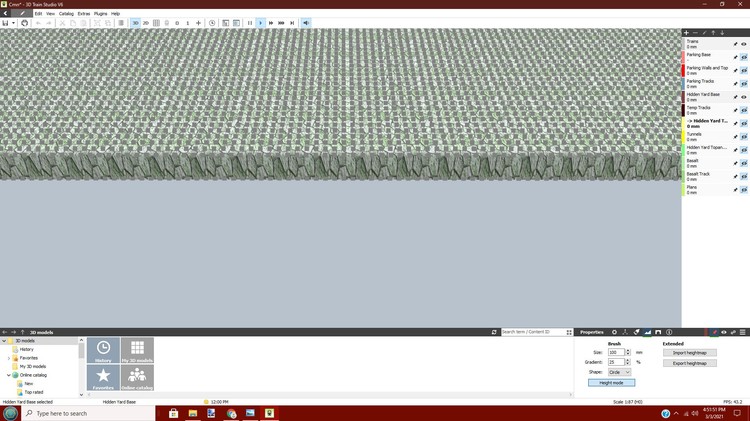
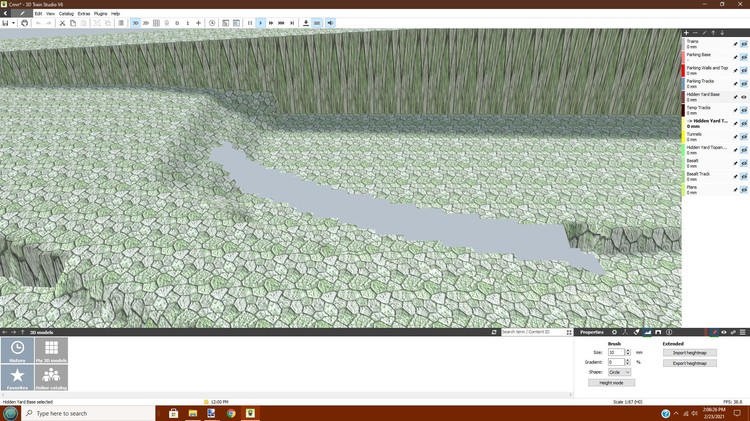
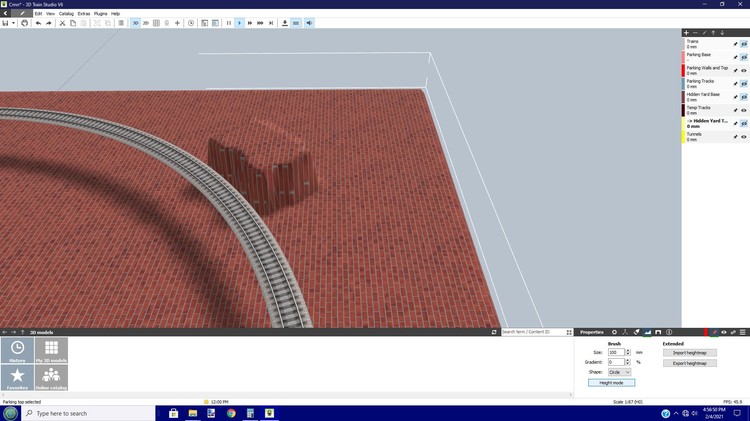
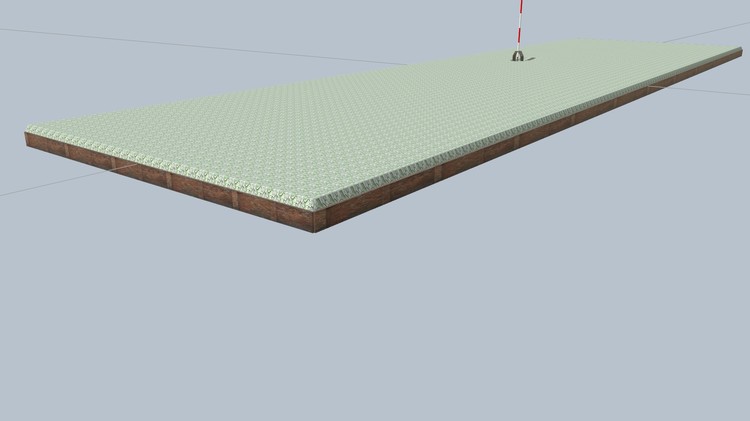
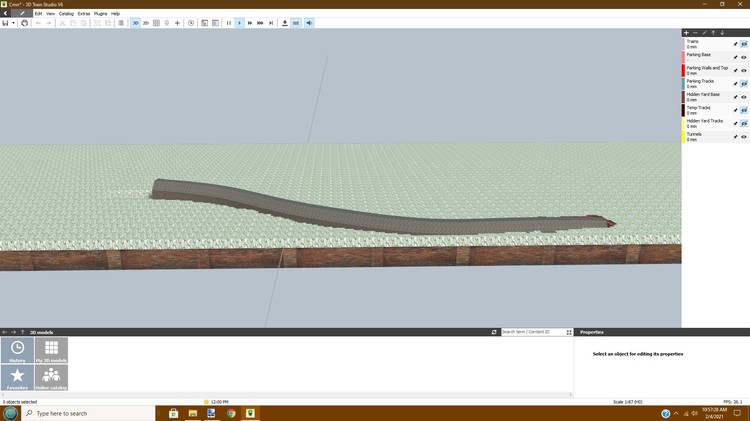
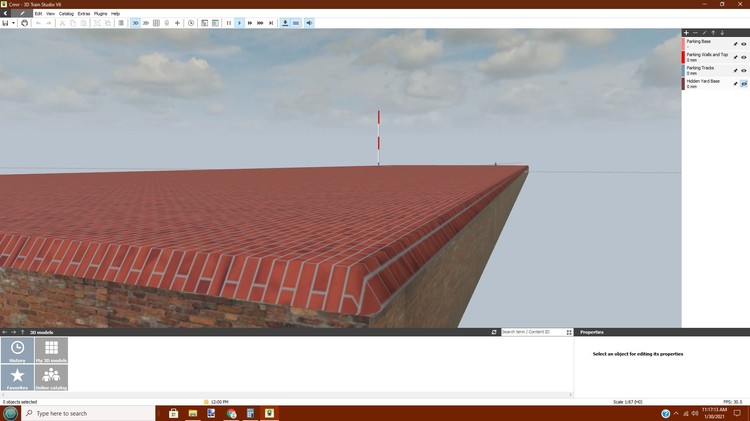
Here is another option for edges on panels. Hier ist eine weitere Option für Kanten an Platten. Here I have placed a panel with no edges or base. Hier habe ich ein Paneel ohne Kanten oder Basis platziert. The entire panel was raised 25.4 mm to accommodate lowering the panel in places. I then selected the edge rows of the panel and lowered them to 0 mm to create fake walls. Das gesamte Paneel wurde um 25,4 mm angehoben, um das Paneel stellenweise absenken zu können. Dann wählte ich die Randreihen des Paneels aus und senkte sie auf 0 mm ab, um unechte Wände zu erzeugen. The Advantage to no base is that holes cut in the plate go all the way through Der Vorteil gegenüber keinem Sockel ist, dass die in die Platte geschnittenen Löcher ganz durchgehen Here is the hole with the parking level beneath Hier ist das Loch mit der darunter liegenden Parkebene Here is the parking level with the hole cut in top level, and a tunnel installed Hier ist die Parkebene mit dem Loch, das in die oberste Ebene geschnitten wurde, und einem Tunnel installiert and the tunnel nicely covers the hole. und der Tunnel deckt das Loch schön ab. Viele Grüße, Curtis
-
Aufbau eines mehrstufigen Layouts
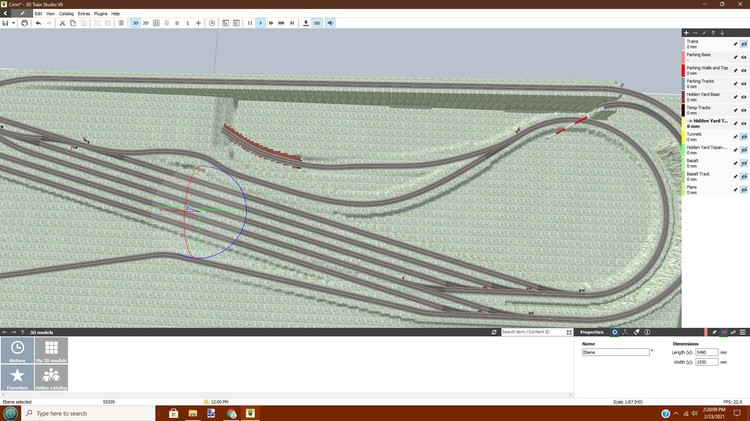
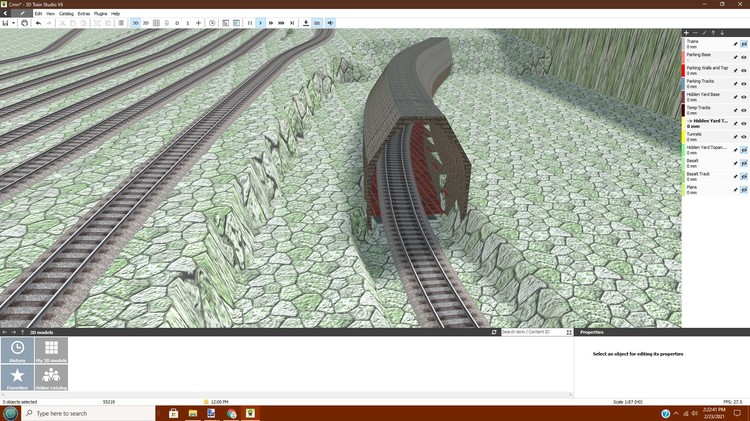
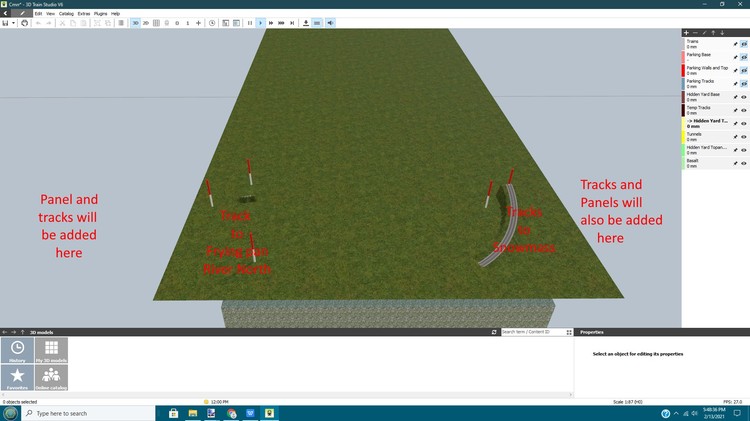
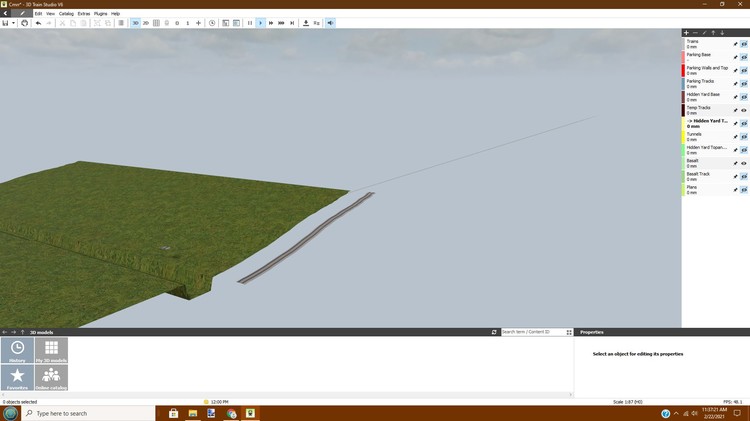
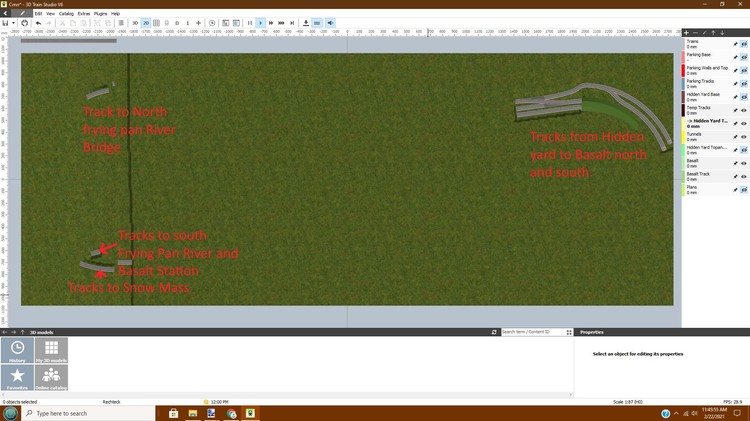
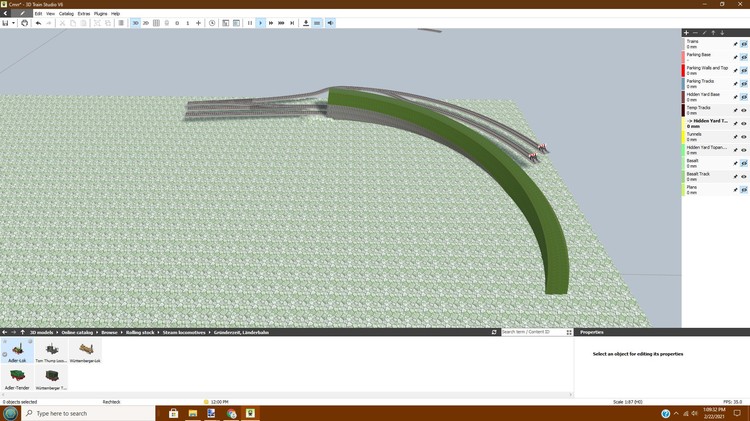
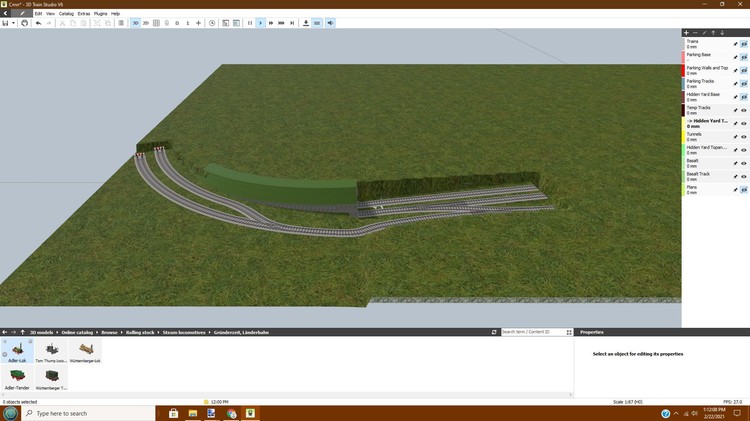
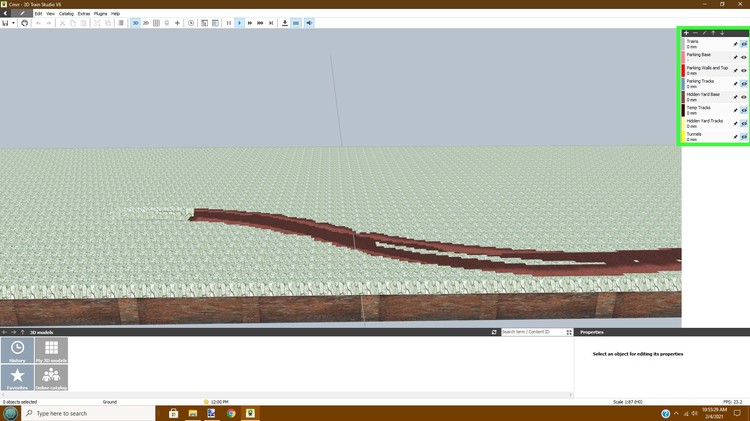
Post nine in a series. / Beitrag neun einer Serie. Finishing the hidden yard, and moving on to the lower main level. (Basalt) Fertigstellung des versteckten Hofes und Übergang zur unteren Hauptebene. (Basalt) With all the trackage for the hidden yard placed, and ready to use, I placed a panel for the hidden yard top and used panels for the side walls (rather than cubes, because there will have to be holes cut in places for the tracks to go through). Some of the tracks project through the top, going up to the lower main level. Nachdem alle Gleise für den versteckten Hof platziert und einsatzbereit waren, habe ich eine Platte für die Oberseite des versteckten Hofs angebracht und Platten für die Seitenwände verwendet (anstelle von Würfeln, da an einigen Stellen Löcher für die Gleise geschnitten werden müssen). Einige der Gleise ragen durch die Oberseite hindurch und gehen bis zur unteren Hauptebene. The 1st panel for the lower main level (Basalt) was placed .1 mm above the top of the hidden yard. This panel is 5490 mm X 2130 mm which is 300 mm wider on each side to accommodate trackage in the town of Basalt. The length is the same. We are looking towards the East end. After placing the panel, the height of the entire panel was adjusted upwards 50.8 mm. Das erste Paneel für die untere Hauptebene (Basalt) wurde 0,1 mm über der Oberkante des versteckten Hofs angebracht. Diese Platte hat eine Größe von 5490 mm X 2130 mm und ist damit auf jeder Seite 300 mm breiter, um die Gleisanlagen in der Stadt Basalt aufzunehmen. Die Länge ist die gleiche. Wir blicken auf das Ostende. Nach dem Einsetzen der Platte wurde die Höhe der gesamten Platte um 50,8 mm nach oben angepasst. Übersetzt mit www.DeepL.com/Translator (kostenlose Version) I built a section of track starting at the west end and sloping down towards the east using short tracks and sloping then down with various grades to get a sloped, but uneven hill as the base adjustment for the west end which is higher than the east end. Ich baute einen Gleisabschnitt, der am westlichen Ende beginnt und nach Osten hin abfällt, indem ich kurze Gleise verwendete und dann mit verschiedenen Neigungen abfiel, um einen schrägen, aber unebenen Hügel als Basisanpassung für das westliche Ende zu erhalten, das höher ist als das östliche Ende. The track plan for Basalt had heights printed on it, but they did not correspond to any of the other levels and so I had to adjust them to match the measurements of the rest of the layout. You will note the Frying Pan River, crossing under a bridge to the north, and then turning to the west. Below the river, there is a track that comes out near Basalt Station, and below it a track to Snow Mass. Auf dem Gleisplan für Basalt waren zwar Höhen aufgedruckt, aber sie stimmten mit keiner der anderen Ebenen überein, so dass ich sie an die Maße der restlichen Anlage anpassen musste. Sie werden den Frying Pan River bemerken, der unter einer Brücke im Norden hindurchführt und dann nach Westen abbiegt. Unterhalb des Flusses gibt es ein Gleis, das in der Nähe der Basalt Station herauskommt, und darunter ein Gleis nach Snow Mass. Übersetzt mit www.DeepL.com/Translator (kostenlose Version) Here the terrain was adjusted for the tracks to the North bridge over the Frying Pan River, the tracks to Basalt Station, and the track to Snow Mass. These tracks had previously been adjusted to the correct height on the plan. Hier wurde das Gelände für die Gleise zur Nordbrücke über den Frying Pan River, die Gleise zum Bahnhof Basalt und das Gleis zur Snow Mass angepasst. Diese Gleise waren zuvor auf dem Plan auf die richtige Höhe angepasst worden. At the east end of Basalt, I adjust the hidden yard top to accommodate the tunnel over the double tracks from the Hidden yard, and place the trackage that connects to them. Am östlichen Ende von Basalt passe ich die Oberseite des Hidden Yards an, um den Tunnel über die Doppelgleise vom Hidden Yard unterzubringen, und platziere die Gleise, die an sie anschließen. On the east end, on the Basalt panel, I began to adjust the terrain to match the tracks coming out of the tunnel. Track laying, terrain adjusting, and adding additional features goes much slower as the Basalt section is more complex, and very uneven as regards terrain. Am östlichen Ende, auf der Basaltplatte, begann ich, das Gelände an die aus dem Tunnel kommenden Gleise anzupassen. Das Verlegen der Gleise, das Anpassen des Geländes und das Hinzufügen zusätzlicher Funktionen geht viel langsamer, da der Basalt-Abschnitt komplexer und vom Gelände her sehr uneben ist.
-
Aufbau eines mehrstufigen Layouts
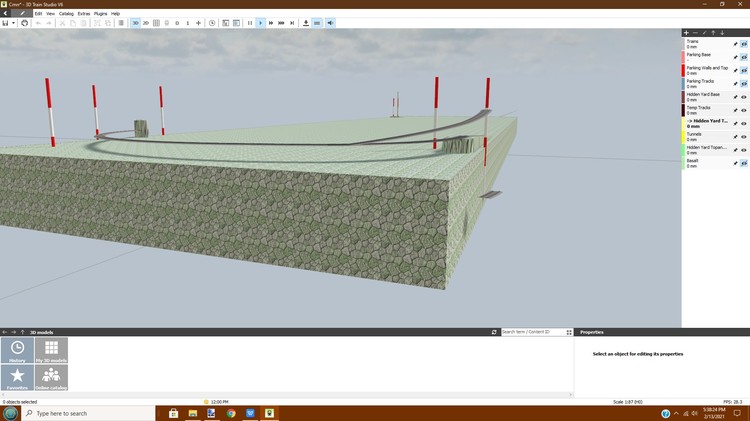
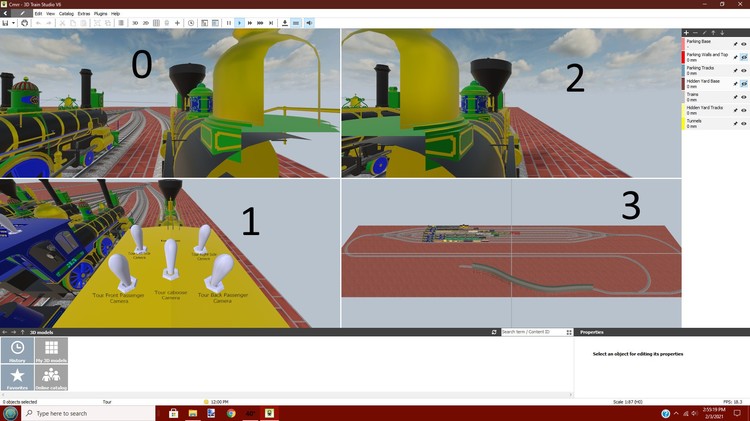
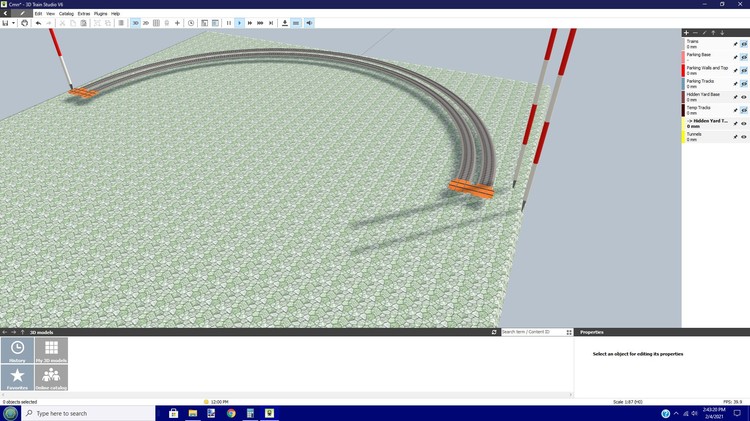
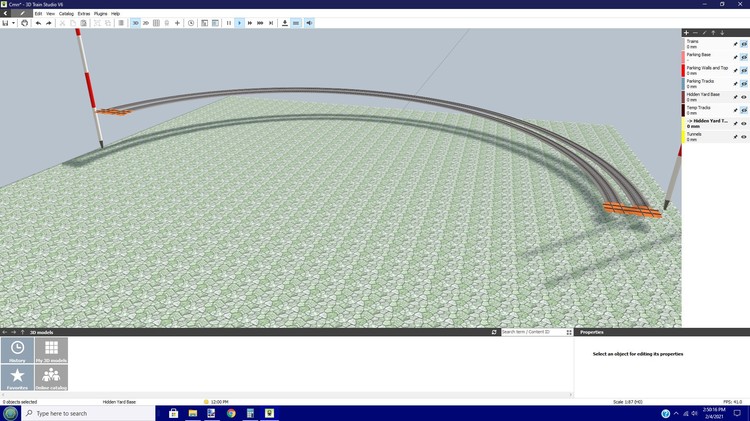
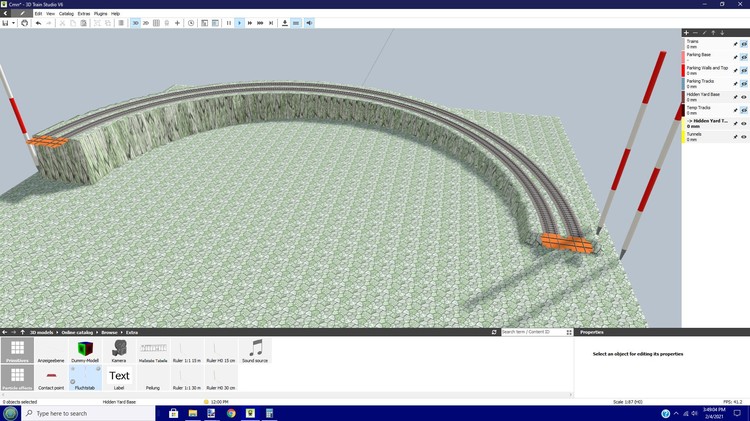
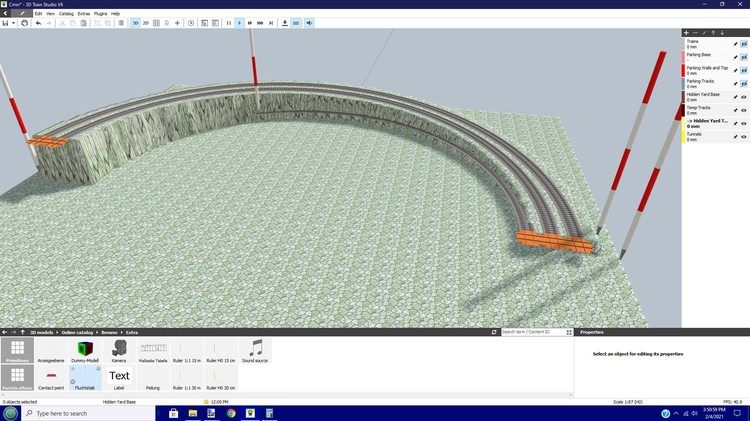
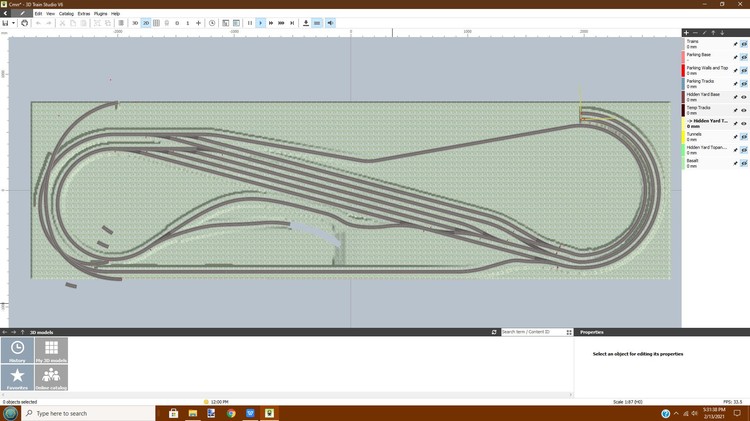
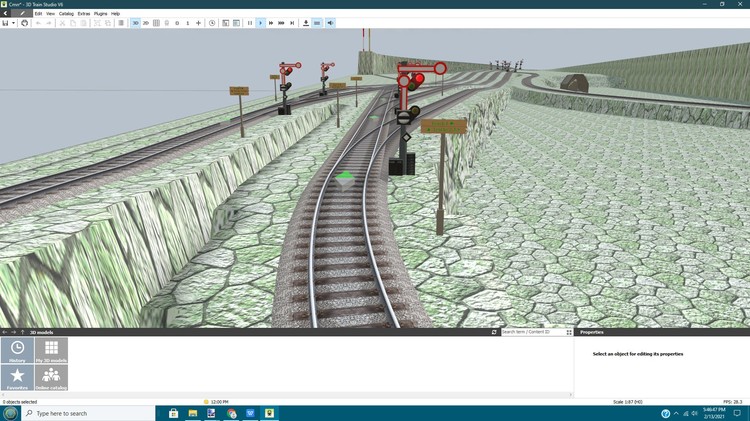
Post Eight in a series. / Beitrag Acht in einer Serie. Finishing The Hidden Switch Yard. Fertigstellung des versteckten Schalterplatzes. First a bit concerning MultiView and programming cameras. Zunächst etwas zu MultiView und der Programmierung von Kameras. I use Multiview in my layout with Locomotive camera on the left side of the cab looking forward in Position 0, and a Locomotive camera on the right side also looking forward in position 2. This allows me to see track controls on both sides of the locomotive. Position 1 looks down on the top of the cab and has switches for other camera views. These switches are controlled via event management. When activating a camera view, by default it opens in view 0. You have to set the view to 1 to get the image in the bottom left window. Position 3 is the 3D camera and shows the entire layout if set to show it. Ich verwende in meiner Anlage Multiview mit einer Lokkamera auf der linken Seite des Führerstands, die in Position 0 nach vorne schaut, und einer Lokkamera auf der rechten Seite, die in Position 2 ebenfalls nach vorne schaut. Dadurch kann ich die Gleissteuerung auf beiden Seiten der Lokomotive sehen. Position 1 blickt auf die Oberseite des Führerstands und hat Schalter für andere Kameraansichten. Diese Schalter werden über die Ereignisverwaltung gesteuert. Wenn Sie eine Kameraansicht aktivieren, öffnet sie sich standardmäßig in der Ansicht 0. Sie müssen die Ansicht auf 1 setzen, um das Bild im unteren linken Fenster zu erhalten. Ansicht 3 ist die 3D-Kamera und zeigt die gesamte Anlage, wenn sie darauf eingestellt ist. Übersetzt mit www.DeepL.com/Translator (kostenlose Version) The Hidden Yard has 2 tracks that lead up to the next level (The Basalt panel) and make a good starting place. I measured the width of the plate, and calculated the Radius of the outer curve as 700 mm (1535 divide by 2 and leaving 67.5 mm border.) the second curve is 700 - 50.8 mm 649.2mm. Track spacers were placed at each end. and then the 2 track spacers at the far end of the curve were raised to the correct height. Der Hidden Yard hat 2 Gleise, die zur nächsten Ebene führen (die Basaltplatte) und einen guten Ausgangspunkt darstellen. Ich habe die Breite der Platte gemessen und den Radius der äußeren Kurve als 700 mm berechnet (1535 dividiert durch 2 und lässt 67,5 mm Rand.) die zweite Kurve ist 700 - 50,8 mm 649,2mm. An jedem Ende wurden Spurabstandshalter angebracht. und dann wurden die 2 Spurabstandshalter am anderen Ende des Bogens auf die richtige Höhe angehoben. Übersetzt mit www.DeepL.com/Translator (kostenlose Version) All track (except the track spacers) was selected, and then the tracks were raised to meet the height of the track spacers. Die gesamte Schiene (mit Ausnahme der Spurabstandshalter) wurde ausgewählt, und dann wurden die Schienen auf die Höhe der Spurabstandshalter angehoben. With all track still selected, I adjusted the terrain for all tracks. From this view, you cannot see it, but the curves are a full 180 degrees. Während alle Gleise noch ausgewählt sind, habe ich das Terrain für alle Gleise angepasst. Aus dieser Ansicht können Sie es nicht sehen, aber die Kurven sind um volle 180 Grad. I placed a third Track Spacer set to 63.5 mm instead of 50.8 and it turned out to still be too close for the third curve, so I changed it to 76.2 mm. the 3 tracks all start at 76.2m (50.8 mm above the top of the plate which was raised 25.4 mm above 0) and the third track lowers down to touch the top of the plate 2/3 of the way around or 120 degrees of curve. Ich setzte einen dritten Spurabstand auf 63,5 mm statt 50,8 und es stellte sich heraus, dass er für die dritte Kurve immer noch zu eng war, also änderte ich ihn auf 76,2 mm. Die 3 Spuren beginnen alle bei 76,2 m (50,8 mm über der Oberseite der Platte, die 25,4 mm über 0 angehoben wurde) und die dritte Spur senkt sich ab, um die Oberseite der Platte in 2/3 des Weges oder 120 Grad der Kurve zu berühren. Übersetzt mit www.DeepL.com/Translator (kostenlose Version) This is the trackage of the Hidden Yard. It is more complex than the Parking level as there are several destinations that can be reached from here. The trackage is not completely finished here. As you can see, there are several track switches, and signal controllers. Dies ist die Gleisanlage des Hidden Yard. Sie ist komplexer als die Parkebene, da es mehrere Ziele gibt, die von hier aus erreicht werden können. Die Gleisanlage ist hier noch nicht ganz fertig. Wie Sie sehen können, gibt es mehrere Weichen und Signalsteuerungen. I am again using @Neo's archived Semaphore signals (scaled to .75) and placing them on the curved side of the track switches. They are linked to the closest track switch, and to open when the curved section of the track switch is open. This was done by editing the track switch and reversing the position and route of the switches. Each switch also has a direction sign consisting of @BahnLand's Signal mast set to .5 scale and a cube for the board on top using custom texture. overlaying this is a label with the directions. They are placed to best be visible from the Locomotive cab. I also placed a track contact with keyword Stop to use the common event stop. Ich verwende wieder @Neo's archivierte Semaphore-Signale (skaliert auf .75) und platziere sie auf der gebogenen Seite der Gleisweichen. Sie sind mit der nächstgelegenen Weiche verknüpft und sollen sich öffnen, wenn der gebogene Teil der Weiche offen ist. Dazu wurde die Weiche bearbeitet und die Position und der Verlauf der Weichen umgekehrt. Jede Weiche hat auch ein Richtungsschild, das aus @BahnLand's Signalmast im Maßstab .5 und einem Würfel für die Tafel oben mit eigener Textur besteht. darüber liegt ein Schild mit den Richtungsangaben. Sie sind so platziert, dass sie vom Führerstand der Lokomotive aus am besten sichtbar sind. Ich habe auch einen Gleiskontakt mit dem Schlüsselwort "Stop" platziert, um den gemeinsamen Ereignisstopp zu verwenden. When adjusting Terrain on a track, be sure that all other layers are deactivated, or you will end up raising sections of the other levels like I did here by mistake. Achten Sie beim Anpassen des Terrains auf einer Spur darauf, dass alle anderen Ebenen deaktiviert sind, sonst heben Sie am Ende Teile der anderen Ebenen an, wie ich es hier versehentlich getan habe.
-
Aufbau eines mehrstufigen Layouts
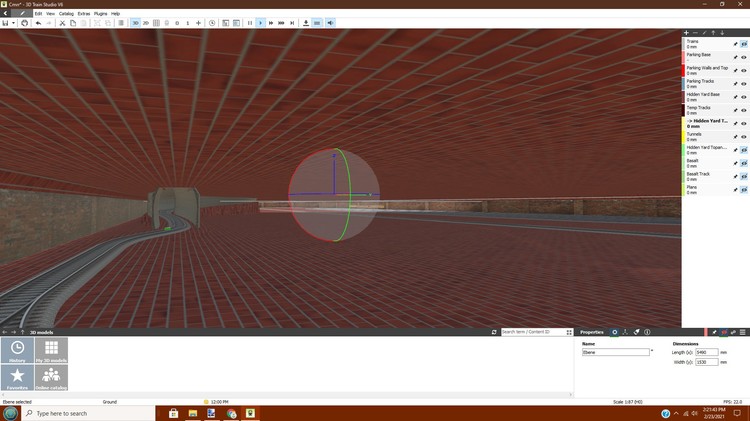
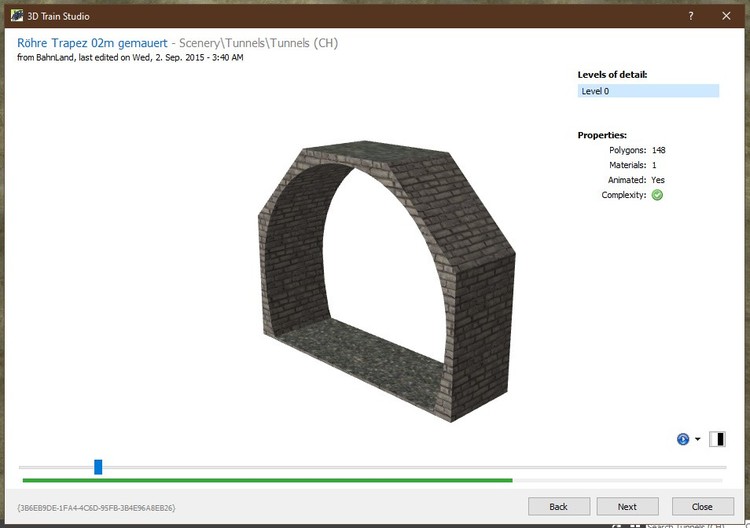
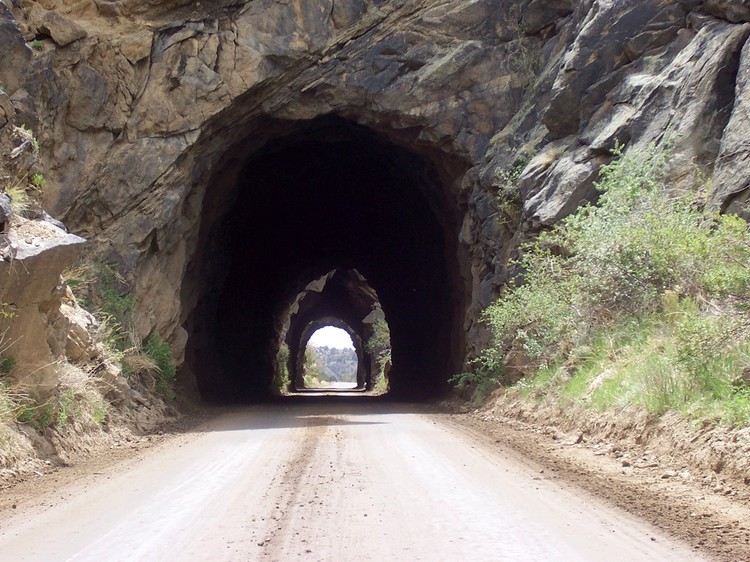
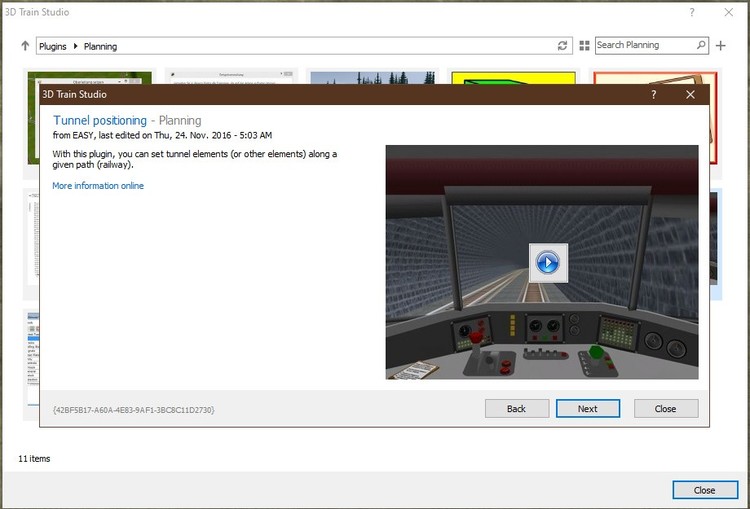
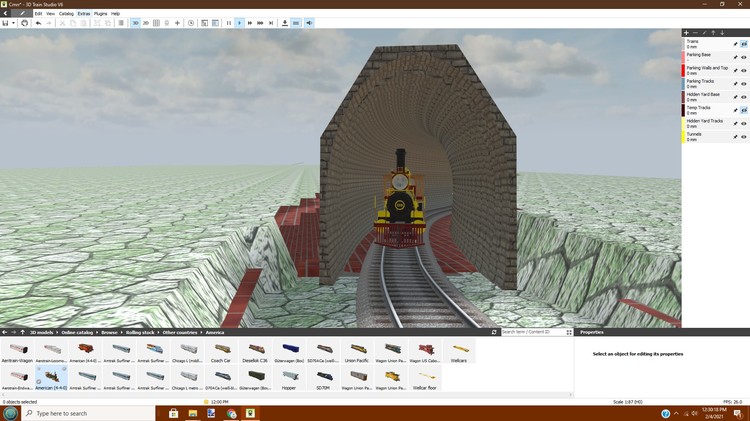
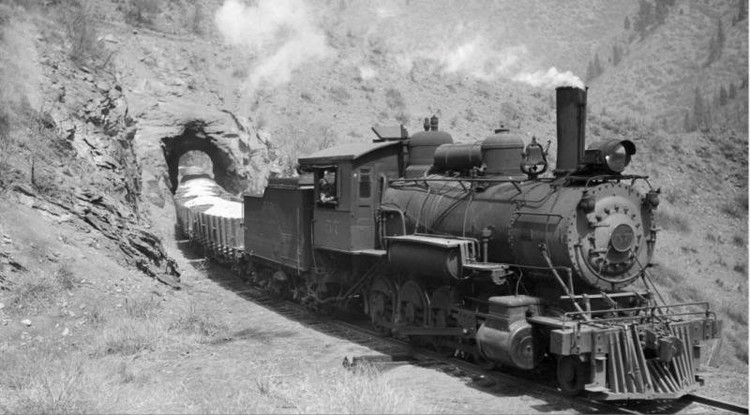
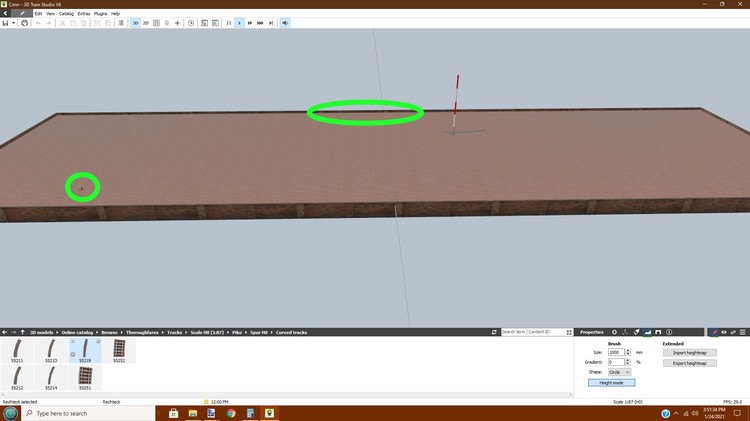
Post seven in a series. / Post seven of a series. Beginning the Hidden Yard level (at last). Beginning of the "Hidden Yard" level (finally). First, a few loose ends and suggestions. First, a few pointers and suggestions. I strongly suggest that you use layers. It makes it much easier to separate out various components of your layout, and allows you to adjust height of each level independent of other levels. It also gives you more control of what objects you are working on. I highly recommend that you use layers. It makes it much easier to separate different components of your layout and allows you to adjust the height of each level independently of other levels. It also gives you more control over the objects you are working on. We start by placing a panel for the hidden yard. this panel is 5490 mm x 1530 mm (the same as the other panels) centered at x, y 0.0. Height is .1 mm above 0. We'll start by placing a panel for the hidden yard. This panel is 5490mm x 1530mm (like the other panels) centered at x, y 0,0. The height is 0.1 mm above 0. A marker is placed at the point where the tracks exit the parking level and continue up to the hidden yard. The whole hidden yard (Except the outermost row of control points) is raised 1 inch (25.4 mm) and a new texture is placed on the panel. An der Stelle, an der die Gleise aus der Parkebene austreten und sich bis zum verdeckten Hof fortsetzen, wird ein Marker gesetzt. Der gesamte verdeckte Hof (mit Ausnahme der äußersten Reihe von Kontrollpunkten) wird um 25,4 mm angehoben und eine neue Textur wird auf der Platte platziert. Now we select the Hidden Yard Tracks Layer, cut a small hole at the marker, place a new track, and adjust the terrain for the hidden yard only. Now we place the first tunnel segment and are ready to place the tunnel. Jetzt wählen wir den Layer "Versteckte Hofgleise" aus, schneiden ein kleines Loch an der Markierung, legen ein neues Gleis und passen das Gelände nur für den verdeckten Hof an. Nun platzieren wir das erste Tunnelsegment und sind bereit, den Tunnel zu verlegen. @BahnLand, I know that these tunnels are archived, but they still make a relatively close match for the prototype tunnels from the prototype Colorado Midland Railroad. Ich weiß, dass diese Tunnel archiviert sind, aber sie passen trotzdem relativ gut zu den Prototyp-Tunneln der vorbildgetreuen Colorado Midland Railroad. This is an actual tunnel on the old Colorado Midland Railroad. It is not tall, is narrow, and a locomotive barely fit. This is the look I am trying to recreate. Dies ist ein tatsächlicher Tunnel der alten Colorado Midland Railroad. Er ist nicht hoch, ist eng und eine Lokomotive passt kaum hinein. Das ist das Aussehen, das ich versuche, nachzubilden. Tunnels were placed using @EASY's Tunnel Positioning plugin. I know that in V6, it has been archived, and that there are scale issues, but they are easily fixed. Load the plugin using it's content ID, and then select the tunnel piece. Once selected, rescale the tunnel from 1 to .2 and measure it. Now rescale the tunnel segment to 1 and place the tunnel. Die Tunnel wurden mit dem Tunnel-Positionierungs-Plugin von @EASY platziert. Ich weiß, dass es in V6 archiviert wurde und dass es Skalierungsprobleme gibt, aber die sind leicht zu beheben. Laden Sie das Plugin mit seiner Inhalts-ID und wählen Sie dann das Tunnelstück aus. Sobald es ausgewählt ist, skalieren Sie den Tunnel von 1 auf .2 und messen ihn. Skalieren Sie nun das Tunnelsegment auf 1 und platzieren Sie den Tunnel. Übersetzt mit www.DeepL.com/Translator (kostenlose Version) The Tunnel looks like this when complete, and we are ready to cut holes in the hidden yard panel, and then the parking ceiling. So sieht der Tunnel aus, wenn er fertig ist, und wir sind bereit, Löcher in die verdeckte Hofplatte zu schneiden, und dann die Parkdecke. As you can see, a locomotive fits just like the prototype. Wie Sie sehen können, passt eine Lokomotive genau wie das Original. Until Next time. / Bis zum nächsten Mal.
-
Primitive "Ebene"
IF the image on the JPG is your own, or public domain, you can upload it to the online catalog. Then everyone can use it. WENN das Bild auf dem JPG Ihr eigenes ist, oder gemeinfrei, können Sie es in den Online-Katalog hochladen. Dann kann es jeder verwenden.
-
Aufbau eines mehrstufigen Layouts
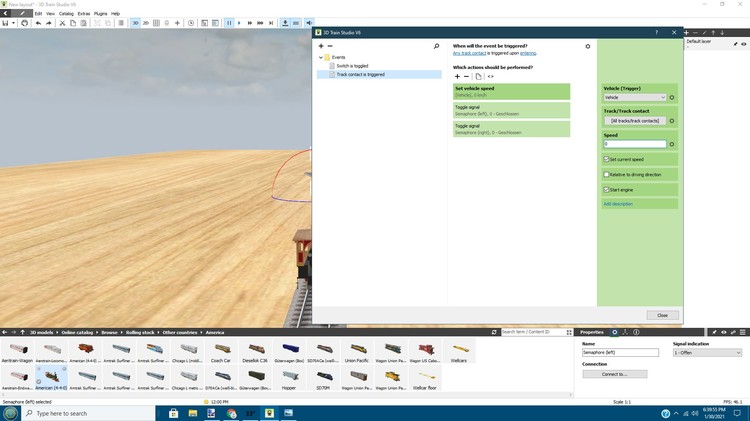
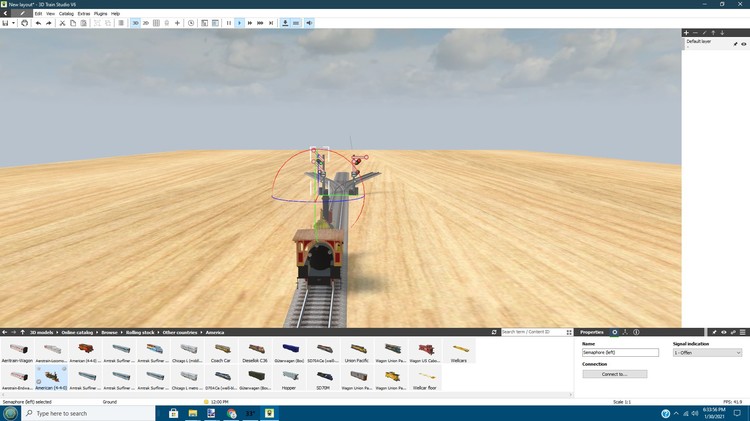
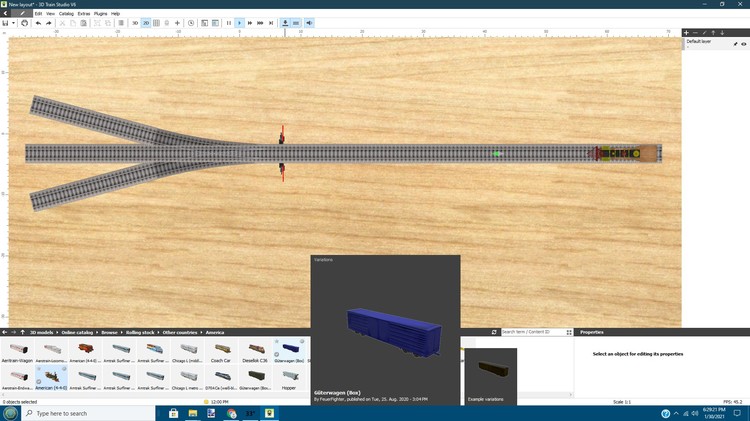
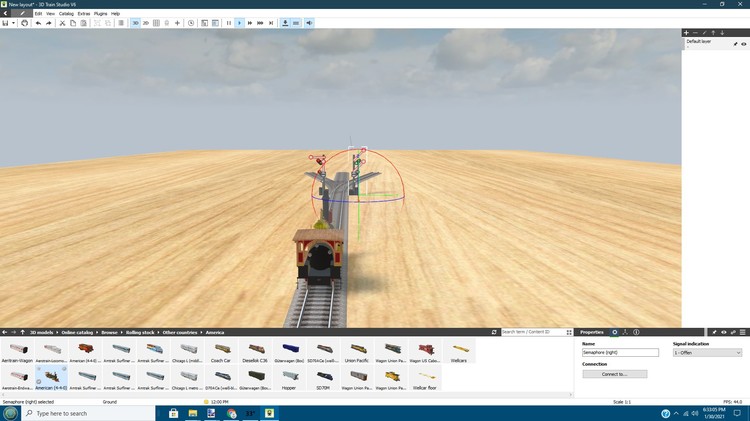
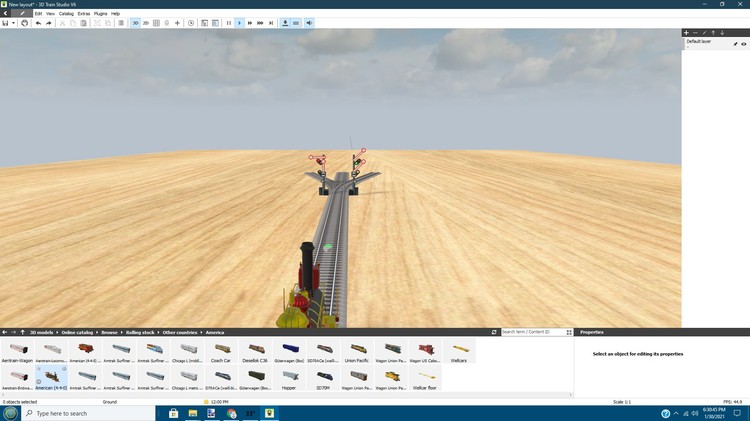
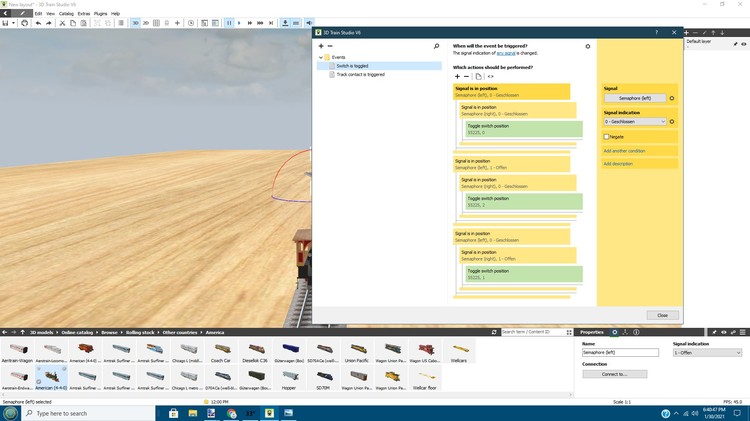
Post out of Sequence (Bonus Post) Sometimes you have a 3 way track switch that you want to control with a signal (or two). This can be done with Event Management. Manchmal haben Sie einen 3-Wege-Gleisschalter, den Sie mit einem Signal (oder zwei) steuern möchten. Dies kann mit der Ereignisverwaltung erfolgen. Here is a simple example with Track, a locomotive, a track contact, 2 semaphore signals, and a three way switch. Hier ist ein einfaches Beispiel mit einem Gleis, einer Lokomotive, einem Gleiskontakt, 2 Semaphorsignalen und einem Dreiwegschalter. The Track contact stops the locomotive, and closes both semaphores. Der Gleiskontakt hält die Lokomotive an und schließt beide Semaphore. In this Picture, contact has not been made, and the right semaphore is open. In diesem Bild wurde kein Kontakt hergestellt, und das rechte Semaphor ist offen. Here, contact is made, the train has stopped, the semaphore signals are closed, and we are ready to set the track switch. Hier ist der Kontakt hergestellt, der Zug hat angehalten, die Semaphorsignale sind geschlossen, und wir sind bereit, die Weiche zu stellen. Now to read the signals, and change the track switch based on the signal. Jetzt können Sie die Signale lesen und die Weiche auf der Grundlage des Signals ändern. Reading the signals, Right signal open, Left signal Closed, Track Switch set to Right track. Lesen der Signale, rechtes Signal offen, linkes Signal geschlossen, Spurschalter auf rechte Spur eingestellt. and, Right signal closed, Left signal Open, Track switch set to Left Track. und, rechtes Signal geschlossen, linkes Signal offen, Spurschalter auf linke Spur gestellt.
-
Aufbau eines mehrstufigen Layouts
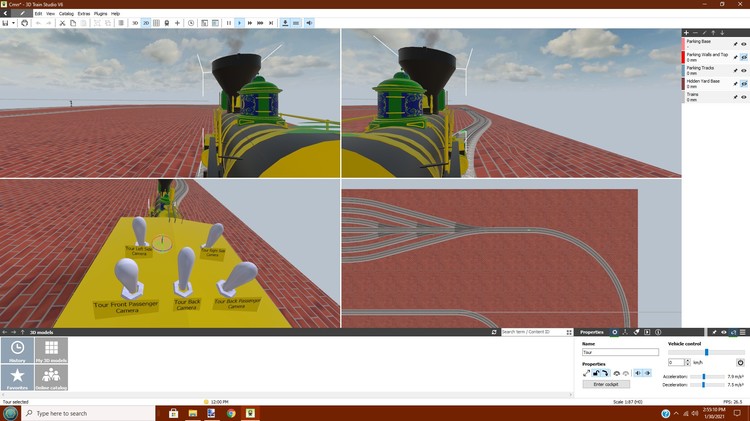
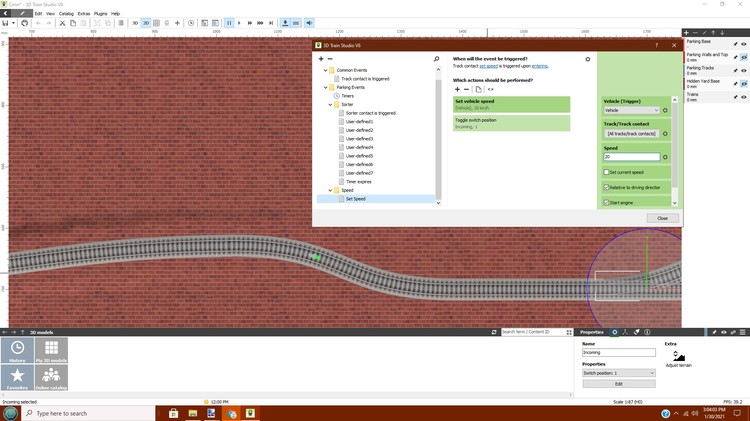
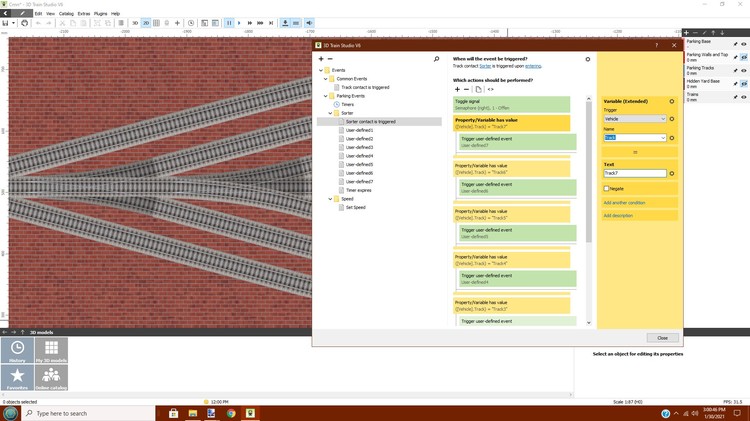
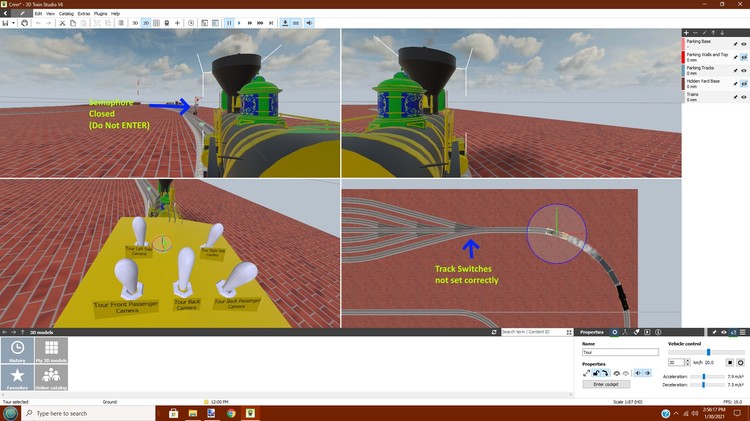
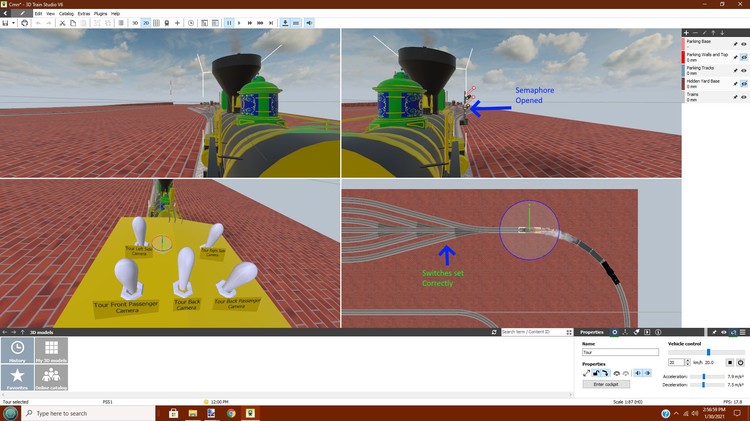
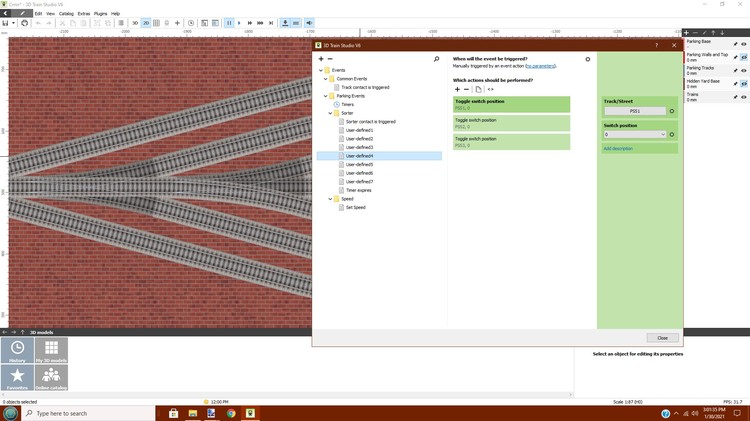
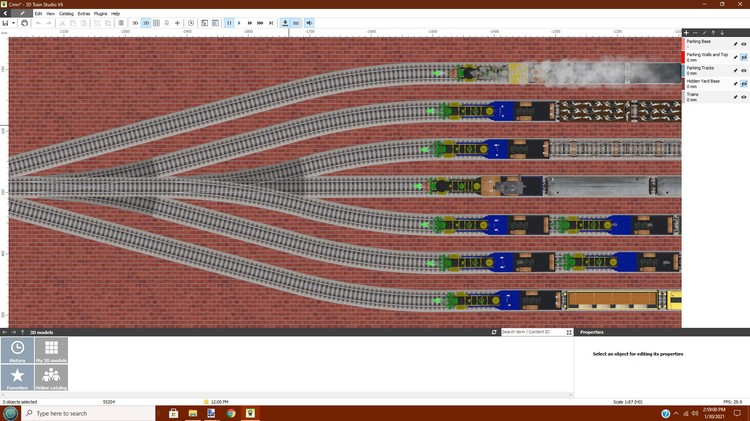
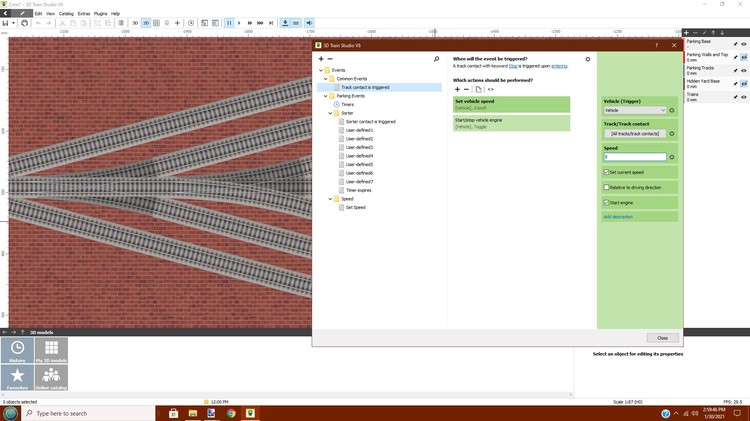
Post six in a series. / Beitrag sechs in einer Serie. Event management for Parking Level. Ereignisverwaltung für Parkebene. First, an explanation for this view. I am using the 4 view option, with a camera in the cab of the locomotive on both the left and right sides of the boiler. The third view is looking down on the cab, and can be used to bring up the properties of the Locomotive. The fourth view is the standard 2D view for demo purposes only. Zunächst eine Erklärung für diese Ansicht. Ich verwende die 4-Ansicht-Option, mit einer Kamera im Führerstand der Lokomotive auf der linken und rechten Seite des Kessels. Die dritte Ansicht blickt auf den Führerstand hinunter und kann verwendet werden, um die Eigenschaften der Lokomotive aufzurufen. Die vierte Ansicht ist die Standard-2D-Ansicht, die nur zu Demozwecken dient. The first triggered event upon entering the parking level from the level above is the track contact that sets the locomotive speed for the parking level, and sets the incoming track switch for incoming trains, instead of outgoing trains. It also sets the speed to 20 km/h. Das erste ausgelöste Ereignis bei der Einfahrt in die Parkebene von der darüber liegenden Ebene ist der Gleiskontakt, der die Geschwindigkeit der Lokomotive für die Parkebene einstellt und die Einfahrweiche für einfahrende Züge statt für ausfahrende Züge schaltet. Er setzt auch die Geschwindigkeit auf 20 km/h. The next event is a complex event that sets the Semaphore signal to open, telling the train it may proceed. IT then checks the value for a text value assigned to each locomotive and executes the matching user defined event. Finally, it starts a timer, which when expired, closes the semaphore signal. Das nächste Ereignis ist ein komplexes Ereignis, das das Semaphor-Signal auf "offen" setzt und dem Zug mitteilt, dass er weiterfahren darf. Es prüft dann den Wert für einen jeder Lokomotive zugewiesenen Textwert und führt das passende benutzerdefinierte Ereignis aus. Schließlich startet es einen Timer, der nach Ablauf das Semaphor-Signal schließt. There are a series of user defined events as shown above that define the track switch settings for each locomotive. There are seven of them, one for each locomotive. They determine where each locomotive parks in the parking tracks. Es gibt eine Reihe von benutzerdefinierten Ereignissen wie oben gezeigt, die die Gleisschaltereinstellungen für jede Lokomotive definieren. Es gibt sieben davon, eines für jede Lokomotive. Sie bestimmen, wo jede Lokomotive in den Abstellgleisen parkt. Here, you notice that the semaphore signal is closed, the sorter contact has not been triggered, and the track switches have not been set. Hier sehen Sie, dass das Semaphor-Signal geschlossen ist, der Sortierkontakt nicht ausgelöst wurde und die Weichen nicht gestellt sind. Here, the track contact has been triggered, the semaphore is open, and the proper track switched have been set. The train may now safely proceed on the correct track and park. Hier wurde der Gleiskontakt ausgelöst, das Semaphor ist offen und das richtige Gleis ist geschaltet. Der Zug kann nun sicher auf dem richtigen Gleis weiterfahren und parken. All seven trains are shown here in an overhead view with the seven stop track contacts. Each stop contact is assigned a keyword "Stop" and a single event serves to stop any locomotive. Hier sind alle sieben Züge in einer Draufsicht mit den sieben Stopp-Gleiskontakten dargestellt. Jedem Haltekontakt ist das Schlüsselwort "Halt" zugeordnet und ein einzelnes Ereignis dient zum Anhalten einer beliebigen Lokomotive. This event is not grouped with the parking events because it can be used with a track switch elsewhere in the layout to stop a triggering train. Instead, I use "Common Events" to group events that can be reused elsewhere. I want to thank those who helped me with learning to program the complex sorting events. Up next post is Levels, and beginning the Hidden yard. Dieses Ereignis wird nicht mit den Parkereignissen gruppiert, da es mit einer Gleisweiche an anderer Stelle in der Anlage verwendet werden kann, um einen auslösenden Zug anzuhalten. Stattdessen verwende ich "Gemeinsame Ereignisse", um Ereignisse zu gruppieren, die an anderer Stelle wiederverwendet werden können. Ich möchte mich bei denjenigen bedanken, die mir beim Erlernen der Programmierung der komplexen Sortierereignisse geholfen haben. Der nächste Beitrag ist "Levels", und der Beginn des "Hidden Yard". Übersetzt mit www.DeepL.com/Translator (kostenlose Version)
-
Aufbau eines mehrstufigen Layouts
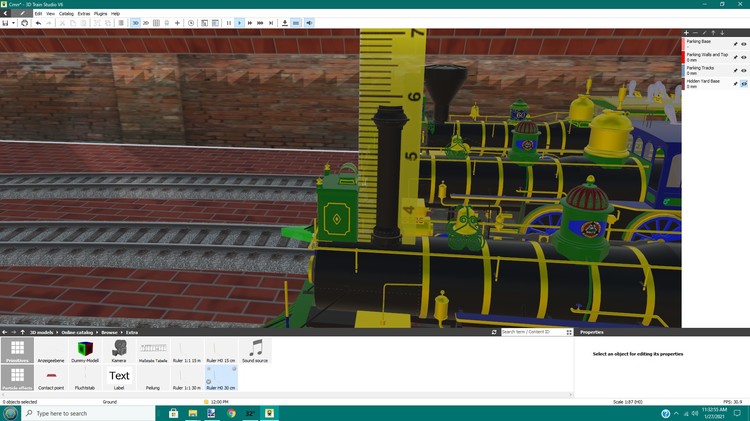
Post five in a series. / Beitrag fünf einer Serie. A story of errors, mistakes, and the correcting of same. Eine Geschichte von Irrtümern, Fehlern und deren Behebung. In proceeding with building this layout, I discovered a number of mistakes that needed to be corrected. Als ich mit dem Bau dieser Anlage fortfuhr, entdeckte ich eine Reihe von Fehlern, die korrigiert werden mussten. First, the Parking walls were the wrong height, and they were not tall enough. I had to increase their height, and make them a bit taller. This was a minor issue. Erstens hatten die Parkplatzwände die falsche Höhe, und sie waren nicht hoch genug. Ich musste ihre Höhe erhöhen und sie ein bisschen größer machen. Dies war ein kleines Problem. Second, all the walls needed to be moved towards the center a bit so that they did not project beyond the parking ceiling. I also discovered that some objects on the Parking base projected through the parking ceiling. Zweitens mussten alle Wände ein wenig zur Mitte hin verschoben werden, damit sie nicht über die Parking-Decke hinausragten. Ich entdeckte auch, dass einige Objekte auf der Parking-Basis durch die Parking-Decke ragten. Checking the height of some of the Locomotives, I discovered that the height of the smokestacks was 58.5 cm. The height of the parking ceiling was 57.15 mm. This meant that the smokestack would project through the ceiling some 1 1/3 mm. This was not good as it meant that the underside of the ceiling would cut off part of the smokestack. This was corrected by raising all of the height control points on the ceiling (Except the outer row) by 15 mm. Bei der Überprüfung der Höhe einiger Lokomotiven habe ich festgestellt, dass die Höhe der Schornsteine 58,5 cm beträgt. Die Höhe der Abstelldecke betrug 57,15 mm. Das bedeutete, dass der Schornstein etwa 1 1/3 mm durch die Decke ragen würde. Dies war nicht gut, da es bedeutete, dass die Unterseite der Decke einen Teil des Schornsteins abschneiden würde. Dies wurde korrigiert, indem alle Höhenkontrollpunkte an der Decke (außer der äußeren Reihe) um 15 mm angehoben wurden. Übersetzt mit www.DeepL.com/Translator (kostenlose Version) Moving the walls, and raising the ceiling results in something like this, where all the trains are visible from the base, and totally covered from the ceiling. We have 13 mm between the top of the smokestacks and the ceiling which makes things look much better. Wenn man die Wände verschiebt und die Decke anhebt, ergibt sich so ein Bild, bei dem alle Züge vom Boden aus sichtbar und von der Decke aus völlig verdeckt sind. Wir haben 13 mm zwischen der Spitze der Schornsteine und der Decke, was die Sache viel besser aussehen lässt. With all the mistakes corrected (except a few cameras) we can move on to programming the parking level. Since we will be using object properties in the programming, it was necessary to add all the locomotives and trains at this time. We have seven different trains here, each with a different function or usage. This layout uses a point to point operation, with different tasks. For Instance: a task might be to pickup a load of logs in one location, and transport them to a saw mill elsewhere and pickup finished lumber there and transport them to towns along the route. Nachdem alle Fehler behoben sind (bis auf ein paar Kameras), können wir mit der Programmierung der Parkebene fortfahren. Da wir bei der Programmierung Objekteigenschaften verwenden werden, war es notwendig, alle Lokomotiven und Züge zu diesem Zeitpunkt hinzuzufügen. Wir haben hier sieben verschiedene Züge, jeder mit einer anderen Funktion oder Verwendung. Diese Anlage verwendet einen Punkt-zu-Punkt-Betrieb, mit unterschiedlichen Aufgaben. Zum Beispiel könnte eine Aufgabe darin bestehen, eine Ladung Holzstämme an einem Ort abzuholen und sie zu einem Sägewerk an einem anderen Ort zu transportieren und dort fertiges Holz abzuholen und es zu Städten entlang der Strecke zu transportieren. Übersetzt mit www.DeepL.com/Translator (kostenlose Version) In conclusion for this post, when planning the height for each piece, check the actual height of rolling stock and be sure of it's actual height. I assumed that the height of Locomotives would be 50.8 mm when in fact they are 57.14 mm Abschließend zu diesem Beitrag: Prüfen Sie bei der Planung der Höhe für jedes Teil die tatsächliche Höhe des rollenden Materials und seien Sie sicher, dass es die tatsächliche Höhe hat. Ich bin davon ausgegangen, dass die Höhe der Lokomotiven 50,8 mm betragen würde, obwohl sie in Wirklichkeit 57,14 mm sind.
-
Aufbau eines mehrstufigen Layouts
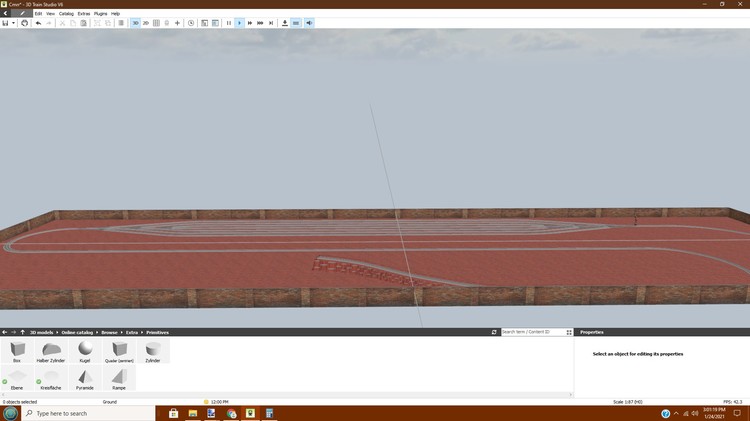
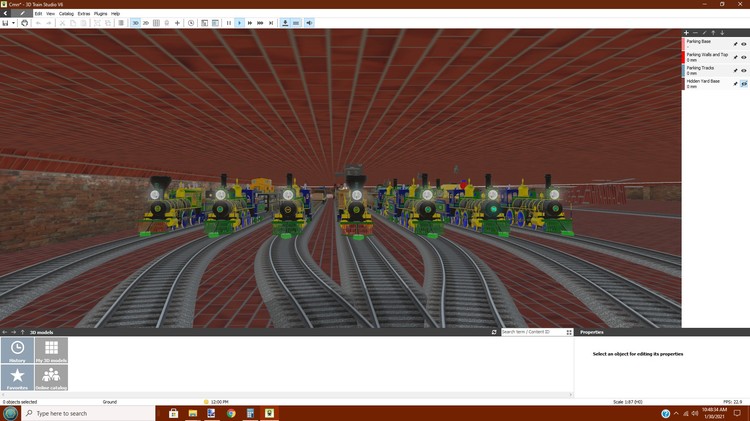
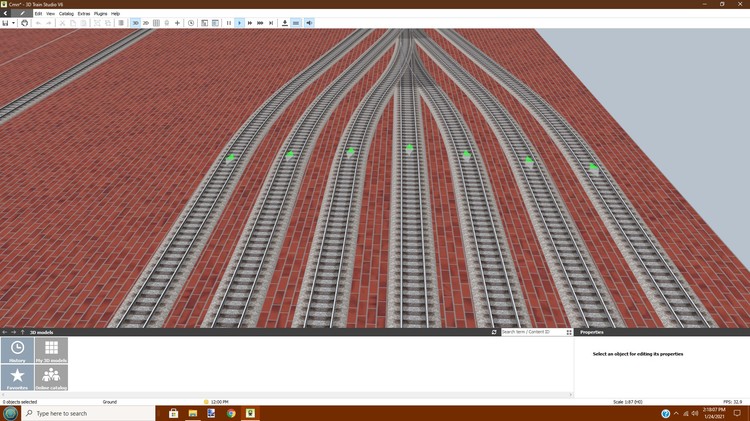
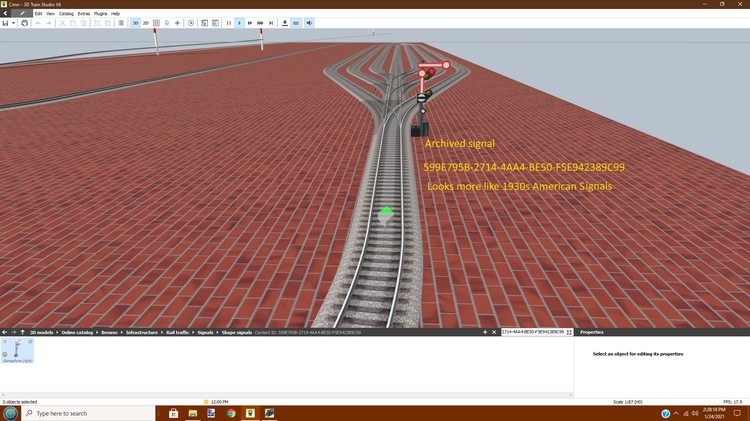
Post four in a series. / Beitrag vier in einer Serie. This post deals with placing controls on the parking level. Dieser Beitrag befasst sich mit der Platzierung von Steuerungen in der Parkebene. On the 7 tracks where the Trains stop and are parked, we placed 7 Track contacts. They are placed in a shallow inverted V, and one side of the contact is deactivated so that only the trains arriving from the bottom of the screen will stop. The Track contacts are given a keyword "Stop" so that only one event is needed for all 7 contacts. I placed this event in the Event Manager as a common event as it can be used elsewhere in the layout to stop trains elsewhere. Auf den 7 Gleisen, auf denen die Züge anhalten und abgestellt werden, haben wir 7 Gleiskontakte platziert. Sie sind in einem flachen, umgekehrten V angeordnet und eine Seite des Kontakts ist deaktiviert, damit nur die Züge, die von unten kommen, anhalten. Die Gleiskontakte werden mit dem Schlüsselwort "Stop" versehen, so dass nur ein Ereignis für alle 7 Kontakte benötigt wird. Ich habe dieses Ereignis im Ereignismanager als allgemeines Ereignis abgelegt, da es auch an anderen Stellen der Anlage verwendet werden kann, um Züge an anderer Stelle anzuhalten. Übersetzt mit www.DeepL.com/Translator (kostenlose Version) At the other end of the parking tree, I placed a single track contact and a Semaphore signal. This Signal is an Archived signal, chosen because it looks more like am American Semaphore signal. The events for this contact include changing the signal from closed to open to signal the train to proceed, a way to set the three track switches (3 way) correctly for each different train, a timer and then an instruction to change the signal back to closed. The trains do not stop here, the changes are made and the train proceeds. Am anderen Ende des Parkbaums habe ich einen eingleisigen Kontakt und ein Semaphore-Signal platziert. Dieses Signal ist ein archiviertes Signal, das ausgewählt wurde, weil es eher wie ein amerikanisches Semaphor-Signal aussieht. Die Ereignisse für diesen Kontakt beinhalten das Umschalten des Signals von geschlossen auf offen, um dem Zug die Weiterfahrt zu signalisieren, eine Möglichkeit, die drei Gleisweichen (3-Wege) für die verschiedenen Züge richtig einzustellen, einen Timer und dann eine Anweisung, das Signal wieder auf geschlossen zu stellen. Die Züge halten hier nicht an, die Änderungen werden durchgeführt und der Zug fährt weiter. on the tracks that come down from the Hidden yard, a final track contact is placed to slow the speed of the train, and to track switch to incoming. Changing the track switch ensures that the trains will be going the correct direction for parking. We also adjusted the terrain for the tracks coming from Hidden Yard. Auf den Gleisen, die vom Versteckten Rangierbahnhof herunterkommen, wird ein letzter Gleiskontakt gesetzt, um die Geschwindigkeit des Zuges zu verlangsamen und die Weiche auf Einfahrt zu stellen. Durch die Änderung der Gleisumschaltung wird sichergestellt, dass die Züge in die richtige Richtung zum Abstellen fahren. Wir haben auch das Gelände für die Gleise, die aus Hidden Yard kommen, angepasst. The Parking area is supposed to be hidden, and so walls were created from boxes (Quader) with the correct dimensions, and placed around the edges of the parking base. Da der Parkplatz verdeckt werden soll, wurden Wände aus Quadern mit den richtigen Maßen erstellt und um die Ränder der Parkbasis gelegt. Now a top panel is added to parking from a panel, the same size as the base, centered on 0,0,0 and painted to match the base. Nun wird eine obere Platte zum Parken aus einer Platte hinzugefügt, die die gleiche Größe wie die Basis hat, auf 0,0,0 zentriert und passend zur Basis bemalt ist. Here is the view inside the parking level with the top and sides in place. Hier sehen Sie die Innenansicht der Parkebene mit montiertem Dach und Seiten.
