simonjackson1964
Mitglieder
-
Benutzer seit
-
Letzter Besuch
Alle erstellten Inhalte von simonjackson1964
-
 I'm not sure if this will help, but I have lots of object variables on my cranes, that store things like, whether it is getting a container or placing a container, whether it is loading a vehicle or unloading a vehicle, the target container and the target pad/vehicle. There's a list that holds the wagons of the train that gets loaded by an iteration when the train arrives, and the wagons/trucks and the pads all have local variables that hold the containers they have on them... Mind you it's not working properly and I've not had the energy to look at it for the past few days. I'm pretty sure I know why it's not working, I'm just not sure how to fix it. For some reason the crane will occasionally pick up an empty pad and put it on the back of a truck!
 -
I've got it working in both directions at one end, but not at the same time - or rather, I'm still figuring out how to make the change over from taking containers off the stacks and putting them on trucks, to a train arriving and the containers being taken off the wagons and put on the stacks, go smoothly. Getting the cranes to load the train at the other end is just a matter of changing the targets on the events that put them on the lorries - that and duplicating the events that handle the train arriving....
-
Thanks, but technically it wasn't my knowledge originally... I think it was Goetz who suggested using a user-defined event. I'd never done that before. Now I use them all over the place!
-
Hi Hotwheels Actually, my solution was much simpler. Each cargo pad/container floor on the ground has a list of three Object elements, and an index (called "Stack Height"). When the crane references the Container floor, it checks the stack height. If the height is 0, then the container floor becomes the target. If the height is greater than zero then the object in the list referenced by the stack height becomes the target. Obviously, the stack height is then incremented and the object ID of the new container placed in the next object in the list. If the stack height is three, the next container floor is used instead. Each of the three cranes had ten container floors to choose from and the floor is chosen using a random number. I'm still working on the reverse procedure...
-
This is why I never got a job doing data entry... I just had to check the content of the container stack lists, because one of the cranes was getting suck. Also why I'm not ready to upload it yet, even as a work in progress. Sorry Hubert. I think I fixed it, but it was a palava. And I've only done the bit that unloads the trains. I still have to do the bit to load the lorries, and then both bits in reverse at the other end. @Goetz and @Herman Thanks for the suggestions. I think I'll have a look at both layouts when I have mine to a point where I'm happy with it, unless I get totally stuck. On a separate but related note I discovered that when using a separate event to decouple the loco and start it's run-around, from the event that uses an iteration to load the cargo of the train into the crane's target list, it is unwise to decouple the loco as soon as it arrives...! I've currently got a 10s delay on the decouple, but hoping to decrease that. Strictly speaking a 1-second delay should be fine, that should be more than enough time for the other event to parse 12 times around the loop... Maybe give it 2 to be safe?
-
I meant referencing the object.... Putting the object reference (or ID) into the object item on the object that stores it. Actually I've managed to solve the problem, but it's fiddly, and I'm still trying to make it work all the time in the same way...
-
Hi Herman Thanks, I think that the solution I have in mind is probably the way I need to do this. It's just the thought of storing all those container IDs is killing me... My own fault for wanting the stacks to look realistic... So far I have "finished" one layout, that is, I got it working the way I wanted and published it... maybe I will eventually "finish" another. Cheers Simon PS: I just thought. If I delete all the containers at the "unload end", get the unload events working, and then manually load the trains at the other end I can build the stacks automatically! *Is sneaky*
-
Adding the following: The above solution might work when stacking the containers, but when it comes to taking them off the stack, it definitely won't, because I won't have a reference to the container underneath. The only solution I can see is to store the IDs of the containers against the container floor, and somehow get that information into the crane. It ought to be possible, but I'm going to have to seriously think about it. Any suggestions that will make it easier would be appreciated!
-
I am probably trying to be too clever, but there must be a way of doing this... What I want to happen: My freight train pulls into the depot, and the cranes get to work unloading the containers, stacking them neatly alongside the roadway where a stream of trucks arrive one after the other and as soon as the train is unloaded the containers are loaded onto the trucks, and off they go, to the other end of the layout where the reverse happens. What actually happens - The story so far: The trucks are just pootling backwards and forwards at the moment because I haven't got to them yet, I want to get the bit that unloads the train working first... So the train arrives in the depot, and the three cranes get to work. I couldn't find a decent container crane that would do the whole of a twelve wagon freight train, so I have three cranes that handle four wagons each. So far, cranes 2 and three successfully pick up the first container on their bit of the train. Crane 1 goes a bit further. after picking up the container it selects one of ten "container floors", and places the container there. But herein lies the problem: If the floor already has one or two containers on it, the crane is supposed to stack the containers. It does so when I operate it manually. But when the event is triggered by the arrival of the train, the crane neatly drops the container inside the one already there! I know why it is doing it, I'm just wondering if there is a better solution than the one I have in mind. ================== When the train arrives it loads the object references of four containers into a list on each crane. The crane so far only gets the first one but it should be easy enough to get the other three. There is a pre-loaded list of ten tables in Crane 1, each table holds the object ID of the crane floor, and the number of containers already on that floor. If the number is 3, the floor won't be selected. So when the crane has finished lifting a container it generates a random index to find which floor to put the container on. What I think I might have to do is add a third item to the table to hold the ID of the floor, and put the id of the topmost container or the floor if empty into the "target" field. Is there something I'm missing, or have I just got to bite the bullet and code that?
-
Yeah.... Everything else works. But that darn "Flexible Rope" is impossible. This is fine if your cable car runs horizontally in a straight line, and even causes few problems if the cables are angled, but run in a straight line between pylons - which kinda defeats the object? But the moment you click that green arrowhead to try and pull the cable into a curve, the darned thing twists. And I've not got the cable running at a funny angle, it's straight up and down the x-axis. Getting it to untwist is next to impossible I've found. (Actually this is similar to what happened with the catenary wires from V5 to V6, only where the catenary insisted on curving unrealistically along the track, the cable car cables insist on travelling in unrealistically straight lines I keep trying and I keep getting more and more frustrated. I'm assuming that the creator of these objects tested them? If so, how did he get them to do what he wanted? Because I can't!
-
Korrektur: Wie oben beschrieben, "driftet" das Auto nach oben oder unten, wenn sich der Winkel des Kabels ändert, da sich der Winkel von Kamera 1 ändert und Kamera 2 Kamera 1 verfolgt, wobei sich der Verfolgungspunkt irgendwo im Körper der Kamera befindet und nicht das Objektiv, in dem sich das Widget befindet. Ich habe versucht, die Kameras umzukehren, wobei Kamera 2 auf die Klemmen und Kamera 1 auf Kamera 2 fokussiert war, wodurch die Drift behoben wurde, aber als sie auf das horizontale Kabel traf, explodierte sie irgendwie! Ich habe versucht, eine Lösung zu finden ... Das einzige, was ich sehen kann, ist, ein zweites Auto in einem Winkel von 90 ° zum ersten zu haben, unsichtbar zu machen und die Sichtbarkeit beider Autos beim Betreten / Verlassen der horizontalen Spur umzuschalten . Welches ist, was ich ursprünglich erfunden hatte. Natürlich funktioniert es beim Setup "Ein Auto in jede Richtung" einwandfrei, da dadurch die Autos nicht um das Lenkrad geschleudert werden.
-
Correction: As described above, as the angle of the cable changes, so the car "drifts" up or down, because Camera 1's angle is changing, and camera 2 is tracking camera 1, the tracking point being somewhere in the body of the camera rather than the lens where the widget is. I tried reversing the cameras, having Camera 2 focussed on the clamps and camera 1 focused on camera 2. that fixed the drift but when it hit the horizontal cable it sort-of exploded! I have tried to think of a solution... The only thing I can see that will work is having a second car at 90° to the first one, set invisible, and toggle the visibility of both cars when entering/leaving the horizontal track. Which is what I had originally come up with. Of course on the "One car in each direction" set up, it works fine, because that doesn't send the cars around the wheel.
-
Seems I owe you an apology! Once I read through what you told Dad3353 a second time, while actually doing it on the layout, I realised exactly what you were saying and how it works. So, sorry, and thanks! Now I just need to get the cable to behave itself and do what I tell it instead of what it thinks I should be telling it! I just tried a little experiment. Camera 1: aligned with the cable, focussed on the "drive" cable clamps, linked to and tracking the cable clamps. Camera 2: aligned at right-angle to the cable, focused on, linked to and tracking Camera 1. Car/seat: attached to the clamps via the attachment pint, linked to camera 2. This has the very satisfying effect of keeping the car from flying out horizontally when it hits a length of horizontal cable! Maybe I can get this thing to work after all, without spending another three evenings on it! Cheers Simon ================================================ Scheint, ich schulde dir eine Entschuldigung! Nachdem ich ein zweites Mal gelesen hatte, was Sie Dad3353 gesagt hatten, während ich es tatsächlich im Layout tat, wurde mir genau klar, was Sie sagten und wie es funktioniert. Also, sorry und danke! Jetzt muss ich nur noch das Kabel dazu bringen, sich selbst zu verhalten und das zu tun, was ich sage, anstatt das zu tun, was ich denke, dass ich es sagen sollte! Ich habe gerade ein kleines Experiment versucht. Kamera 1: Ausgerichtet auf das Kabel, fokussiert auf die "Laufwerks" -Kabelklemmen, verbunden mit den Kabelklemmen und deren Verfolgung. Kamera 2: rechtwinklig zum Kabel ausgerichtet, fokussiert auf Kamera 1, mit dieser verbunden und verfolgt. Auto / Sitz: Wird über das mit Kamera 2 verbundene Befestigungspint an den Klemmen befestigt. Dies hat den sehr befriedigenden Effekt, dass das Auto nicht horizontal herausfliegt, wenn es auf ein horizontales Kabel trifft! Vielleicht kann ich das Ding doch zum Laufen bringen, ohne noch drei Abende damit zu verbringen! Prost Simon
-
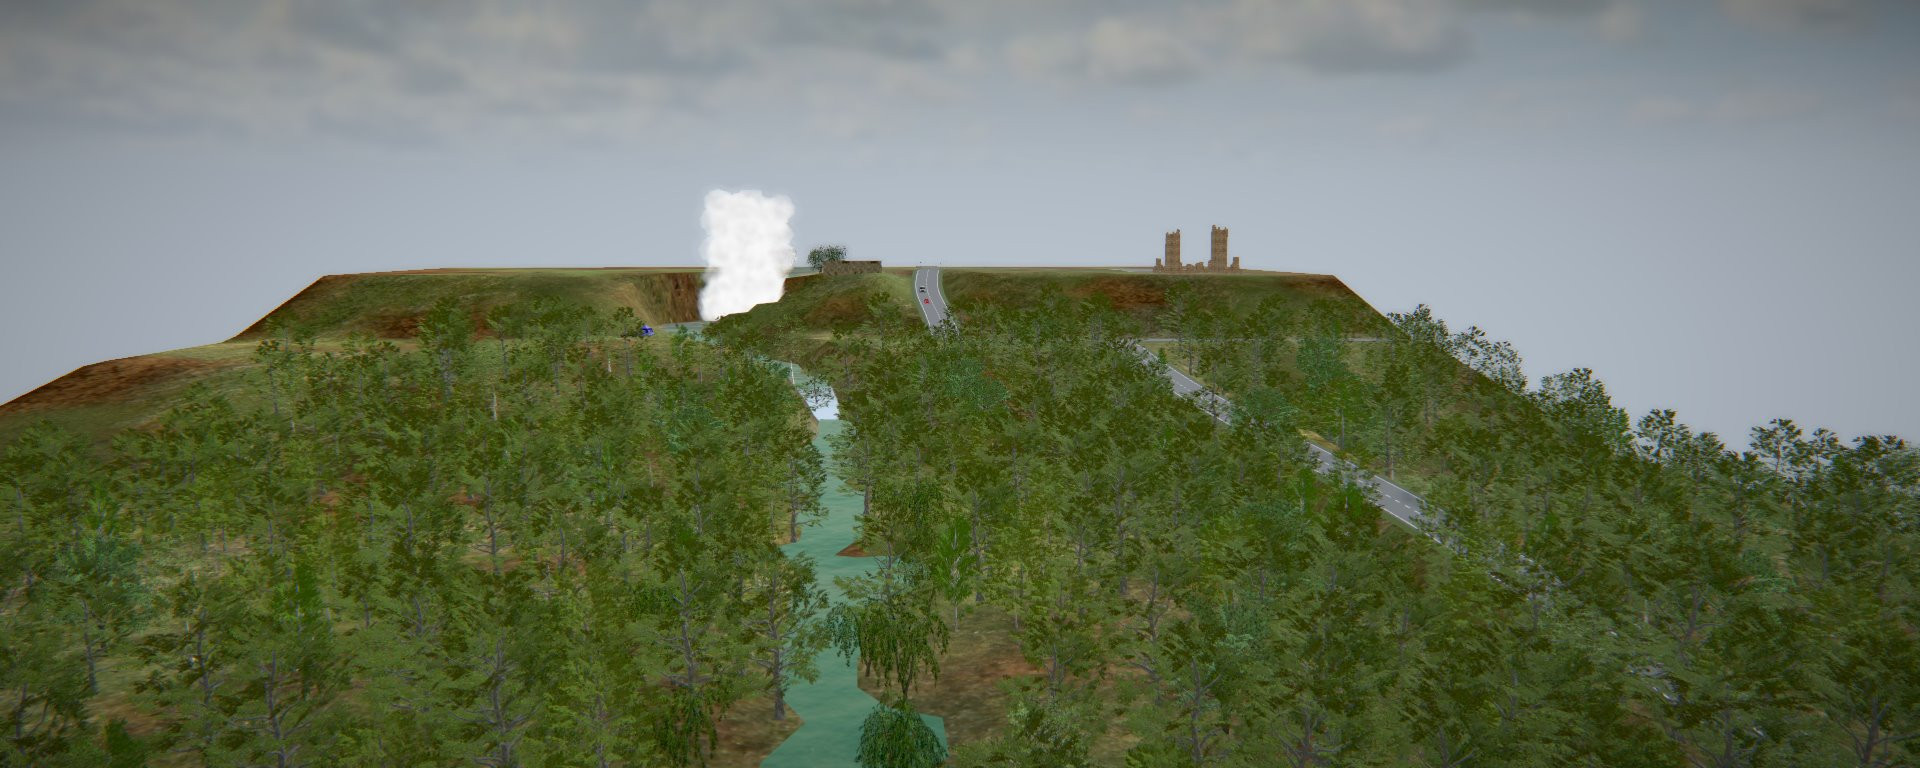
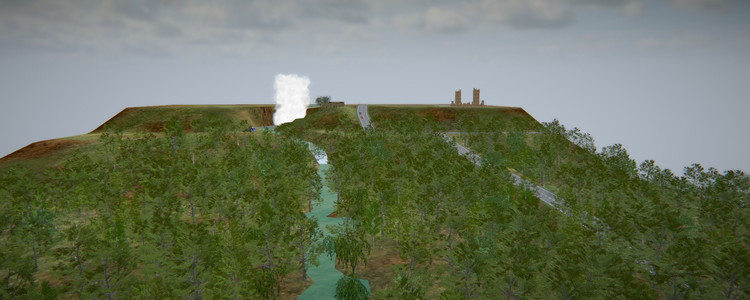
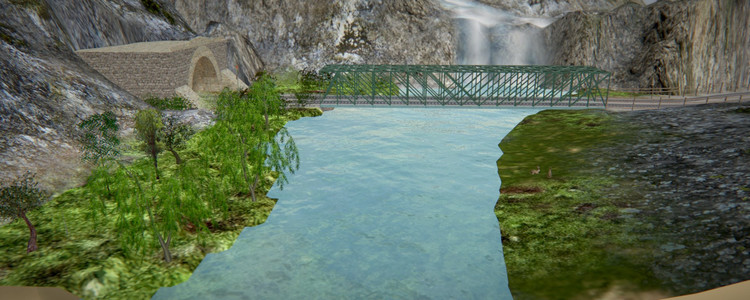
Really? That's interesting, I didn't realise you could do that. I'll have a go. Doesn't solve all the other problems though, like how to make that so-called "flexible rope" go where I want it to go! Oh, don't get me wrong, I enjoy a challenge as much as the next guy. But having faced and solved several different challenges and spent three entire evenings fiddling about trying to get it to behave, only to have each solved problem bring up another brand new one, I finally ran out of patience and reverted back to a previous save. Instead I spent Saturday afternoon/evening finishing the cascade waterfall that is descending from on high to the plane below, putting a monastery on a different mountain, and running the river that is fed by the falls out to the front of the baseboard. Managed to find a bridge that let me run the river under the five railway tracks there! And I had the foresite to put "ground level" 100mm up so I could drop the river underneath! Then put a rowing boat going up and down the river, managed to position the virtual track so their was no water in the boat at any time, but the boar wasn't hovering above the water (at least not noticeably). So, yes, I'm happy to solve problems I've caused (like putting a Y junction into a virtual track but forgetting to add the switch settings), but problems that are caused by the model itself are someone else's to solve...!
-
The problem with that is that it restricts the operator to only viewing the chairlift from one camera. I think my preferred option is not to include the chairlift after all. It's too much like hard work for something that is supposed to be fun.
-
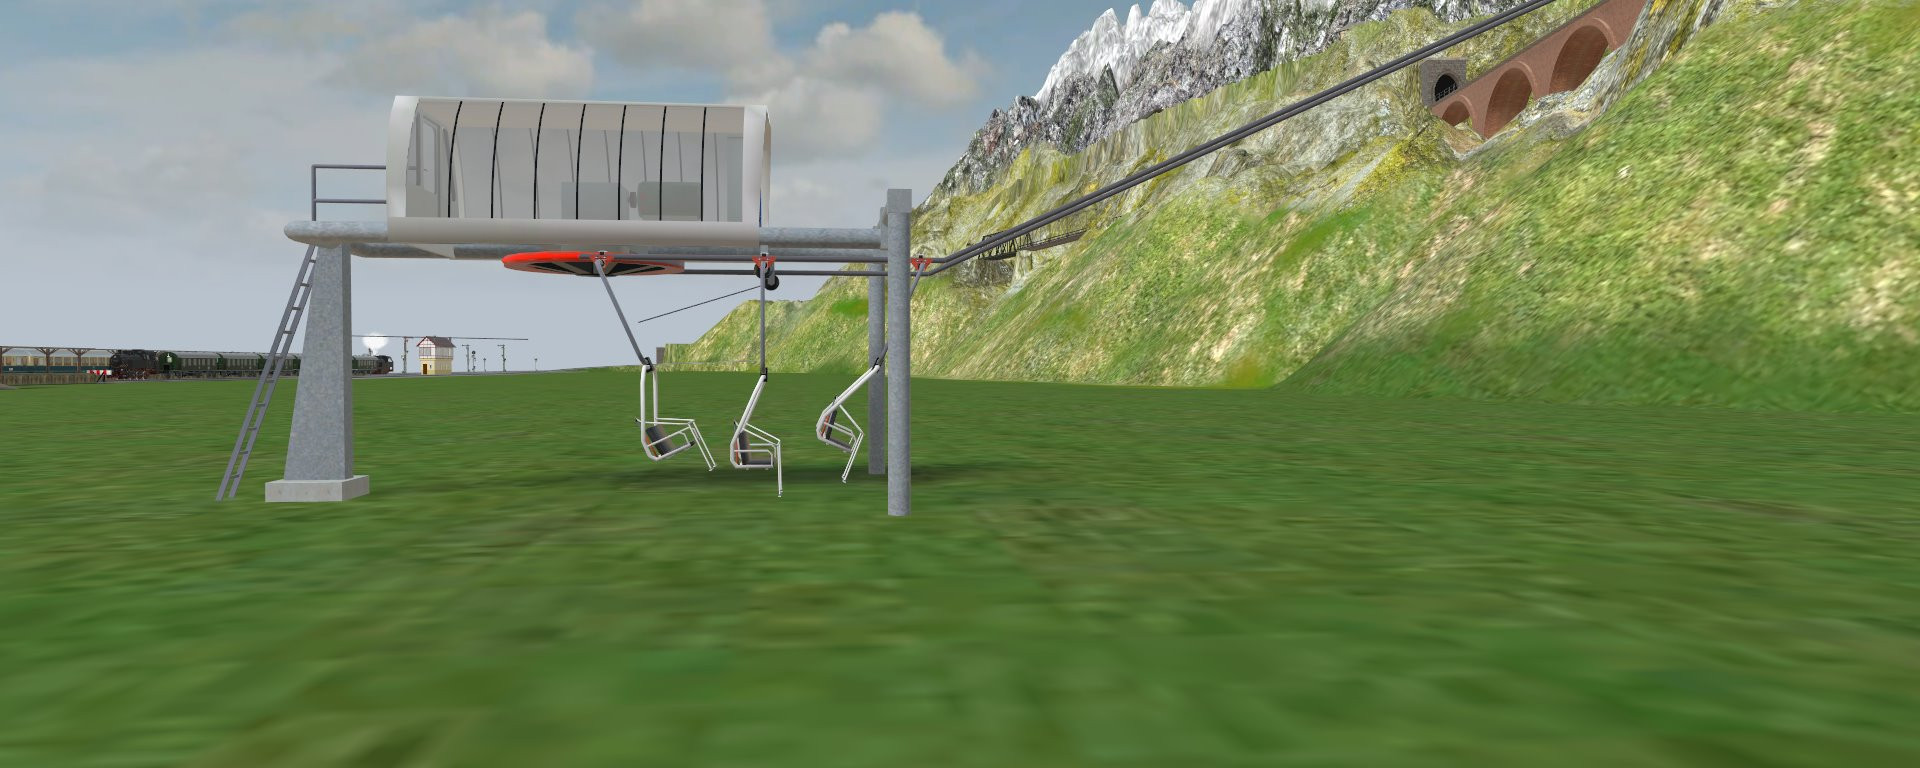
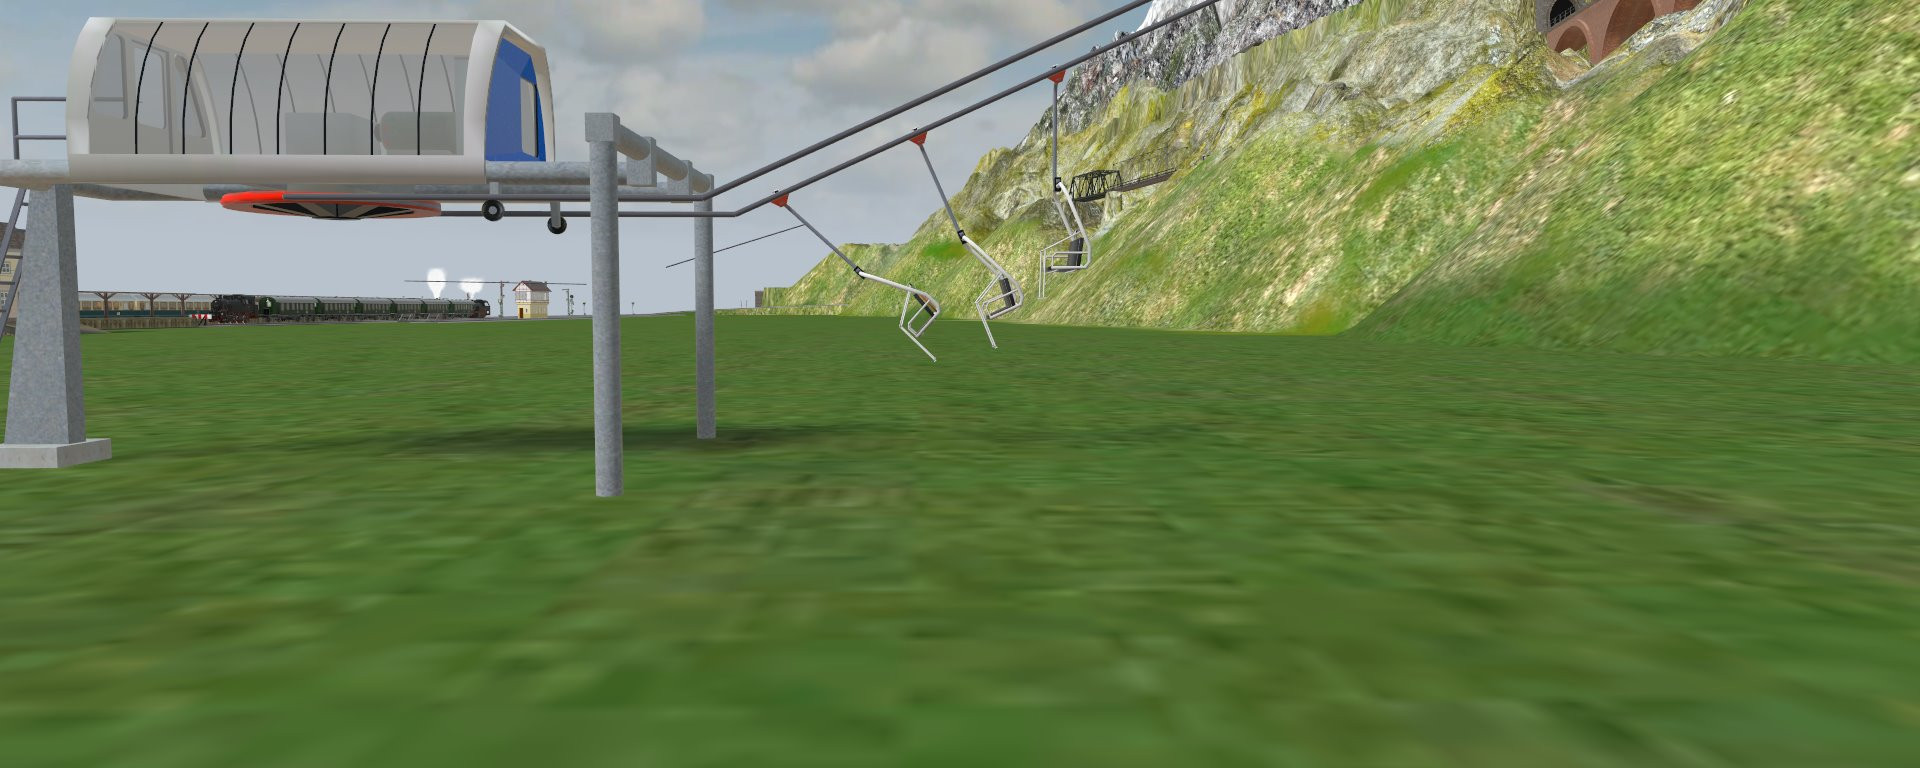
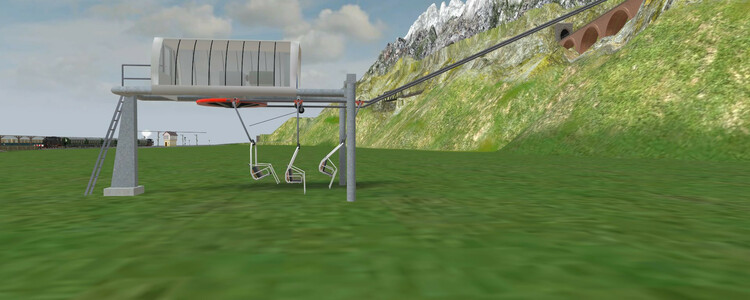
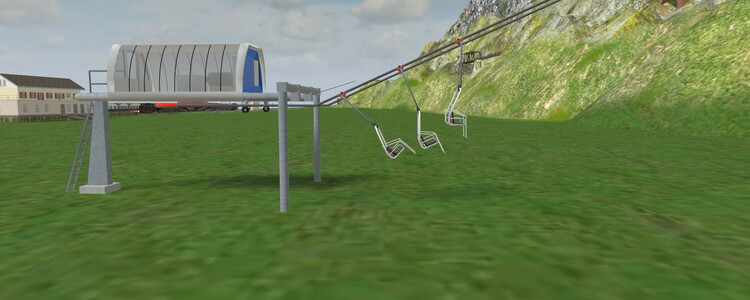
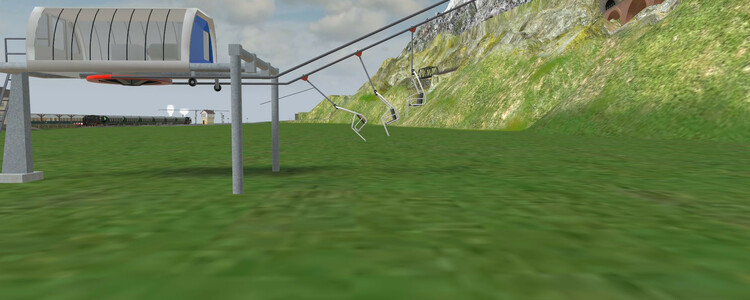
I'm trying to put a cable car and/or a chair lift on a mountainous layout, because I think it would look cool, and also give a reason for the railway to go half way up the side of a mountain and stop! (Ski sloaps will probably follow. But there are many problems associated with the cable car / chair lift set centred on item 576399B5-366A-4C43-BD67-3A21B25C087D Circulating cable and Chairlift stations. To start with, the "cable" that is a fixed part of the station is not a track, it's just a static part of the model. To make the cars go into the station, it is necessary to put an actual track (the "flexible string" that is part of the set works nicely) into the correct place on the station, one on each side. Easy enough with the chair lift as the fake cable is there as a guide but really difficult with the cable car station. Then there is the problem of the U bend around the wheel. The so-called "Flexible String" is about as flexible as a steel girder. I have found using two lengths of virtual track, setting the radius to 9.4mm and the angle to 90° then joining them together will create a suitable loop. But why could this not be incorporated into the model to begin with? On the subject of the cable and the motors, "The normal variations are for use with vertically aligned track..." Right? Turn the track through -90° in the y plane and the car hangs vertically when suspended from a "normal" motor, but when it hits the wheel at the end, because this is using a normally aligned track to negotiate the 180° bend, the car flies out horizontally as though under centrifugal force. Obviously this can be overcome by flipping the car's visibility off and replacing it with one on a "horizontal" motor, but that involves faffing about to line them up, and a special event to handle the change over. The easiest solution is to ignore the instructions regarding sagging cables (I wasn't able to sag a cable anyway) and just use the track normally. But never mind sagging, just having the cable go up a mountain creates another problem: The chair in the centre is hanging vertically. in the horizontal station. The one to the right will hang vertically on the way up, and the one at the rear will be vertical on the way down. When they start going up... And on the way back down... Let's hope the safety harness holds on that front chair, hmm? Again this could be handled by toggling visibility, but why isn't there an animation that can be used to rotate the car to keep it vertical? That would be far more sensible than to have three different cars on the one motor - six if your cable is oriented vertically! I'm also having issues with the things that sit on the ends of the mast T attachment - I suppose if I was using vertical cable I would be able to bend it to shape? Tried that and the cable snapped to the locking point and put itself the right way up! But my biggest issue is, shouldn't the rollers be under the cable? The drive wheel in the station rotates anti-clockwise, meaning the cars will travel on the right. But the rollers on the mast attachments also rotate anti-clockwise by default meaning that the tops are going the wrong way. Sure, reverse the animation and they go the right way, but this is something that should be fixed. Never mind the fact that the two wheel attachment seems to want to embed itself in the middle of the pylon, rather than attach to the end. Bit of a rant there, sorry. But I am getting very frustrated with this whole thing. Any obvious solutions I've missed? Any offers to fix the models? Greatly appreciated. Cheers Simon Ich versuche, eine Seilbahn und / oder einen Sessellift auf eine bergige Anlage zu stellen, weil ich denke, dass es cool aussehen würde, und auch einen Grund für die Eisenbahn anzugeben, auf halber Höhe eines Berges zu fahren und anzuhalten! (Skipisten werden wahrscheinlich folgen. Es gibt jedoch viele Probleme im Zusammenhang mit dem Seilbahn- / Sesselliftsatz, der auf Artikel 576399B5-366A-4C43-BD67-3A21B25C087D umlaufende Kabel- und Sesselliftstationen zentriert ist. Zunächst ist das "Kabel", das ein fester Bestandteil der Station ist, keine Spur, sondern nur ein statischer Teil des Modells. Damit die Autos in die Station einfahren können, muss eine tatsächliche Spur (die "flexible Schnur", die Teil des Sets ist, funktioniert gut) an der richtigen Stelle auf der Station platziert werden, eine auf jeder Seite. Einfach genug mit dem Sessellift, da das gefälschte Kabel als Leitfaden dient, aber sehr schwierig mit der Seilbahnstation. Dann gibt es das Problem der Übung am Lenkrad. Die sogenannte "flexible Saite" ist etwa so flexibel wie ein Stahlträger. Ich habe festgestellt, dass die Verwendung von zwei virtuellen Spurlängen, wenn der Radius auf 9,4 mm und der Winkel auf 90 ° eingestellt und dann zusammengefügt werden, eine geeignete Schleife ergibt. Aber warum konnte dies nicht zunächst in das Modell aufgenommen werden? Zum Thema Kabel und Motoren: "Die normalen Variationen gelten für vertikal ausgerichtete Schienen ..." Richtig? Drehen Sie die Spur in der y-Ebene um -90 ° und das Auto hängt vertikal, wenn es an einem "normalen" Motor aufgehängt ist, aber wenn es am Ende auf das Rad trifft, da dies eine normal ausgerichtete Spur verwendet, um die 180 ° -Biegung zu überwinden. Das Auto fliegt horizontal wie unter Fliehkraft. Offensichtlich kann dies überwunden werden, indem die Sicht des Autos ausgeschaltet und durch einen an einem "horizontalen" Motor ersetzt wird. Dazu gehört jedoch, dass man sich in einer Reihe befindet, um sie auszurichten, und ein besonderes Ereignis, um die Umstellung zu bewältigen. Die einfachste Lösung besteht darin, die Anweisungen zum Durchhängen von Kabeln zu ignorieren (ich konnte ohnehin kein Kabel durchhängen) und die Schiene einfach normal zu verwenden. Aber es macht nichts aus, wenn das Kabel einen Berg hinaufführt, entsteht ein weiteres Problem: Der Stuhl in der Mitte hängt senkrecht. in der horizontalen Station. Der rechte hängt vertikal auf dem Weg nach oben und der hintere senkrecht auf dem Weg nach unten. Wenn sie anfangen zu steigen ... Und auf dem Rückweg ... Hoffen wir, dass der Sicherheitsgurt an diesem Vordersitz hält, hmm? Auch dies könnte durch Umschalten der Sichtbarkeit behoben werden. Warum gibt es jedoch keine Animation, mit der das Auto gedreht werden kann, um es vertikal zu halten? Das wäre weitaus empfindlicher, als drei verschiedene Autos an einem Motor zu haben - sechs, wenn Ihr Kabel vertikal ausgerichtet ist! Ich habe auch Probleme mit den Dingen, die an den Enden des Mast-T-Aufsatzes sitzen - ich nehme an, wenn ich ein vertikales Kabel verwenden würde, könnte ich es biegen, um es zu formen? Versuchte das und das Kabel schnappte zum Verriegelungspunkt und stellte sich richtig auf! Aber mein größtes Problem ist, sollten sich die Rollen nicht unter dem Kabel befinden? Das Antriebsrad in der Station dreht sich gegen den Uhrzeigersinn, was bedeutet, dass die Autos rechts fahren. Die Rollen an den Mastbefestigungen drehen sich jedoch standardmäßig auch gegen den Uhrzeigersinn, was bedeutet, dass die Oberseiten in die falsche Richtung weisen. Sicher, kehren Sie die Animation um und sie gehen den richtigen Weg, aber dies sollte behoben werden. Es ist egal, dass sich der Zweiradaufsatz in die Mitte des Pylons einbetten möchte, anstatt am Ende zu befestigen. Es ist ein bisschen scherzhaft, sorry. Aber ich bin sehr frustriert über diese ganze Sache. Irgendwelche offensichtlichen Lösungen, die ich verpasst habe? Irgendwelche Angebote, um die Modelle zu reparieren? Sehr geschätzt. Prost Simon Alle Übersetzungsfehler sind die Schuld von Google Translate!
-
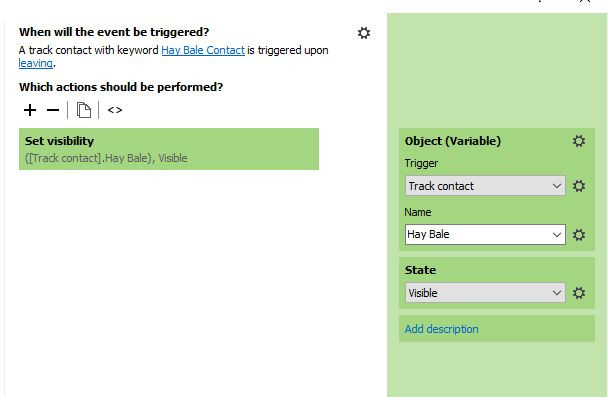
The answer to this is to use a keyword on the track contact, say "Hay bale Contact", and an object variable called (say) "Hay bale" also on the contact which contains the object id of the bale you want to appear. This can be set by simply clicking on the bale when you create the object variable. Select both the contact and the bale, copy and paste both, and this will automatically populate the new track contact's variable with the corresponding new bale. Your event then looks like this: I use "Upon Leaving" because that lets you put the bale on top of the contact that triggers it. If you ise "Toggle" on the visibility state, you can use the same event for both vehicles, as long as the visibility is correct to begin with, and a separate event on the following vehicle will make the bale appear in the wagon. (not sure about this one, but with the above as a starting point, I expect you can work something out?)
-
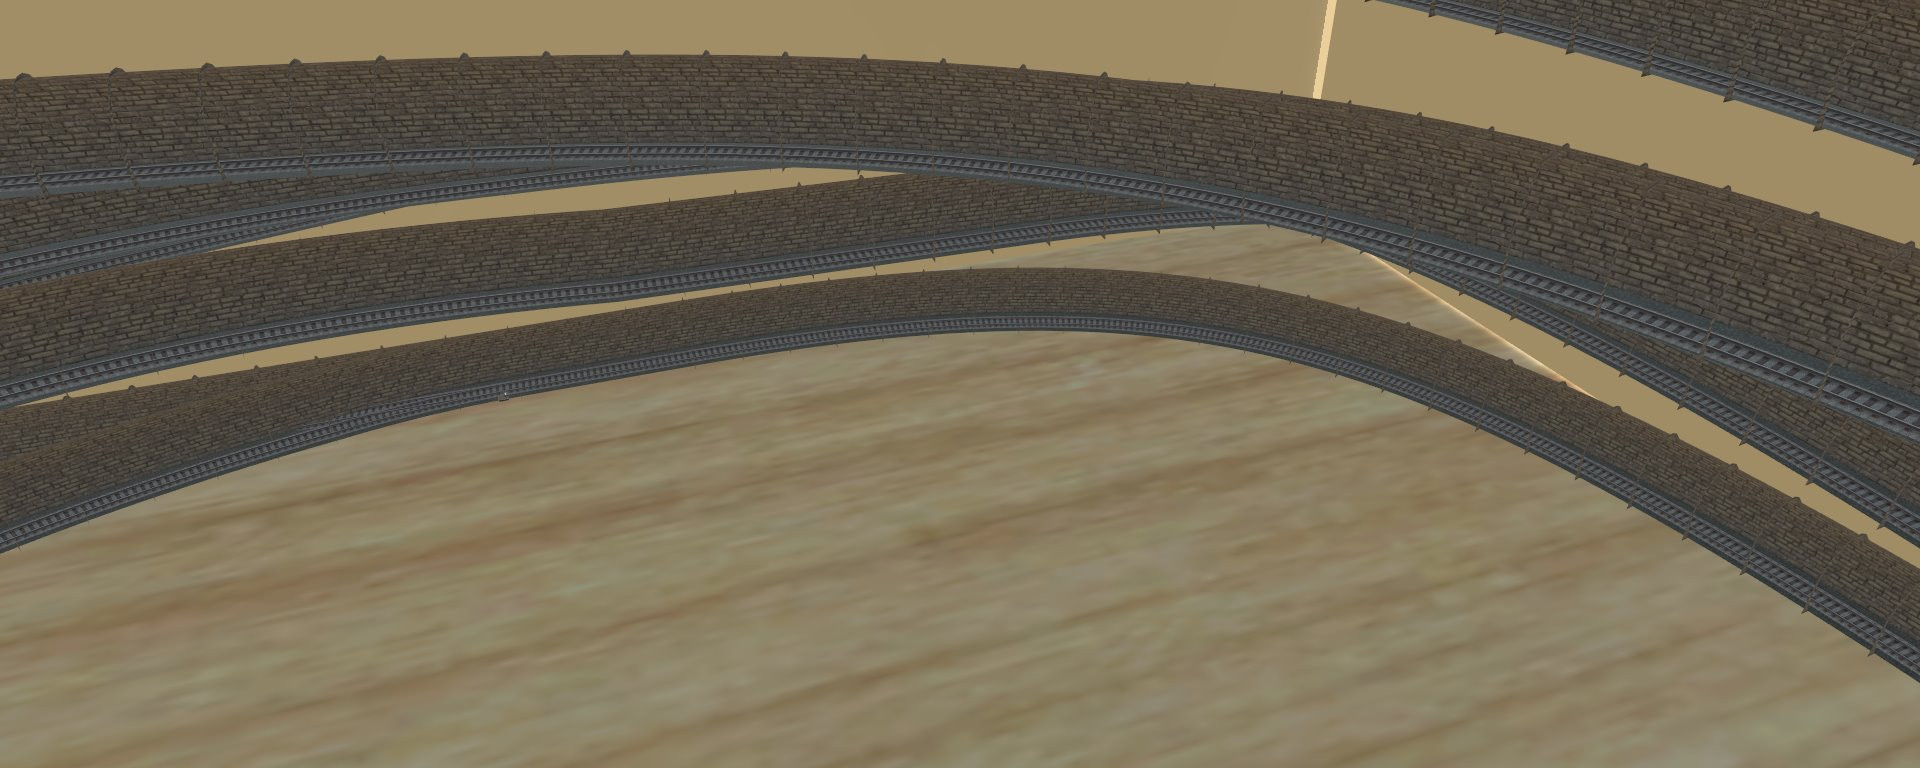
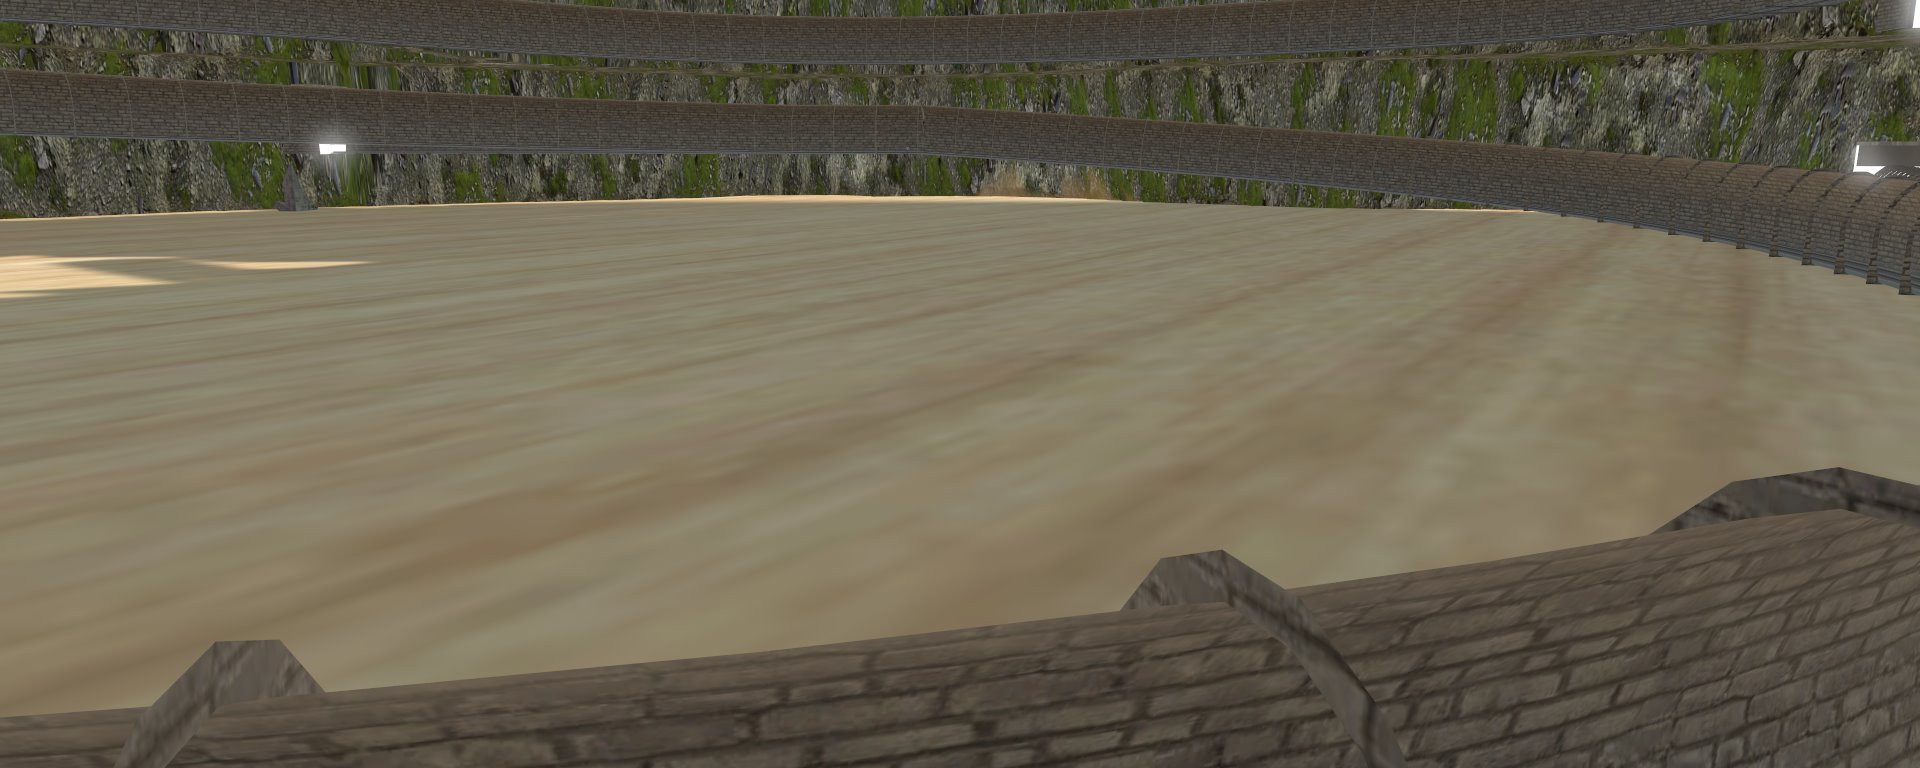
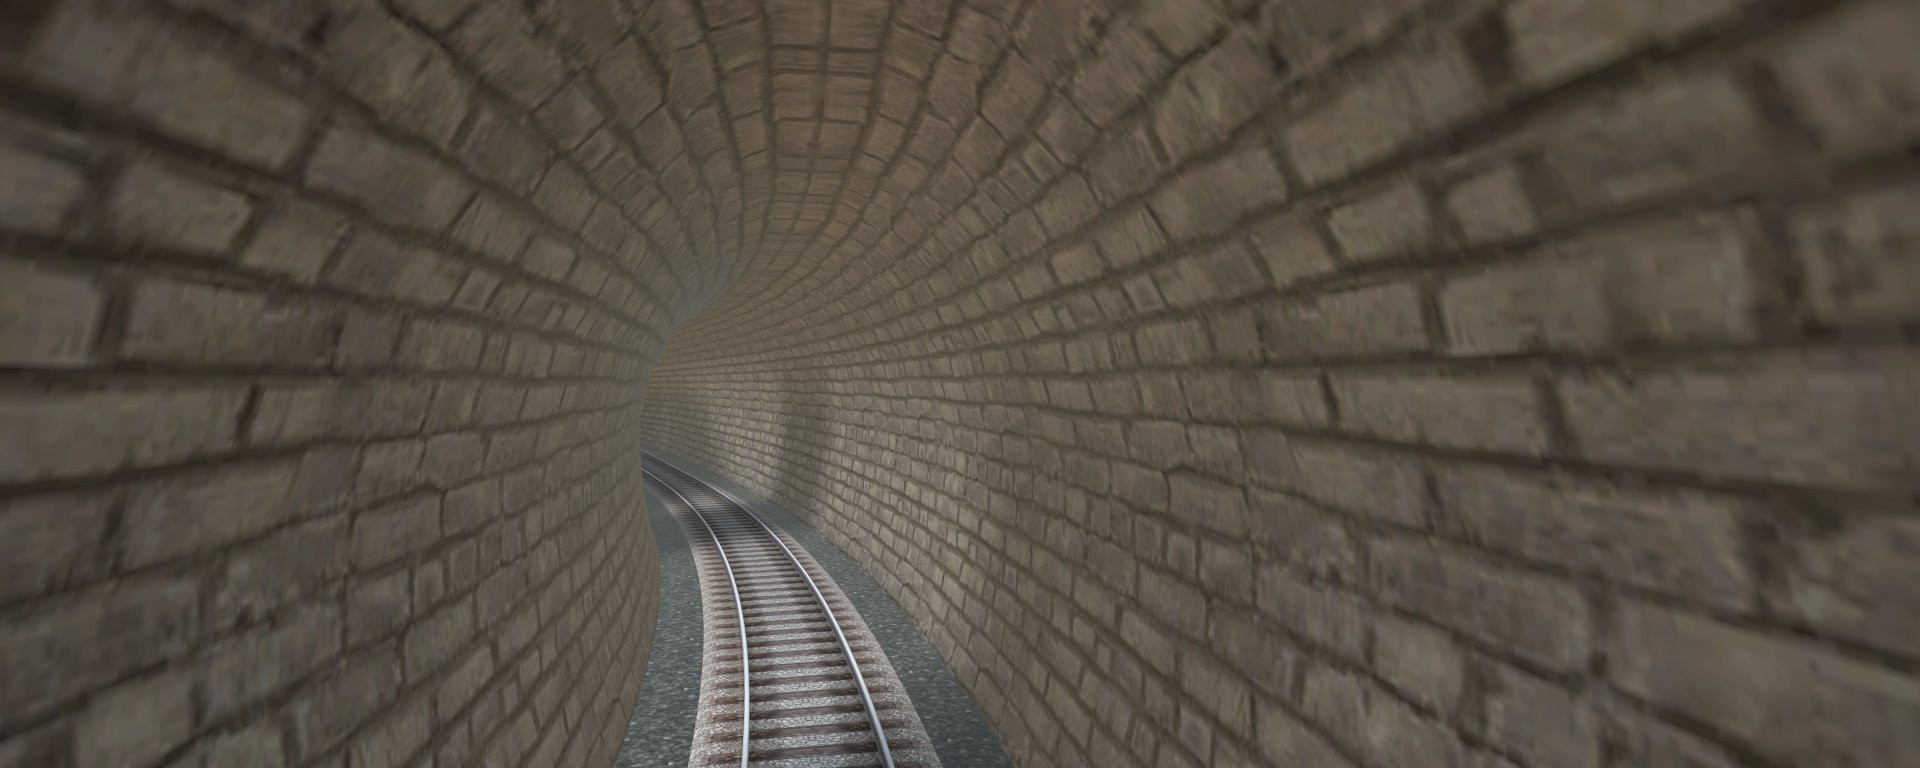
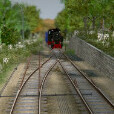
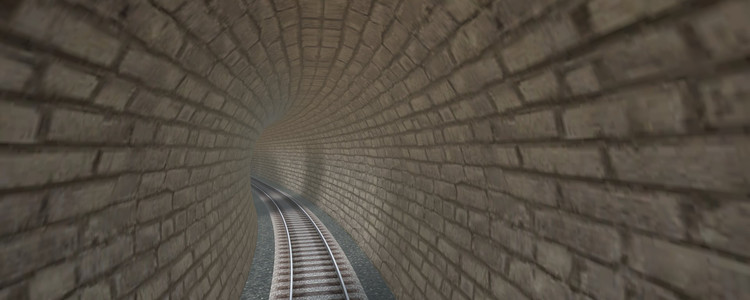
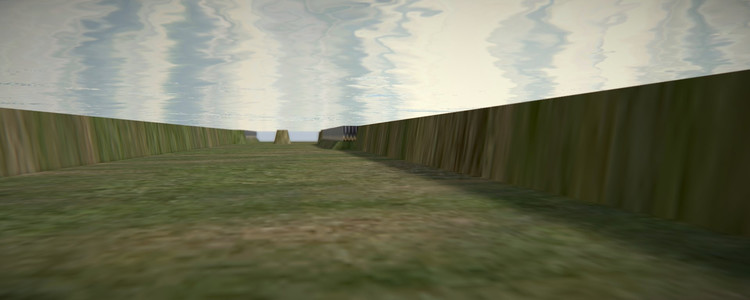
Hi Curt Well, I'd be lying if I said there were no gaps, but there are no deliberate gaps. The tunnel in the screen shot is all one long section, and you can clearly see the wall of the tunnel where the light is coming through. The only gaps are where the gradient changes in the tunnel. @BahnLand Definitely inside the mountain. The one at the bottom is the one in the previous shot . That's it in the foreground Move the view a fraction and the sunlight vanishes! Move a bit more, and it's as if someone cut the side off the mountain!


-
We all know about "The light at the end of the tunnel", (and how the more cynical among us always assume it's the headlight of the train coming the other way!) And in fact that's pretty easy to model... But I seem to have a different problem: It seems the Sun is powerful enough to penetrate the side of the mountain and the wall of the tunnel... The tunnel is solid. What's more, it seems the light is only visible from some angles! I did try capturing a video that shows the patch of light closest suddenly appear as if something has moved out of the way, but I am unable to link it to the post. I know the tunnel walls are single sided and invisible from outside, but that doesn't explain how the light is penetrating the solid ground. I'd also like to know if anyone has a solution, and / or a way of making the tunnels darker, without setting the time to midnight! Wir alle kennen "Das Licht am Ende des Tunnels" (und wie zynisch unter uns immer angenommen wird, dass es der Scheinwerfer des Zuges ist, der in die andere Richtung fährt!) Und tatsächlich ist das ziemlich einfach zu modellieren ... Aber ich habe anscheinend ein anderes Problem: Es scheint, dass die Sonne stark genug ist, um die Seite des Berges und die Wand des Tunnels zu durchdringen ... Der Tunnel ist fest. Außerdem scheint das Licht nur aus einigen Winkeln sichtbar zu sein! Ich habe versucht, ein Video aufzunehmen, das zeigt, dass der am nächsten liegende Lichtfleck plötzlich so aussieht, als wäre etwas aus dem Weg geräumt, aber ich kann ihn nicht mit dem Beitrag verknüpfen. Ich weiß, dass die Tunnelwände einseitig und von außen unsichtbar sind, aber das erklärt nicht, wie das Licht den festen Boden durchdringt. Ich würde auch gerne wissen, ob jemand eine Lösung und / oder eine Möglichkeit hat, die Tunnel dunkler zu machen, ohne die Zeit auf Mitternacht einzustellen! (Google Translate werden alle schlechten Übersetzungen gutgeschrieben!)
-
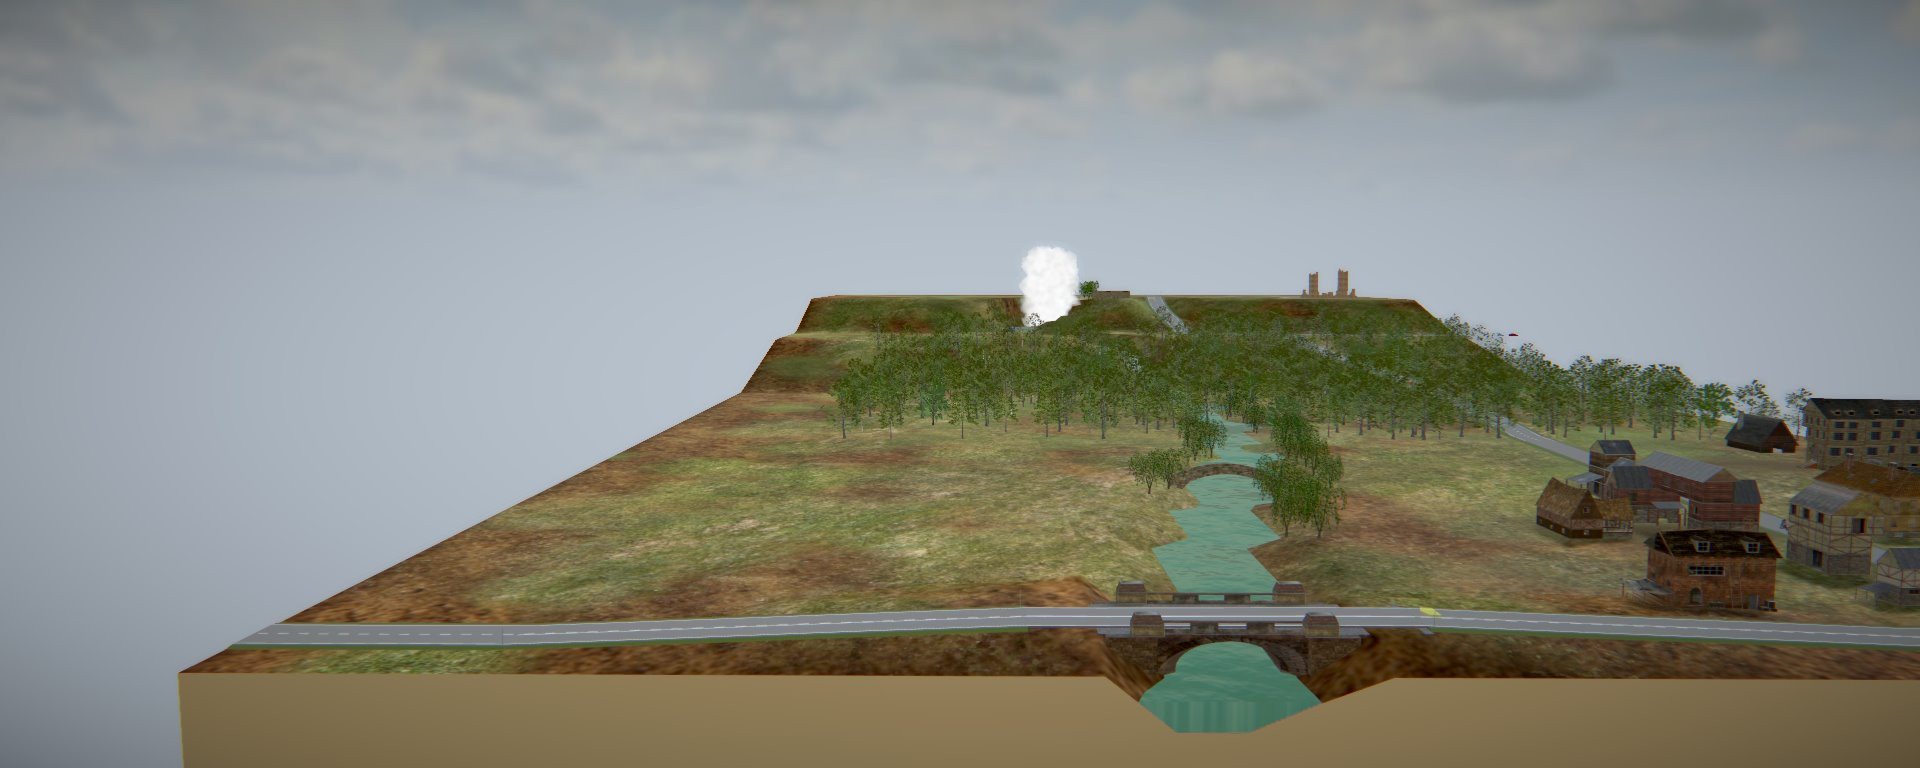
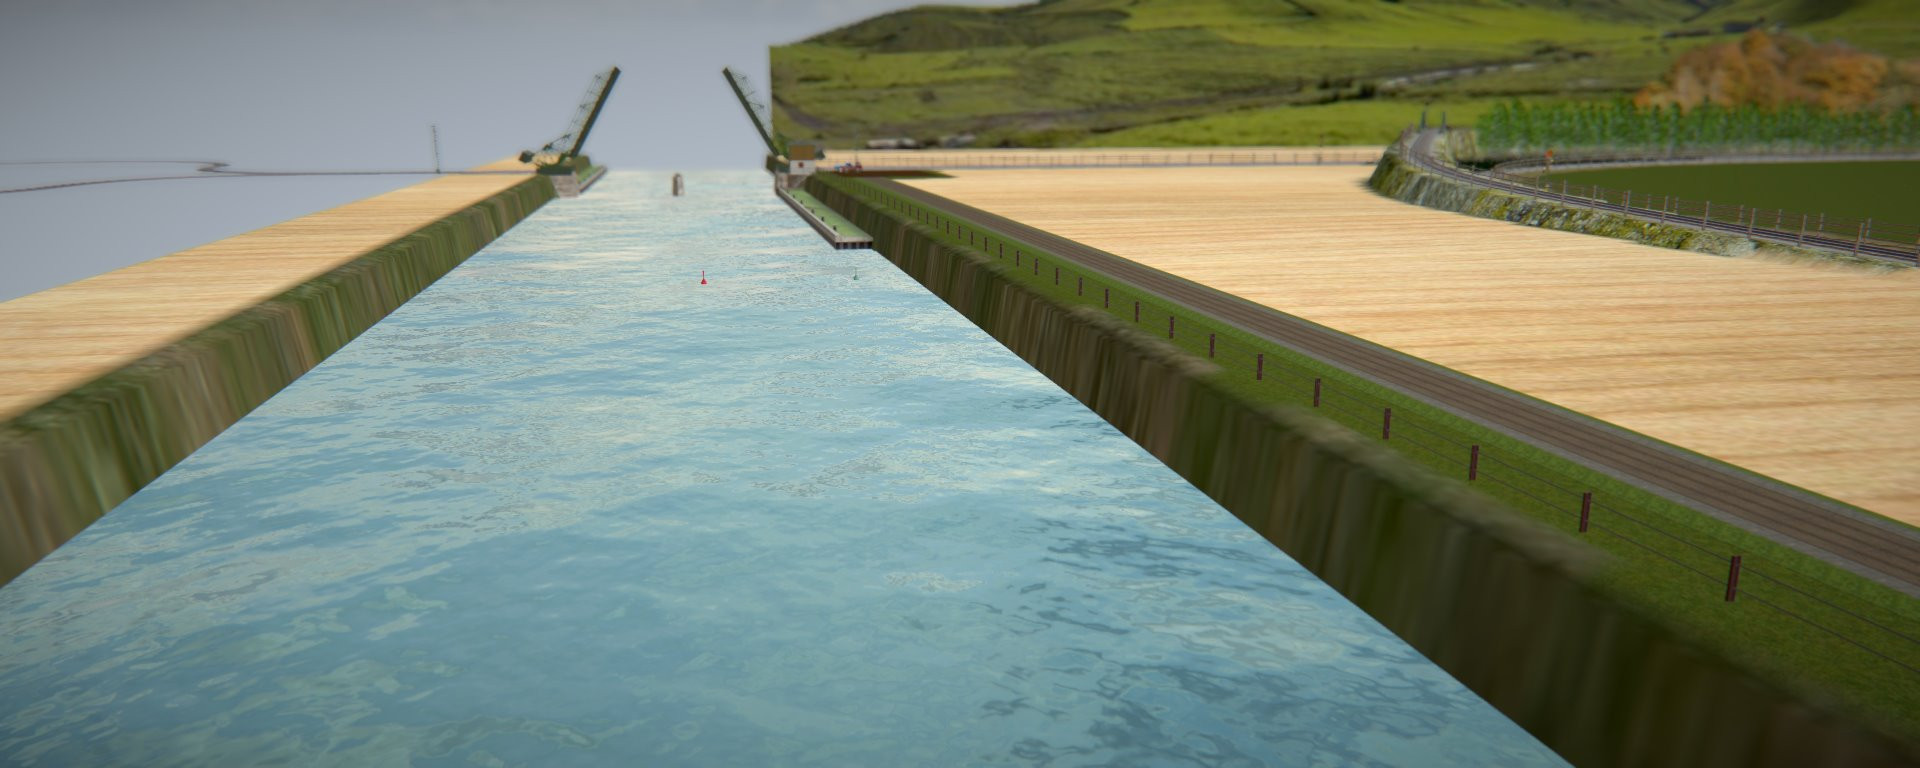
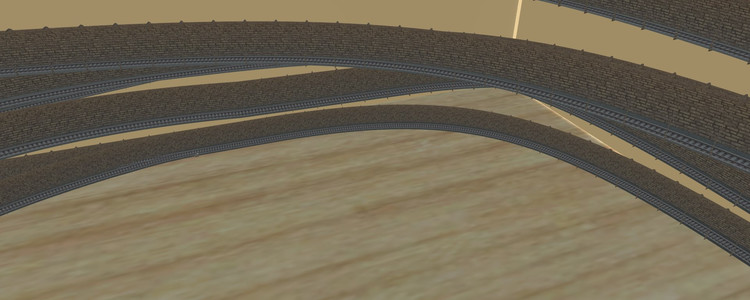
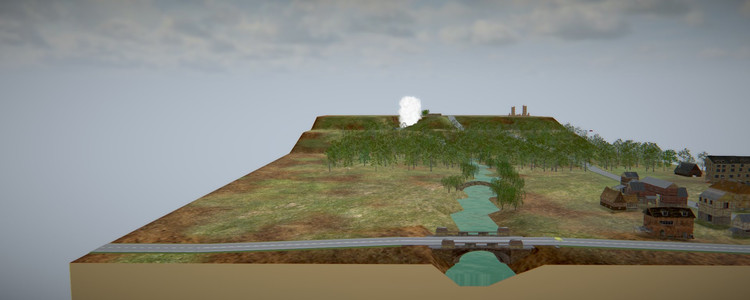
I have done something similar. This was created in V5 (but still works in V6!) Worth note: Where the river meets the end of the baseboard, there's an additional rectangle "Ebene" (to use the word our German hosts use) coloured with the same water texture, and turned through 90° on the Y axis, so it is vertical and in the same plane as the edge of the baseboard, thus giving an end to the water itself This one is entirely in V6, but is a work in progress. Partly because I need to clear out all the events and start from scratch... The river is quite shallow and the waterfall is fixed on the mountain module The canal, on the other hand... You can go swimming if you want! Same technique as the end-plate, but set the y-rotation to 180. set te x, y and z coordinates to the same as the surface, linked the two together and presto, the water surface as seen from underneath.

-
Hi Bahnland Thank you, I appreciate the compliment. But if you knew how much trouble I had just getting the doors to open and close when I wanted them to... (The thread is still near the top in "Problems and Solutions"). I have to say, I hadn't noticed that, but I'll add a half second delay for V2. Danke, ich schätze das Kompliment. Aber wenn Sie wüssten, wie viel Mühe ich hatte, die Türen zu öffnen und zu schließen, als ich wollte, dass sie ... (Der Thread befindet sich in "Probleme und Lösungen" immer noch ganz oben). Ich muss sagen, ich hatte das nicht bemerkt, aber ich werde eine halbe Sekunde Verzögerung für V2 hinzufügen.
-
Actually, on the prototype, there is never a free block between trains during rush hour. At least, not in this country! What looks like a free block is actually the length of the block normally being several times longer than the train. The reason obviously being to give the ATP system time to stop the train before it ploughs into the back of the one in front, should the driver fail to stop at the signal. In the situation you show above , going left to right, Block 3 is clear and thus the signal to enter that block would be green. However normal operation would mean that the train would enter block and turn that signal red before the back of the train has left block four. Thus there would be a block that appeared to be empty between the one train showing entering one block and the next train entering the block it just left. This, of course, assumes modern automatic signalling. With manually pulled signals, it is entirely down to the signalman to determine which train is in which block... That said, a quick check reveals that the London Underground uses a "rolling block" signalling system where each contact point clears the signal two or three back, but the fixed blocks are actually shorter than the trains.

-
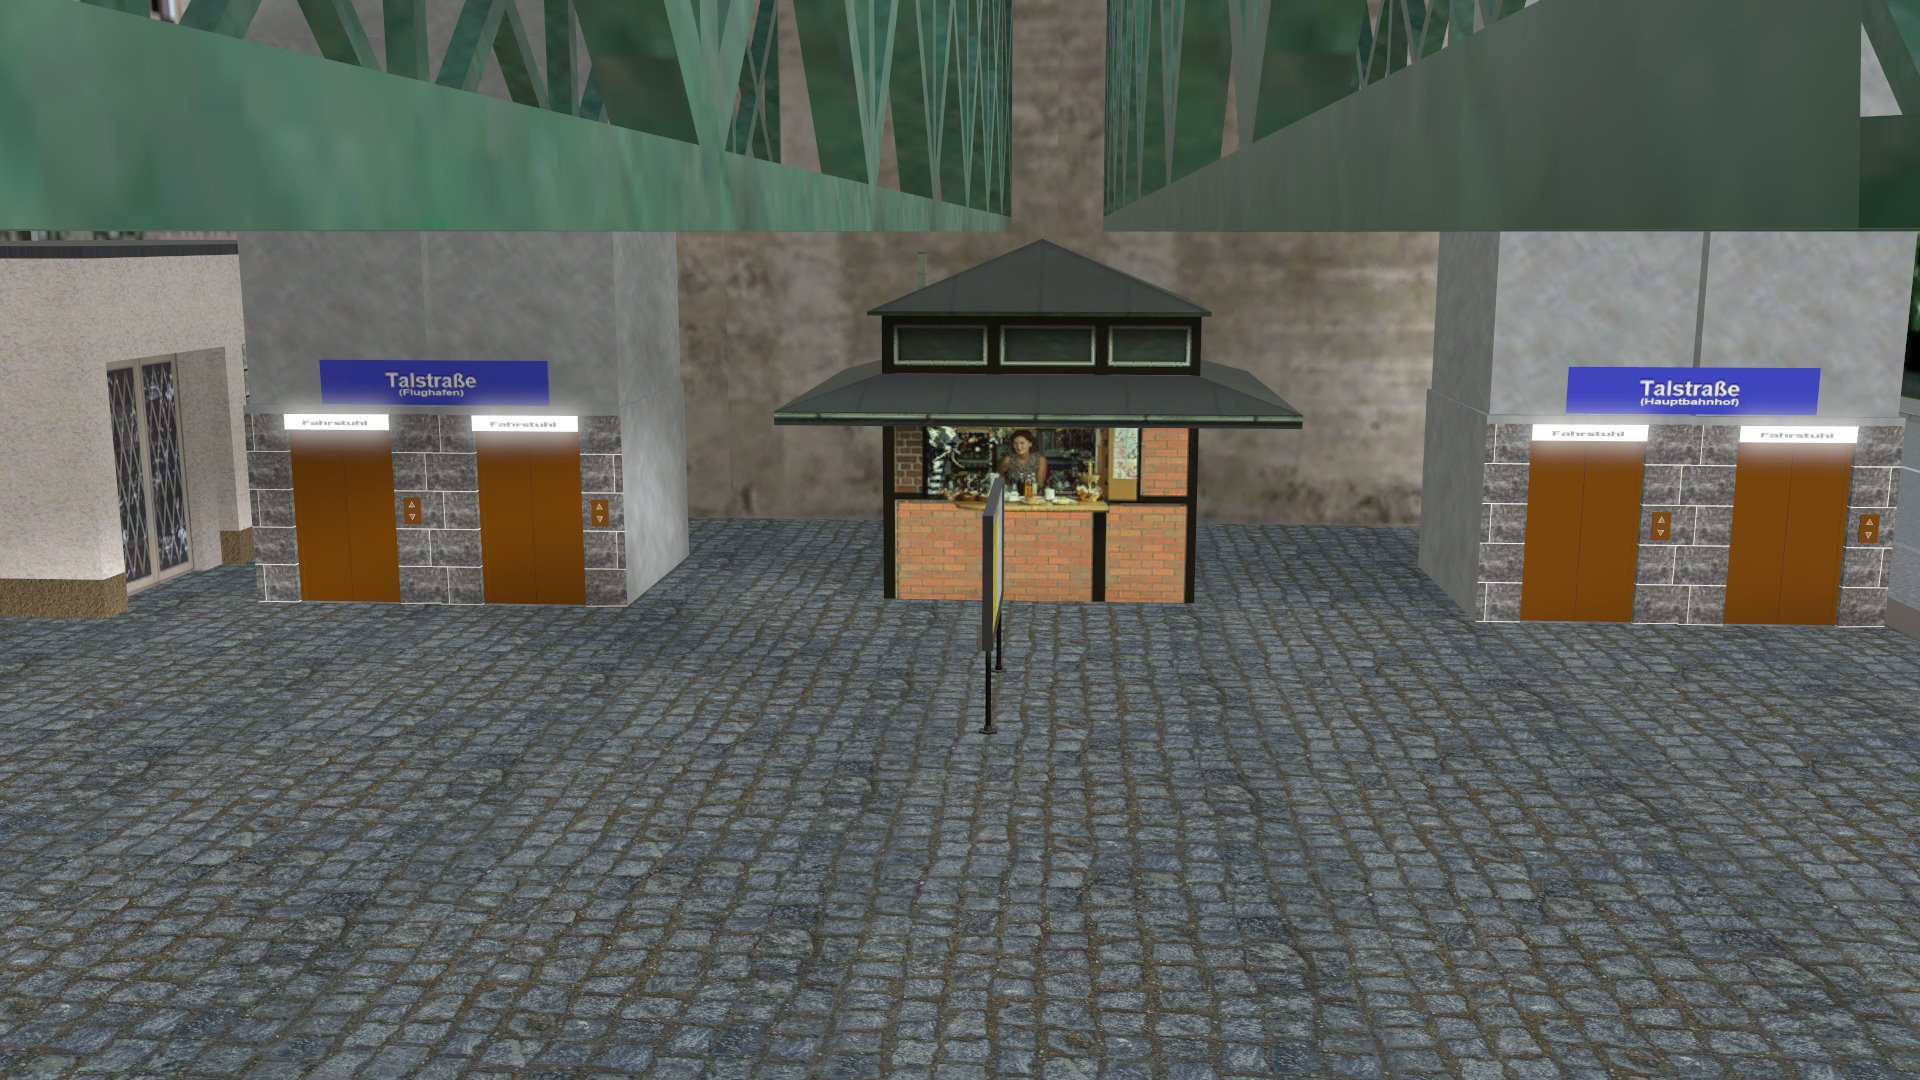
Thanks Doug. Yes, I know it needs road traffic. I've mot had good experiences with cars though. They do weird things fo no reason, and I've never been ableto figure out a way of making them behave at junctions... Then again if I took the "priority" signs off the junctions, then everything stopping even on the main road would probably be realistic...! I spotted the doors on that tower opening and closing while I was fiddling with the landscape - You're referring to the brick tower in the corner, right? I didn't have the heart to turn them off! Hmm. The third person was actually sittingin another market stall that I took off because it looked wrong. But if you count the lady selling coffee, that's three still...! Road and cars are still something of a challenge and I think sending passengers up and down in lifts and making them get on and off the trains is a bit ambitious, but my plan of using the fast clock to make people visible or invisible, and use the same technique as on the trains to let cars in from hidden loops... Would probably work.
-
Danke. Ich freu mich, dass es dir gefällt. Thank you. I'm glad you like it.
-
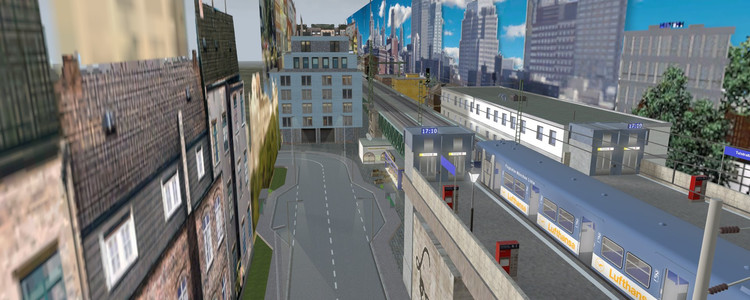
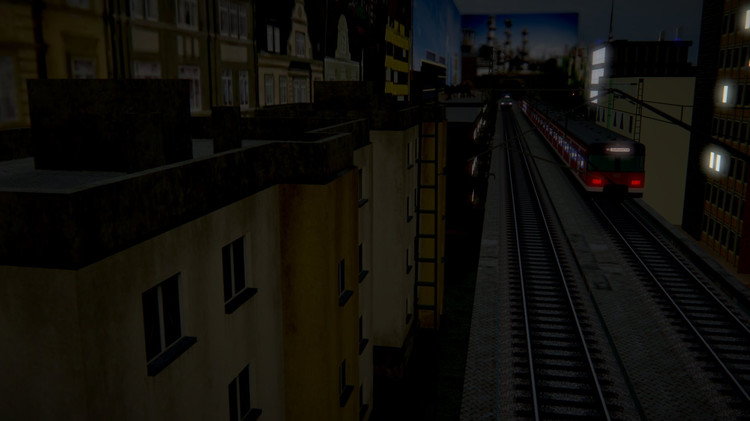
Hallo zusammen. Nach vielen Monaten voller Qualen und Fehlstarts und einer ganzen Menge halbfertiger Layouts habe ich endlich eines hochgeladen! Als Referenz habe ich zuerst Version 3 heruntergeladen, als die Dampfmaschine im Symbol war! Das Layout heißt also auf Englisch Talstraße oder Valley Road, und es ist recht einfach, nur eine einzige Gleisschleife, die den Anschein einer geraden zweigleisigen Hauptstrecke erweckt. Es ist über Kopf mit einer einzigen Station elektrifiziert. Der Unterschied besteht darin, dass die Strecke erhöht ist, wie viele städtische Massentransits auf der ganzen Welt. Aber natürlich muss es an beiden Enden eine Tunnelmündung geben, um den Geigenhof zu verbergen, daher der Name der Station in der Mitte: Valley Road. Die Straße, die unter / entlang der Gleise verläuft, ist die gleichnamige Straße. Der Bahnhof ist unbemannt und auf den Bahnsteigen stehen Fahrkartenautomaten. Der Zugang erfolgt über Aufzüge - zwei pro Plattform. Das rollende Material sind alle EMUs der DB-Klasse 420 mit Kraftfahrzeugen der Klasse 421, weil sie gut aussehen und genau das sind, was ich in dieser geschäftigen Metro sehen wollte. Ich habe angenommen, dass die Linie zu mehr als einer Stelle jenseits des Geigenhofs "Down" führt - und möglicherweise auch über den "Up" -Hof hinaus. Es gibt mindestens eine von jeder Lackierung für den Zug und zwei von den meisten. Eines der "cleveren" Dinge, auf die ich ziemlich stolz bin, ist die Änderung der Ziel- (oder Ziel-) Anzeigen an den Antriebswagen an beiden Enden und an den beiden in der Mitte, wenn der Zug den Geigenhof verlässt. Die S1 fährt vom Hauptbahnhof zum Flughafen, die S2 vom Hauptbahnhof nach Erding, die S4 vom Ostbahnhof (der die andere Seite des Hauptbahnhofs in meiner fiktiven Stadt ist) nach Geltendorf und so weiter. Mit ein wenig Hilfe von einigen Leuten im Forum gelang es mir, die Türen auf der Bahnsteigseite zu öffnen, wenn der Zug am Bahnhof anhält, und wieder zu schließen, bevor der Zug abfährt. Ich war versucht, kurz vor dem Schließen eine Warnsirene einzuschalten, aber ohne das leise Summen der Elektromotoren, die beim Wegfahren des Zuges heulten, hätte es sich nicht richtig angefühlt. Andere "clevere" Teile: Insgesamt gibt es 10 Züge, und die Geigenhöfe an beiden Enden haben jeweils 4 Gleise sowie das Gleis, das die ankommenden Züge zum anderen Ende führt, sodass beide fünf Züge halten. Die Gleise werden alle paar Sekunden nach dem Zufallsprinzip ausgewählt (siehe unten). Wenn sich auf diesem Gleis ein Zug befindet, wird dieser freigegeben. Wenn ein Zug am Tunneleingang hält, wird ein zusätzlicher Zug freigegeben, der hilft, Dinge auszugleichen, wenn sie nicht mehr synchron sind. Eigentlich verursachte mir das Probleme mit der Freigabe von Zügen, wenn sie nicht sollten. Ich glaube, ich habe es repariert, aber wenn Sie bemerken, dass ein Zug mit zwölf Wagen durcheinander ist, lassen Sie es mich bitte wissen, denn das sollte nicht passieren! Züge werden automatisch auf die erste verfügbare Spur geleitet, und das Haltesignal hat eine Spuranzeige, die A - E anzeigt (aber nicht C, ich nehme an, dass dies mit etwas anderem verwechselt werden könnte). Und die Timer, die die Züge freigeben, ändern sich, sodass es Spitzenzeiten (ein Zug alle 4 Minuten nach Maß), Nebenzeiten (alle neun Minuten) und späte Nacht (jede halbe Stunde) gibt. Ich bin auch sehr zufrieden mit der Landschaft. Einige Bereiche sind detaillierter als andere. Es gibt nur drei Leute irgendwo ... Wieder dachte ich daran, klug zu sein und die schnelle Uhr zu benutzen, um sie erscheinen und verschwinden zu lassen, aber ... Gleiches gilt für Autos. Das einzige "Straßenfahrzeug" ist ein Bulldozer, der gerade eine heruntergekommene Fabrikeinheit niedergeschlagen hat. Ich wollte Straßenfahrzeuge anziehen, aber es schien einfach zu viel Mühe zu geben. Vielleicht für Version 2? Die ganze Idee war es, eine städtische Umgebung zu schaffen, die im Großen und Ganzen ein Ort ist, an dem man nicht wirklich alleine sein möchte, spät in der Nacht ... Ich würde mich über Feedback und konstruktive Kritik freuen. D8ED1623-8BCD-45D8-95BF-BD62AAAAA700 Google Translate ist schuld an schrecklichen Übersetzungsfehlern!