maxwei
Mitglieder
-
Benutzer seit
-
Letzter Besuch
Alle erstellten Inhalte von maxwei
-
 Hallo zusammen, erstmal freut es mich dass der Faden wieder aufgenommen wird, vielleicht kommen wir ja doch zu einem sinnvollen Ergebnis welches auch NEO zufriedenstellen würde. Bevor wir an eine Reihung gehen sollten mal alle möglichen/sinnvollen Animationen gelistet werden mit deren Anzahl hier alle einverstanden sind. Das Voranstellen einer lfd. Zahl finde ich als eine gute Idee. Hier würde ich nicht unterscheiden, ich würde sogar noch weiter gehen und sagen: zB: 01-Fahrlicht vorn (gilt für SÄMTLICHE Fahrzeuge) 02-Rotlicht vorn (gilt für SÄMTLICHE Fahrzeuge welche eben ein Rotlicht vorn haben) ......................... 05-Rotlicht hinten (gilt für SÄMTLICHE Fahrzeuge mit Rotlicht hinten, also Lok wie auch Auto) 06-alle anderen Lichter..... ...-ebenfalls-...... .......aufgezählt...... 10-Innenbeleuchtung (gilt für SÄMTLICHE Fahrzeuge, entweder Waggon, Maschinenraum, Auto, Bus),... im Gegensatz zur 11-Kabinenbeleuchtung (gilt für SÄMTLICHE Fahrzeuge mit Kabine, wie Bus, Lok, Triebwagen, Schiff, aber NICHT Waggon) 20-alle Lichter ...-ebenfalls-... ...ich hoffe nicht zu kompliziert gedacht. Ich denke auch dass die Anzahl gar nicht das Problem darstellt, soll es eben 50 verschiedene Möglichkeiten(damit alles abgedeckt ist) geben, wenn sich jeder einmal diese Liste ausdruckt, sollten wir jemals auf einen grünen Zweig kommen, wäre es glaube ich kein Problem. Animationen welche nicht vorhanden sind werden dann eben ignoriert in der Liste, d.h. leicht möglich dass man von 01 auf 10 springt. lg max PS: Und das Problem mit Türen links/rechts bei symetrischen Fahrzeugen, hmmmm, sollte man explizit angehen.
 -
Ich wollte dir nur zeigen dass man das ganz leicht selbst machen kann lg max
-
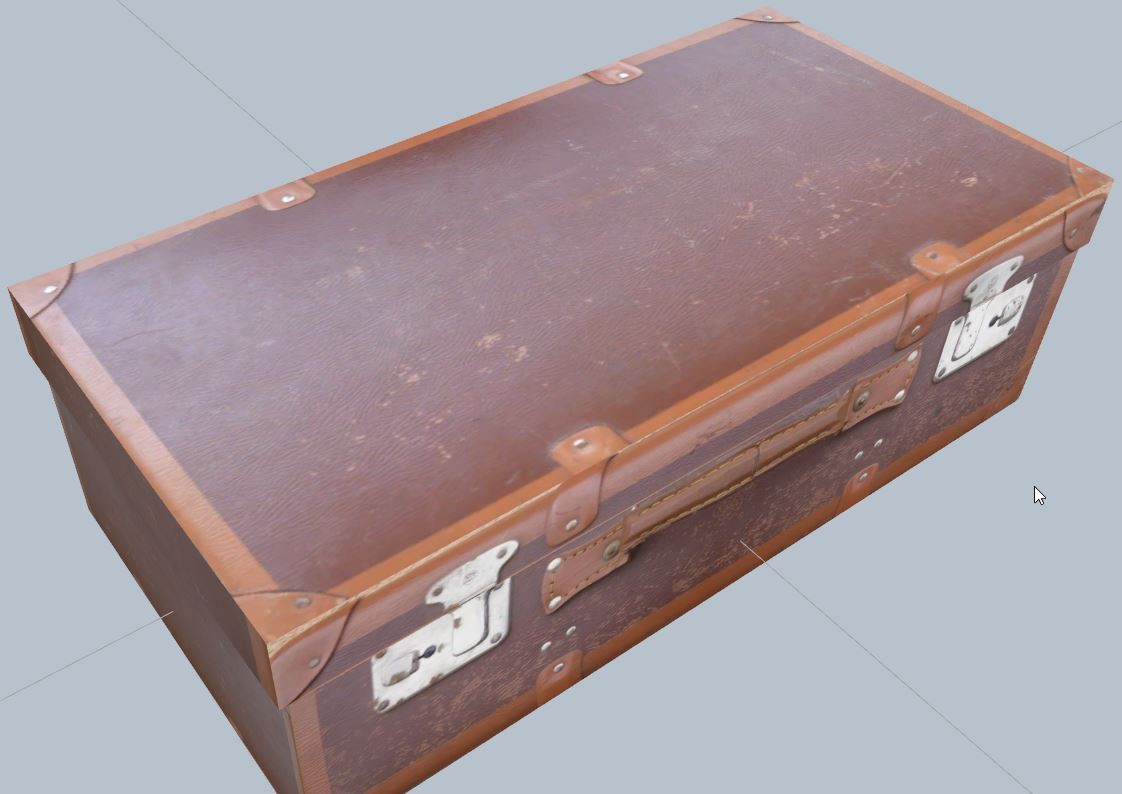
Hallo Markus auf die ganz Schnelle, so mal als Test, erstellt: koffer - YouTube lg max

-
Hallo Vermanus In der WIKI steht schon sehr viel, solltest du explizite Probleme lösen wollen dann wäre es wohl am Besten diese hier im Forum anzusprechen. lg max
-
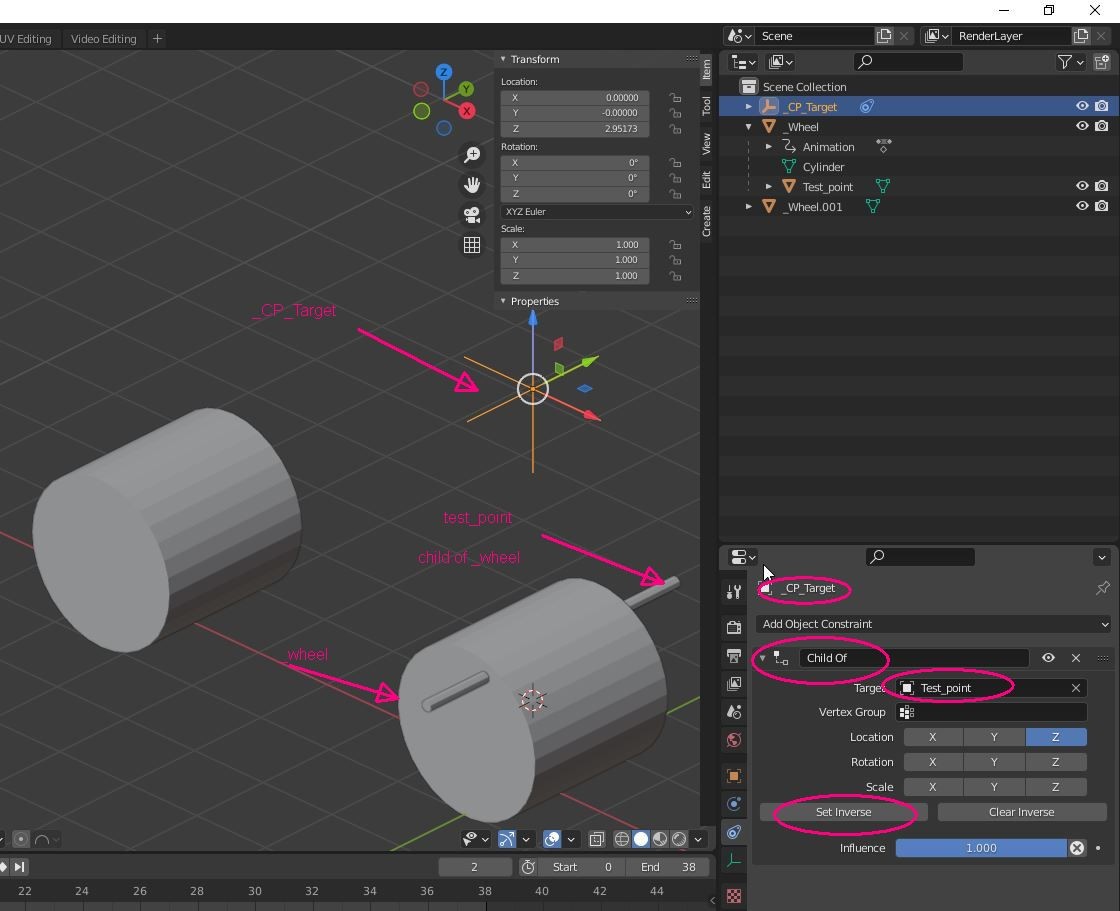
I hope this gives you alittle more information. I dont want to write an exactly step by step procedure, 'cause if you learn with this its easier to remember the next time, but if you want this, I can do that . Almost Correct, not to the _wheel but to the Test_point (which is a child of the _wheel) and after "baking" the "Constraint" is not longer activatet, 'cause we made a keyframe-animation out of a calculated animation lg max

-
hi DAD I have tinkered times on the quick what you might help. The trick is (maybe there is another possibility) to animate the_CP_Target via a constraint. In this case the "Child" constraint, where you still have to define the directions and then press "Set Inverse". The whole thing needs an auxiliary child (in the example below the hexagon) which is then linked to the horse). If the animation works in Blender you have to "bake" the _Empty-Animation _CP_Test_GLB.zip Blender_CP.zip lg max
-
You want the rider to be linked to the horse? Sorry, my mistake, then of course you need the rider as _CP_Source and the horse as _CP_Target, cause they belong together and when the horse moves it takes the rider with it. You make these points in Blender with an "Empty".
-
Hi DAD You do not need to name the ContactPoint _CP_Source ('cause this is a special Contact Point and needs mandatory a _CP_Target). You just have to name the rider e.g _CP_Rider (or _CP_whateveryouwant), and the saddle _CP_Saddle (or _CP_whateveryouwant): Whenever there are 2 _CP's ("the normalones") , they can find each other when close enough. lg max PS: reserved expressions for special purposes: _CP_Source _CP_Target _CP_Spline _CP_Track _CP_Track_Dynamic
-
Hallo zusammen, ich habe mal ein bisschen gegoogelt in Bezug auf Copyright von z.B. Texturen, Fotos, Hintergründe für Modelle oder Anlagen. Wer sich etwas damit auseinandersetzen möchte dem empfehle ich folgende WIKIPEDIA Seite, in der genau beschrieben die CC's (Creative Commons) sind, eine Organisation für Standard-Lizenzverträge, welche in derzeit unterschiedlichen Formen auch in D,A, und CH, gültig sind. Creative Commons Wikipedia lg max
-
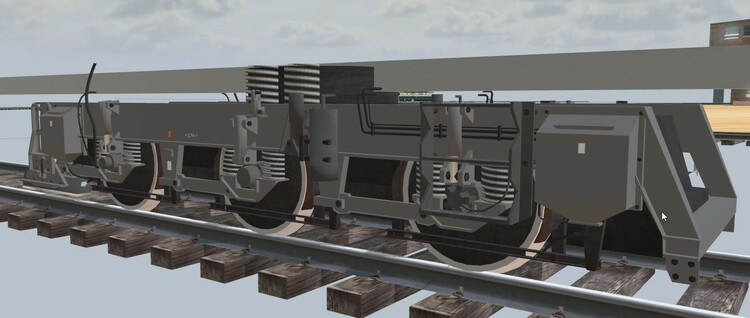
Hallo zusammen, erster Zwischenschritt zum "Blue Tiger", Drehgestell ist soweit mal fertig: lg max
-
Hallo Reinhard Wenn es dir möglich ist dann auch von mir "Alles Gute, und immer schön auf die Krankenschwester hören". lg max
-
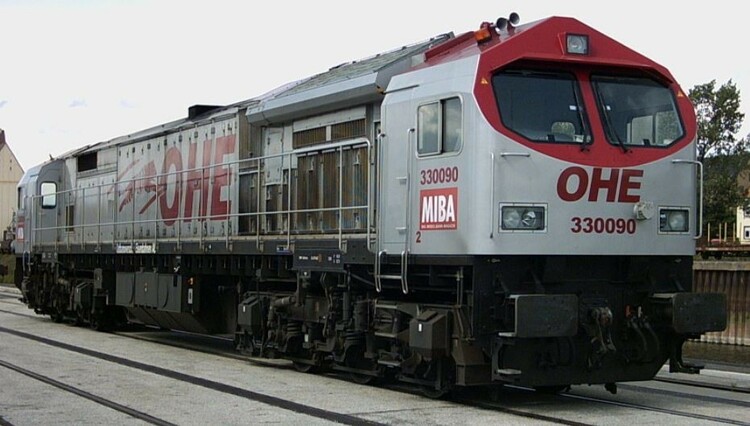
Hallo zusammen Nächstes Projekt, auch schon lange am Zettel ADtranz DE-AC33C lg max
-
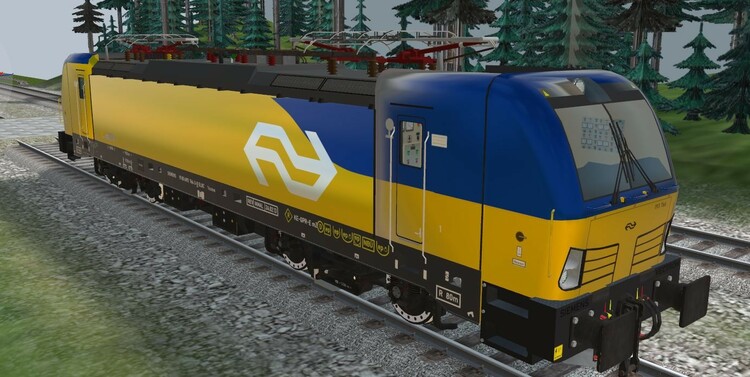
...und die letzte Version für unseren brasilianisch/holländischen Freund Hubert lg max
-
Das ist auch meine Devise, erstmal die ersten vielen Patches abwarten und dann vielleicht nächstes Jahr, wenn überhaupt , umsteigen. lg max
-
Ich hab's mal aufgeschrieben lg max
-
Hallo zusammen, habe mich auch der blauen gewidmet... lg max
-
Hallo Hans Brauchst dir nicht die Mühe machen, das ist es nicht wert, ich lasse es so wie es ist, kommt zumindest auf den Bildern halbwegs korrekt rüber. lg max
-
Hallo zusammen Vielen Dank für die Likes und Kommentare. Wäre ja befremdend wenn's nicht so ist. Zwischenfrage zur Optimierung nachdem ich im Netz nichts darüber gefunden hatte. Weiß jemand die RAL Nummer dieses Grün's? lg max
-
Hallo zusammen, ich kann's mir einfach nicht verkneifen, aber jetzt, nach 2 Monaten, das Modell schon längst wieder aus der Datenbank entfernt, keinerlei Antwort von Appenzeller, habe ich das Gefühl, das ich wohl doch nicht so ganz unrecht hatte zu Beginn (übrigens war Appenzeller's letzter Besuch am 1. August),....das musste ich jetzt loswerden. lg max
-
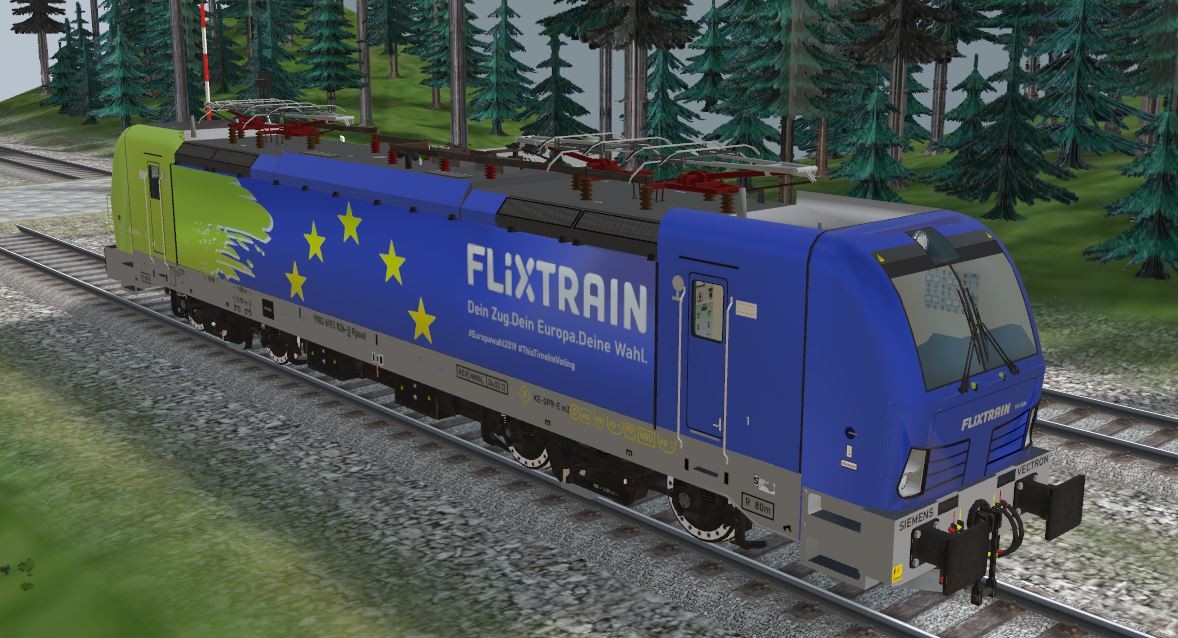
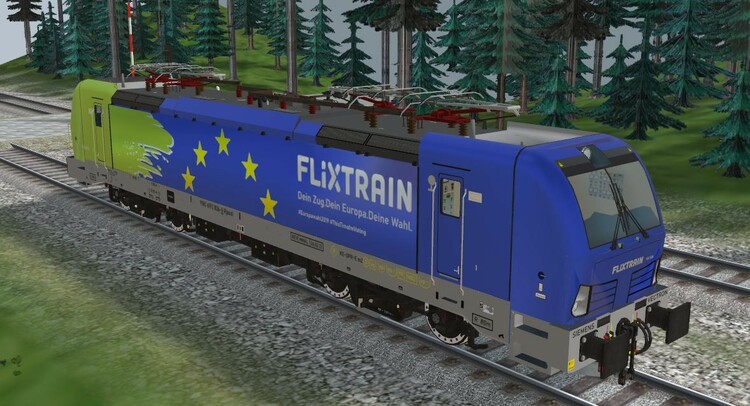
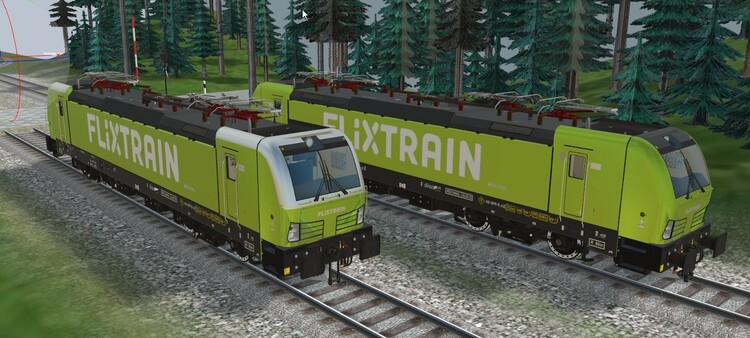
Hallo zusammen, die ersten 2 Flixtrain-Variationen sind fertig lg max
-
Hallo Hans, kann ich machen (stelle hier die 3 Varianten als Bilder ein, damit ich mir eine Vorstellung machen kann) lg max PS: OK, Nachdem ich auch noch von anderer Seite angesprochen wurde zwecks weiterer Variation mache ich hier noch einen Aufruf: Wenn ihr mir Bilder schickt von gewünschten Variationen (diese müssen nicht sehr groß sein, nur damit ich weiß was es werden soll, dementsprechende Vorlagen suche ich mir dann selbst) werde ich versuchen alle Wünsche zu erfüllen sofern es die Textur zulässt. lg max
-
Hallo NEO Ich kann von hier keine Bilder verschicken, aber metallic ist hellgrau und roughness ist dunkelgrau (nicht ganz am Anschlag), nur an den Wänden und Front, nicht das Dach, wenn ich jedoch beide auf Anschlag gebe, dann kommt wieder das zu extreme grün/graue (nicht schöne) als Reflektion hervor. Vor allem bei den dunkleren Farben, das Einzige das ich machen könnte, wenn auch mit viel Aufwand verbunden, jeder Lackierung einen individuellen M/R zuzuweisen. lg max
-
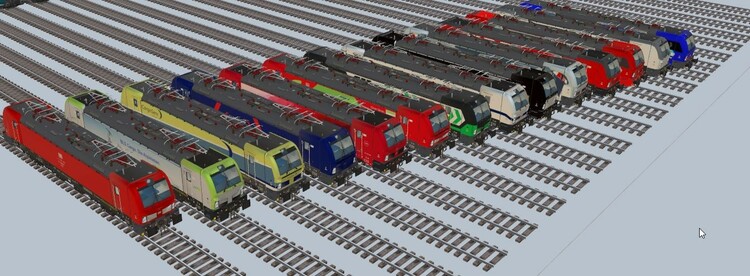
Hallo zusammen, nach einem Abstecher zu einem anderen Thema welches vorerst auf Eis gelegt wurde hab ich mich der Erneuerung der Vectron gewidmet. Fehler wurden korrigiert, Materialsystem auf PBR umgestellt, Emissive statt _LS erstellt, Führerstand upgedatet, LOD's überarbeitet und die gesamte Flotte komplett hochgeladen mit der Bitte an @Neoum Freigabe. lg max
-
Sorry Tec, wenn du das meinst mit den Komparsen finde ich es äußerst geschmacklos. max
-
Hallo Hajo, zusätzlich zu @Goetz' Ausführungen... bekommst du mit einem Doppelklick auf die FPS-Rate ganz rechts unten. lg max